mysteryscribe
TPF Noob!
- Joined
- Feb 1, 2006
- Messages
- 6,071
- Reaction score
- 3
- Location
- in the middle of north carolina
- Website
- retrophotoservice.2ya.com
- Can others edit my Photos
- Photos OK to edit
I had been threatening to make a contact printer that was all daylight no electricity needed for some time now. It finally all came together.
The first things you need to know are:
a little about pinhole photography.
how to deal with paper exposure.
how to make some kind of back for the printer to hold standard film holders
So I had to rip the lens from one of my remanufactured cameras. I decided that it was a good time to finally make the printer. I made a pinhole lens with a 1/16 inch hole. To large for a camera but I thought it might work
after you get those things simi mastered your ready to go.
You just take your standard film holder and insert a piece of enlarging paper into the holder. Then you insert your negative over it. I used the next size up paper but I believe you could use the same size paper and negative. That is my next test.
So then you take the printer to a place with a consistant light source. I took mine along with a cup of coffee to the front porch. I pointed my light meter up and read the light. Since I have been shooting some paper negatives I knew that the ceiling of the porch is what I now call a dead light source. With a dead light source the asa/iso of the paper is 2. I had estimated just by looking that the aperture was f64. So I got a time of 2 minutes. I pulled the darkslide and left the camera sitting in a chair for the two minutes then replaced the dark slide.
I loaded the paper into a daylight tank and processed it for the max time I use for paper negs.
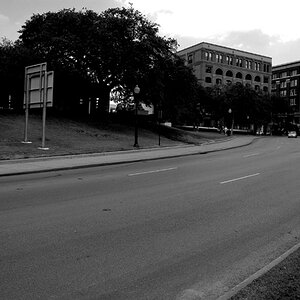
I was a little shocked to find that I had a print. There were two things wrong with it. The roof of the porch was clearly evident and the print was too light. I decided that the print was 2 stops under exposed so I redid the shot with a ten minute exposure. I added the extra 1/4 stop because I put a piece of frosted plastic over the pinhole opening. It was there to defuse the light and kill outside image.
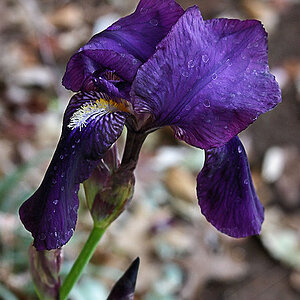
so how did it look, here see for yourself.

The first things you need to know are:
a little about pinhole photography.
how to deal with paper exposure.
how to make some kind of back for the printer to hold standard film holders
So I had to rip the lens from one of my remanufactured cameras. I decided that it was a good time to finally make the printer. I made a pinhole lens with a 1/16 inch hole. To large for a camera but I thought it might work
after you get those things simi mastered your ready to go.
You just take your standard film holder and insert a piece of enlarging paper into the holder. Then you insert your negative over it. I used the next size up paper but I believe you could use the same size paper and negative. That is my next test.
So then you take the printer to a place with a consistant light source. I took mine along with a cup of coffee to the front porch. I pointed my light meter up and read the light. Since I have been shooting some paper negatives I knew that the ceiling of the porch is what I now call a dead light source. With a dead light source the asa/iso of the paper is 2. I had estimated just by looking that the aperture was f64. So I got a time of 2 minutes. I pulled the darkslide and left the camera sitting in a chair for the two minutes then replaced the dark slide.
I loaded the paper into a daylight tank and processed it for the max time I use for paper negs.
I was a little shocked to find that I had a print. There were two things wrong with it. The roof of the porch was clearly evident and the print was too light. I decided that the print was 2 stops under exposed so I redid the shot with a ten minute exposure. I added the extra 1/4 stop because I put a piece of frosted plastic over the pinhole opening. It was there to defuse the light and kill outside image.
so how did it look, here see for yourself.