Restoration help

Christie Photo

No longer a newbie, moving up!
Joined
Jan 7, 2005
Messages
7,199
Reaction score
148
Location
Kankakee, IL
Website
www.christiephoto.com
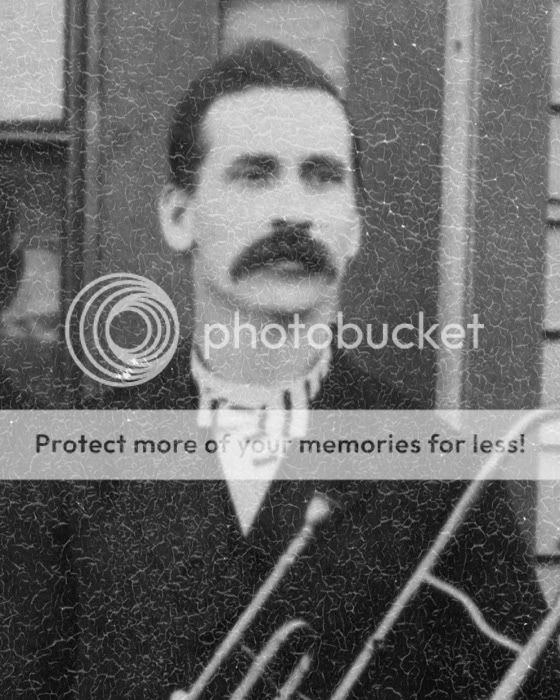
I just took in a copy and restoration job, and the original is printed on a textured paper. As a result, I have some small, white, squiggly lines covering the entire photo to deal with. Any suggestions on how to proceed?

Thanks!
Pete

help.jpg
 
These are really tough to deal with Pete. I can see that the shot is not real sharp to begin with, but you can try using dust and scratches in photoshop. You'll want to duplicate your background layer before you run it. Use a low radius and a high threshold. Start at 1 or 2 for your radius and adjust the threshold starting around 20. You have to balance it so it's just affecting the texture. Use a higher radius or a lower threshold if you are not affecting them at all. It's hard for me to say because the settings will be much different for the full res file.

Anytime you use this filter, you'll see some degradation to the file, so be sure to mask off anything funny. Your only other hope I'm afraid is the clone tool or healing brush, which can and will take hours and hours of tedious work.

Good luck.
 
Keep in mind Pete that if you can't see that texture in the print that you copied, you won't see much more of it in the print that you produce. Sometimes just softening it a bit can help. It pays to have a proof printed for yourself, to evaluate.
 
Yeah.... BUT... I didn't tell you....

I explained to the customer that when you enlarge an image, you enlarge all of it's deficiencies. The original is a portion of a group photo. The area is about 1 3/4 x 2 1/2. She wants an 8x10. I told her... we'll see, but expect something smaller.
 
Oof, yes, well, at least you prepared the client. Whenever I do something like this for a client, I also set their expectations lower than mine. :)
 
You might cut the work by masking off the face and torso, then lens blurring or using the dust/scratches filter on the the rest to remove the scratches there in one shot. THere's no useable detail there anyway.
 
I'm curious as to how a photo even gets to looking like that. It looks almost fake, like some sort of texture applied in PS. I guess time can be a terrible thing, but still, it looks kind of hyper-real.
 
Just found this on a listserv and thought it might help

I sometimes get good result by scanning the document twice (second time 180 degrees rotated.

Then I add the second scan as a new layer, and while temporarily reducing opacity, I carefully adjust the position (Move tool) until it's in good register with the layer below.

The registration won't be pixel precise, because mechanical and timing tolerances in the scanner causes a slight difference. (scan at extreme optical res, lets say 600 or even 1200 ppi, and don't worry about the tolerance).

Opacity back to 100% and blending mode to "Lighten". This does the trick. This blending mode compares pixels from top and bottom layer, and sets whichever is the lightest of the two as the resultant pixel.

This eliminates part of the shadows that make the three dimensional texture visible in the first place.

I had some successful scans this way with a scanner that throws light at an angle. (it should, to prevent glare)
He wanted to get lines distinct. You want to eliminate them so you may have to use a 'darken' mode for the layer.
In any case, Please let us know if that works.
 
is this ok to try an edit with Christie?
 
is this any better for you?

help3.jpg


I'm a bit tired and i've forgotten exactly what i did to it :scratch:

I think it was more or less what Matt suggested except i added a 50% grey colour fill and set it to multiply, it seems to even it out abit. then wacked the highlight right up in levels adjustment. There was a few more adjustment layers also. I can probably figure it out again if you think it's worth it?
 
You've done a very decent job there
 
i think it's time to use 3rd party plug-ins for this job. there are lots.
 

Most reactions

New Topics

Back
Top