The background is not white

akazoly

TPF Noob!
Joined
Jan 3, 2008
Messages
236
Reaction score
0
This is my light tent (home made) using this tutorial http://digital-photography-school.com/blog/how-to-make-a-inexpensive-light-tent/ :


I take the photo in manual mode, at F4. The background is not perfect white, I use a DAYLIGHT bulb (6400 K). The same problem happen with two bulb.
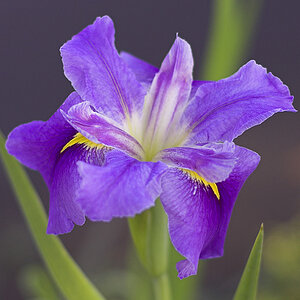
This is the result:


I try to shoot in RAW. But I don't know what I need to set to correct the gray background and this settings affect the image ? I think RAW is not the best solution for me. I want to keep the image quality.

I use spot metering. Now I don't have more idea, anyone has a sugesstion ? How to correct this problem to achieve a white background ?

Thanks!
how-to-make-a-inexpensive-light-tent
 
The white balance is correct. All I had to do to get it to pure white is push the exposure by about a half stop in DxO. You could do the same thing on the camera.
 
You could try putting up white walls on the sides as well, I have not yet used a setup like that but I am fairly sure a little more reflection from the sides would clear that up.
 
The white balance is correct. All I had to do to get it to pure white is push the exposure by about a half stop in DxO. You could do the same thing on the camera.

Can you help me a bit and explain me in more details what is Dx0 ? I need + or - exposure ?
 
You can try using a gray card for your metering.

Looking at your set-up, have you thought about using some tracing paper as a diffuser?
 
I had silmilar issues with my studio shots at college... mainly cus the backdrop was dirty as lol, but it came out grey. I fixed it by shooting RAW and then making two convertions.. one fairly blown out one for the background and then one correctly exposed one for the subject.

Worked for me
 
You can try using a gray card for your metering.

Looking at your set-up, have you thought about using some tracing paper as a diffuser?

I need aluminium foil under white paper?
 
I use a gray card (Available at most any camera store and even in the back of some photography books. Actually, one of the British mags has a gray card included in this month's issue -- the one with the squirrel on the cover) for all of my home studio shots. I didn't want to buy a hand held meter and a gray card will help a great bit.

As far as the tracing paper goes, if you'd like a cheap fix to harsh lighting, you can create a diffuser by using some tracing paper around the front of the light. I've built my home studio out of such ideas I've read about and numerous trips to the local fabric, hardware, and craft stores. Best of luck.
 
Not sure if this has been mentioned already. The tutorial says to cover up the sides of the box with white paper too. In your picture, the sides were not covered, which would explain the grayish side-vignetting on your photo.
 
In order for this background to be white, really white, you need to meter for the background instead of the object, and maybe put a gobo to cover the light from your object and hope it gets enough reflection from the background to light it thoroughly. Or you could use two light sources and blow out the background. There's really a bunch of ways to fix this problem.
 
You're clearly getting light falloff. Add a white or reflective material on the sides and you'll be golden.
 
Or you could use two light sources and blow out the background. There's really a bunch of ways to fix this problem.

That is basically the way I did it for this, I use three light sources and reflective paper. But I figured the OP wanted to stick with the single light source and for that side mounted reflection is likely the easiest means to do it.
 

Most reactions

New Topics

Back
Top