- Joined
- Mar 29, 2016
- Messages
- 14,857
- Reaction score
- 8,313
- Can others edit my Photos
- Photos NOT OK to edit
Follow along with the video below to see how to install our site as a web app on your home screen.

Note: This feature currently requires accessing the site using the built-in Safari browser.
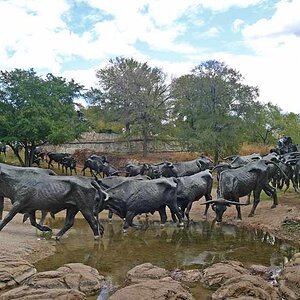
Nice set, my daughter lives in Bradenton
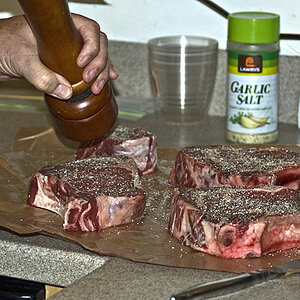
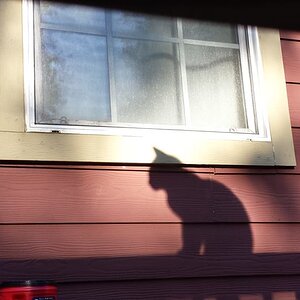
I used the "Smart Brush Tool" in PSE 2020. It does a dotted line around the subject but it's not always accurate, as mentioned. I also have Topaz Studio 2 but I haven't tried anything with that other than the typical post editing.@K9Kirk cookie cutter lighting doesn't require any selection, that's where you're problems are coming in. Which editing software are you using I'll try to send you some specific instructions.
used the "Smart Brush Tool" in PSE 2020.
used the "Smart Brush Tool" in PSE 2020.
Okay I know little about PSE but let me see if I can walk you through a modification of a process I use in PS. A little background first, the DR (dynamic range) of any scene is the number of f/stops between the blackest Black and the whitest White. Unfortunately in reality the digital camera is unable to capture more than 10-15 stops. Add to that it "attempts" to average out the best exposure it can based on a middle value of 18% gray, which doesn't always work. Cookie Cutter lighting technique is based on the premise that in real life a scene does not exhibit an equal or average EV across the frame. In real life the DR of the image will be far greater than the camera captured and unequal. The Cookie Cutter approach attempts to mimic that by darkening the overall image then using a mask to punch holes in the effect, leaving you with only parts of the image being affected.
Cookie Cutter adjustment should be close to the last adjustment you do on an image, because if I read it right there's no ability to change the effect other than to delete and start over on it. It's a little more difficult in PSE if you don't have the curves plugin, they call it a Color Curves Adjustment. Instructions for adding a curves layer in PSE using both the standard tool and the plug in curves
Using the standard tool in PSE duplicate layer, ( Copy and arrange layers in Photoshop Elements ) . Add a Color Curves Adjustment. Now adjust your highlight slider left to pull down the highlights, and possibly some on the midtones. You want the overall image to darken evenly, until you reach the point you're happy with for the darkest point. Now add a mask to the layer Photoshop Elements layer masks selecting the whole image to be masked. Using a soft White brush set to 100% opacity adjusted to a suitable size, dab on the areas of the mask that you want the affect revealed, change to a black brush and dab the areas you don't want affected. Hence the term cookie cutter, because you're creating shapes to hide and reveal the effect. You'll have to select the blend mode for the layer that gives the best result (in PS I'd use Luminosity, but I don't believe PSE has that), try soft light, or overlay maybe to start. Of course you can also adjust the opacity of the layer to reduce the effect.
If you have the plug in for curves it's simpler, you just grab the top right point on the curve and pull it down, pretty much the same as I'd do on a curves layer in PS.
I hope my crossover works, as I said earlier I've no experience with PSE (I use LR & PS), so I'm taking a shot in the dark based on what I could find about it online.
I have to say, I'm not as advanced and have never used layers so this will take a little time. I'll practice with some pics and get comfortable with it and put something up. I appreciate everything you've done to help me, thank you very much.
Actually you'll find the curves adjustment invaluable as well.
the luminosity is a nice feature. I notice though that the curve is similar to some of the other tools but different because of the curve tool instead of a slider. I think I like the curve better, though.
the luminosity is a nice feature. I notice though that the curve is similar to some of the other tools but different because of the curve tool instead of a slider. I think I like the curve better, though.
Layers with a blending mode of Luminosity have an advantage on some adjustments in that they don't change the color, they only change the brightness of the image.
Elements is a really scaled down version of PS. The curves adjustment in it is nowhere near as powerful as the curves layer in PS. You can get a plug in that will help Curves for Photoshop Elements 4 and Above - Photo Tips @ Earthbound Light I haven't used it so I can't recommend one way or the other. Also it's my understanding that more robust Curves is included in Elements Plus.


![[No title]](/data/xfmg/thumbnail/42/42055-105f2ee23a1fd79c786de42c5578274b.jpg?1619739992)