what's up with this pic!?

mfacer

TPF Noob!
Joined
May 18, 2004
Messages
112
Reaction score
1
Location
Manchester, UK
Website
www.mattfacer.com
Hi,

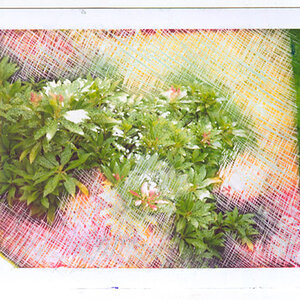
I took this pic on a very bright sunny day - and it looked just perfect to my eye - so I was quite excited to get the pictures back... when I did, the sky had obviously been so bright that you lost the definition of the ground (I think that's what happened?!)

There was no filter used or anything, and as I dont really know (yet) how to use the shutter speed thing, its probably a horrible combination of the above!!

anyway, here's the picture - I've tried to improve the colours in paint shop pro - but to no success. (this is the unedited original)

6.jpg


any thoughts and comments would be appreciated - as I can always go back to this same spot and try again!! :D

ps.. I recently also bought a "polarizer" and "skylight" filter..... I guess one of those would have helped?

[edit] I also dont think the scanner helped with the colours! [/edit]
 
Film has a property that we call latitude. Film can only capture a certain range of contrast. You can get detail in the bright areas (the sky), or you can get detail in the shadow or dark areas...but if there is a big difference...you can't get both.

Different film has different latitude. Slide film has a very narrow latitude so your exposure has to right on. Negative film has a wider latitude and is more forgiving, not to mention that exposure can be somewhat corrected when your prints are made.

For a shot like this, a graduated filter would be your best bet. A graduated filter is dark on one side and lighter (clear) on the other side. There are various kinds of these filters. You would position the filter so that the dark part covers the sky. Then the sky and ground are not so different to the camera/film.

When photographing, we must often choose what we want to be properly exposed. We learn that the camera will not make this decision on it's own and we must make a compromise. In this case, you could have exposed for the ground and let the sky be blown out (too bright).

Another option would be to take two different photos. Exposing one for the ground and one for the sky. Then scan them and combine them in PS. Or you could use a mask in PS to lighten just the dark areas.

Is that enough rambling yet :?

Oh, your polarizing filter would probably have made the sky a lot more rich & blue looking but would not have helped with the dark ground.
 
WOW! Interesting to see what can be done in PhotoShop if only you can use it properly... I can't and am still stumbling my ways through the most basic things in PhotoShop here and there, and this surprises me so: what a change in that photo. At last I even see that sheep. I may not have looked for it carefully enough in the first photo, but it really stands out in the photoshopped version. I am surprised.
I am NOT surprised, however - Matt (you are another Matt, aren't you?) -, about why you stopped to take THIS very photo! Can you tell me where it was taken?
 
hey,

thanks for the info Big Mike - I never realised there was so much to consider! I did look at getting some filters with the dark at the top - might have to rethink this and go get some!

canonrebel - the pic looks a lot better, thanks! Did you use the saturation tool?

LaFoto - the tree is just awesome and I've driven past it a few times - always wanting to get a picture of it. It's another nice day today, so might go and give it another try! I'm not sure of the exact location but its on a country road near a dam off the main silk road near Macclesfield. My mate lives near there, so I'll ask him the place name!! (gosh, I'm rubbish at directions!!)
 
Try taking the shot early in the morning or late in the evening (a few minutes before or after sunrise/sundown). This will reduce the harshness of the light some and give the shot more depth. Since the light will be coming from the side and not from straight overhead, the scen will not look as flat.

When you get there, examine the scene from as many different sides as possible, and shoot from the spot where the light makes it look the best.
 
You might also want to try getting closer. If you want the tree to be the subject, then really show the tree. As is, the tree is only taking up a small portion of the frame.
 
mfacer said:
canonrebel - the pic looks a lot better, thanks! Did you use the saturation tool?

Nope, didn't use a saturation layer.

There are several techniques which can be used to obtain a similar result and all of them simpler than the one I used. There's a "Shadows/highlights" option in Pshop cs v8 that can be used to add detail in shadows in many but not all instances.

If you're really interrested in knowing which technique I used for this particular photo, let me know and I'll take the time to write the instructions for you.
 

Most reactions

Back
Top