Band Promo - Parmalee

Unrestrained Focus

TPF Noob!
Joined
Jul 3, 2009
Messages
18
Reaction score
0
Location
Greenville, NC
Website
www.unrestrainedfocus.com
Can others edit my Photos
Photos NOT OK to edit
This is my first semi semi semi big name band to shoot. They are currently in the studio recording with the help of Nikki Sixx of Motley Crue.

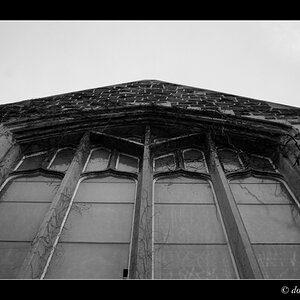
We shot at an old abandoned house in Farmvlle, NC. We shot both inside and outside since we had some cool looking dusk storm clouds.

1.

556135656_eNwEh-L.jpg


2.

553244295_Loodt-L.jpg


3.

554796370_LuMgz-L.jpg


4.

550220526_qqoP8-L.jpg
 
wow these are great! I am doing some shots for a friend's band soon, can you explain how you got this look in these photos? Post processing or camera settings? Beautiful shots!
 
Thanks!

I used one strobe light (because I only have one). For a band, it might be helpful to use two if they are standing close together cause you'll get annoying shadows.

I use a small aperture, between F/9 and F/16. Shutter speed is usually around 1/125, but you may want to adjust that to let in more or less light for the background.Don't use a faster shutter speed than your camera's sync speed.

In photoshop, I duplicate the layer and do filter->high pass. I set it to about 50, but you can play around with it. I then set that layer to overlay, or even hard light, depending on how much contrast I want. Set your opacity to about 50%. Watch out for halo's though. If you see haloing, make a layer mask on the high pass layer and paint black on the halo. If you want more of the effect, just flatten the layers and repeat.

In some of them I create a saturation layer and select colorize, and set the opacity to about 35%. Then select a hue you like. For bands, browns and blues work really good.

Hope this helps!

Thank you so much for these tips! I will definitely be practicing this. I really appreciate it. I went to your site and browsed your galleries, you are very talented!
 
Thank you Kimberly! I checked out your Flickr site and you have some lovely shots. These are my favorite:

Fun with colors - a set on Flickr

I love what you did with her eyes.

Thanks, I have a hard time taking photos of myself, personally, I don't like being in front of a camera lol, but figured while I was messing around I'd set my WB to the most incorrect setting possible and this is sort of the result coupled with some PS work, Im going to try your PS treatment on some of these and see how they turn out :)
 
These pictures are great! The lighting and coloring. Very very nice! Makes me want to try something like this (not for a band...just on my own). Now where can I find an abandoned building...hmmm ;)
 
Good set. Why didn't you follow your own advice and remove the halo in photo number 2?
Other than that, well done.
 
Well, if they WANTED thaty look, it looks good... but I personally think they are overprocessed and you leave some colors looking too saturated and some highlights looking too bright,
 
I like the look. A little bleachy is a good effect for their image IMO. Yet another interesting way to layer. Thanks!

Pic #3 does it for me. The house is a much more interesting background.
 
Well, if they WANTED thaty look, it looks good... but I personally think they are overprocessed and you leave some colors looking too saturated and some highlights looking too bright,

Its for a rock band... of course they are going to be very processed. Its a very edgy look which goes really well with what she was shooting, I love it :)
 
Yeah looking at it now, I see I missed a few halos. Good eye!

And yeah, I know this style isn't for everyone. But the rock stars love harsh lighting and over the top contrast for their posters and CD covers.

Thank you everybody for the comments.
 
Would you be able to post before post processing pic/pics??

Thanks
 
That lighting works well and all but I think you took highpass too far, I think it would look much better taken down a lot or even to not have it at all. It makes the image look lower quality in a way with the post process sharpening and all.

Other than the PP no real complaints, except watch the shadows since you only have 1 light, like in the first one. Could have had the second guy from the right take a step to the right to get out of that shadow, but thats not a huge problem, just pointing it out.
 
It's funny because bands always want me to take the processing to the extreme. This band was ecstatic about the results, but some bands have said I didn't go far enough. They want it as grungy as i can get it.

And yeah, I need another light to remedy the shadows. Or a reflector maybe.

OK, here's the unedited pics. These are unprocessed RAWs straight out of the camera. And yes, I know I need to clean my sensor.

1.
548890040_qi2Ao-L.jpg


2.
548865762_eHxSv-L.jpg


3.
548867590_HftR8-L.jpg


4.
548879878_VNyMS-L.jpg
 

Most reactions

New Topics

Back
Top