First Shoots, Yeah I am new to this

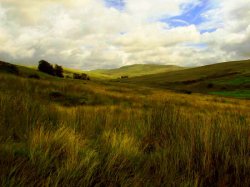
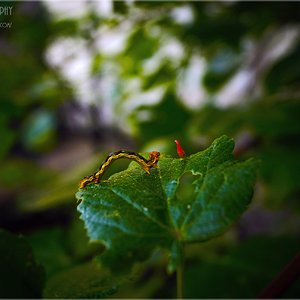
Here's what less than 10 min can do with Photoshop CS3
*raised Saturation
*raised Hue
*Brought up Yellow, Red, Green in Midtones
*Brought up Yellow, Red in Highlights
*Brought up Blue, Green in Shadows
*Raised the brightness/Contrast both
*Played with the Curves bringing up the low end and lower the high end so that you have brigther landscape and brought the darkness back to the clouds after brightening up the image... just some ideas.
 

Attachments

  • $tpf edit.jpg
    $tpf edit.jpg
    74.6 KB · Views: 84
thanks 93rd I love it. I will keep in mind the changes you made for future projects/pictures.
 
thanks 93rd I love it. I will keep in mind the changes you made for future projects/pictures.
Great shots I just think that with the right editing you can bring out the aspects that the exposure and lighting conditions were letting you down on. Do you have PS CS3 yet? If you don't you will find that it is a good investment especially with digital images.
 
I have CS2 but am not used to post processing images with it.

here is another picture. Comments and tips on how "I" can post process this so I can learn would be appreciated

1393691606_0441a513f5_o.jpg
 
My recommendation is to start with the Image tab and go down to Adjustments. From there you will have the main features to edit with. Play around with Brightness/Contrast, Color Balance, and Hue/Saturation to begin with. Also if you set your camera to originally store the image in Raw format you can also play around with White Balance, Clarity, Exposure, etc. when you import the image from Adobe Browser over to Photoshop. Really I'm still learning too. I just decided to jump in and start editing and took note of what I liked and what was working. Have fun! :D

I would like to see more detail in the clouds in the background. Play around with the saturation too because it would look a little warmer with more vibrant color. I would also look at playing with the highlights to get more yellow and red to soften up the strength of the white.
 
ok thanks again I will try some things out
 
here is my first shot at it. I probably try different variations when I have time

53fykg1.jpg
 
^ Watch out, don't make the sky blown out.
 
Yeah as I said I will try again but thanks for the tip!!
 
ok.. 1st of all. never edit your image in RGB. Go to IMAGE>MODE>LAB COLOR. Then IMAGE>ADJUSTMENTS>LEVELS. There should be an equal balance in the histogram. Move your black and white tabs till you find what your looking for *be careful not to under, or over expose your image. remember your trying to make it better.

2nd of all, curves.. take the black dropper, and click the darkest point on the image, white dropper (clear) click on the brightest point on the image. Do that for every color layer given for LAB COLOR mode. Your image will come out alot better.

heres a good tutorial if you need help.


And for histograms


Watch them! And Learn!
 
Last edited by a moderator:
Since everyone seems to like posting their edits thought I would share mine as well.

edit1322627688_c07bd4f6a6_ocopy.jpg


What I did was edit it in 3 different parts. Anyone who has messed with the brightness and contrast in PS noticed the clouds turn pure white fast. So what you need to do is edit it so that you like the ground then put a layer mask on and put the sky back to its original color by basically deleting it in the layer you edited. Then I proceeded to edit the sky in the same manor on a new layer (didn't do much). After this I made a new adjustment layer and edited the back hill so it wasn't so foggy. There are tutorials out there if you look to find out more specifically as I cant really describe exactly what I did. If you ask though I will try and describe in a more detailed fashion. :mrgreen: Anyway this edit isn't perfect but it enhances the original a bit I think.

Edit: oh yea, also did a minor unsharp mask to, well sharpen it a bit.
 

Most reactions

Back
Top