- Joined
- Mar 29, 2016
- Messages
- 14,861
- Reaction score
- 8,316
- Can others edit my Photos
- Photos NOT OK to edit
Studio, is where my greatest interest lies, but with the lock down, I've had to look elsewhere to pacify the photography itch. The time in has given me the opportunity to revisit and refine some of my editing techniques. "The Orton Effect", named for a technique that was developed by Michael Orton back in the 1980s creates a dreamlike glow to an image. I've used it off and on over the years, both in landscape and portraits, but like all things Ps unless you use something on a regular basis it's easy to forget when new things come along. Many of you probably know and use this, so this may be redundant for you, but for those new to Ps, it can add an ethereal feel to your image. Just remember like all effects it can be easy to overdo.
Here's an image, without the effect. I've applied most of the corrections already in Lr. I find it better to do it that way then to add edits after you apply the effect. Also if you google the Orton Effect you'll find many different yet similar methods of doing it, this is just my way. The first step is

Open your image in Ps. Duplicate the base layer twice (Crtl/Cmd J). Name the top layer Details, (this is the sharpening layer that will add back detail) and the next down Blend, (this is where the glow takes place) then convert both to smart objects. Converting to Smart Objects lets you go back and adjust later.

Click the eyeball on the Detail layer to turn it off and dbl click on the Blend layer to make it active. Go to Image>adjustment>Brightness>raise the slider up to about 40 (since your layer is smart object you can adjust this later if necessary) Just don't blow the highlights.

then go to Filter>Blur>Gaussian Blur. I start off setting the radius to the megapixel of my camera, (again this can be adjusted later if necessary).

Next go to Image>Adjustment>Levels. You need to choke the highlights and shadows at this point to increase contrast. This an adjustment feel that can be adjusted later if necessary. It will look horrible at this point but don’t worry it gets better. Adjust the opacity of this layer down to 0. Look away do something else, for a couple minutes to let your eyes adjust after the funky colors. Now raise the opacity somewhere around 15-20% to start. Blending mode is a choice here. On this one it's Soft Light, you might need Overlay, or Multiply, every image is different.
DBL click on the detail layer to make it active. Go to Filter>Other>High Pass. Set the radius to around 4 pixels to start. Click OK, and change the blending mode of the layer to soft light or overlay. Judge for yourself which works best. With it being a smart object you can also go back and adjust the sharpening radius. You may need to adjust the opacity.

With the Detail layer active. Hold the shift key and click on the Blend layer to select both. Hit Crtl/Cmd G to group the layers. I find it helpful to add a white mask, so I can brush away some of the effect if necessary, using a soft black brush.
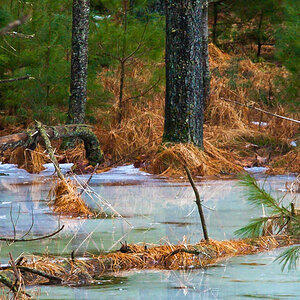
Here it is with the glow added, notice the glow in the water and the greens. Again you can make it as pronounced or subtle as you like, with layers as smart objects you can vary the effect of the elements, change blending modes, it's very flexible.

Here's an image, without the effect. I've applied most of the corrections already in Lr. I find it better to do it that way then to add edits after you apply the effect. Also if you google the Orton Effect you'll find many different yet similar methods of doing it, this is just my way. The first step is
Open your image in Ps. Duplicate the base layer twice (Crtl/Cmd J). Name the top layer Details, (this is the sharpening layer that will add back detail) and the next down Blend, (this is where the glow takes place) then convert both to smart objects. Converting to Smart Objects lets you go back and adjust later.
Click the eyeball on the Detail layer to turn it off and dbl click on the Blend layer to make it active. Go to Image>adjustment>Brightness>raise the slider up to about 40 (since your layer is smart object you can adjust this later if necessary) Just don't blow the highlights.
then go to Filter>Blur>Gaussian Blur. I start off setting the radius to the megapixel of my camera, (again this can be adjusted later if necessary).
Next go to Image>Adjustment>Levels. You need to choke the highlights and shadows at this point to increase contrast. This an adjustment feel that can be adjusted later if necessary. It will look horrible at this point but don’t worry it gets better. Adjust the opacity of this layer down to 0. Look away do something else, for a couple minutes to let your eyes adjust after the funky colors. Now raise the opacity somewhere around 15-20% to start. Blending mode is a choice here. On this one it's Soft Light, you might need Overlay, or Multiply, every image is different.
DBL click on the detail layer to make it active. Go to Filter>Other>High Pass. Set the radius to around 4 pixels to start. Click OK, and change the blending mode of the layer to soft light or overlay. Judge for yourself which works best. With it being a smart object you can also go back and adjust the sharpening radius. You may need to adjust the opacity.
With the Detail layer active. Hold the shift key and click on the Blend layer to select both. Hit Crtl/Cmd G to group the layers. I find it helpful to add a white mask, so I can brush away some of the effect if necessary, using a soft black brush.
Here it is with the glow added, notice the glow in the water and the greens. Again you can make it as pronounced or subtle as you like, with layers as smart objects you can vary the effect of the elements, change blending modes, it's very flexible.



![[No title]](/data/xfmg/thumbnail/35/35263-86f580cf5d28d23109a45984030a79ad.jpg?1619736968)
