A lot of noise in night sky photos

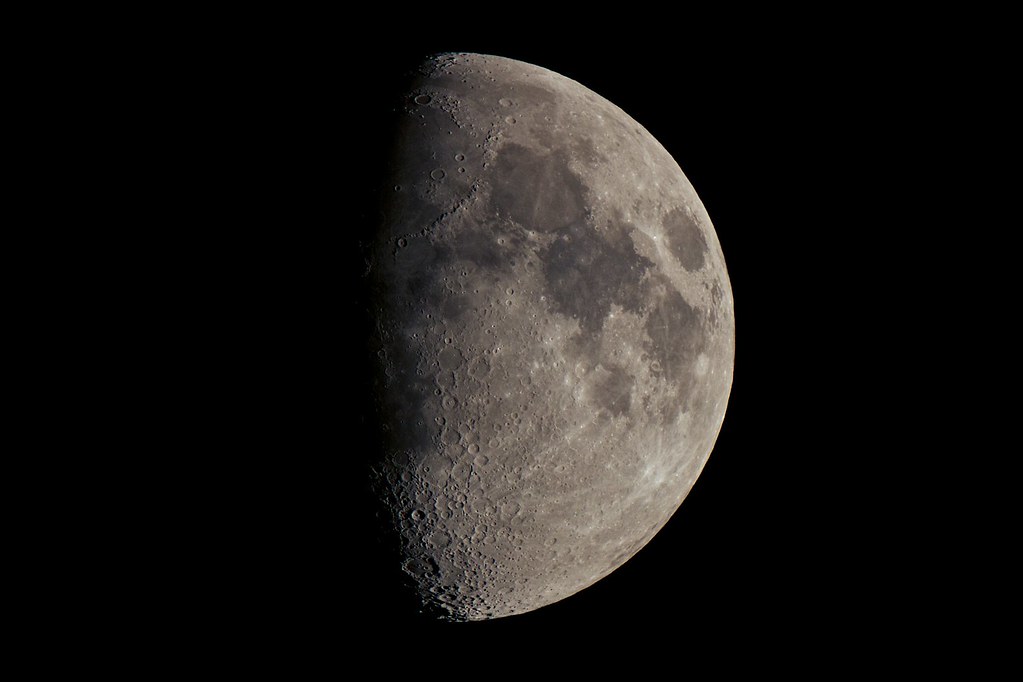
Using a lower ISO and longer shutter speed will introduce noise too. To get any sort of decent star trails with just one frame you would need an hour+ exposure, and then a dark frame unless you want a ton of hot pixels and noise. I mostly shoot at night, and am friends with a ton of other astrophotographers. Everyone I know does an hour or so of 30 second exposures, ISO3200ish, f2.8 and stacks them in post. Maybe your camera just doesn't perform well at high ISOs
 
I always struggled with getting great pictures of the moon. Is there a good setting for that?
I love star/night sky pictures by the way. The first one you posted is beautiful to me! :)
 
I always struggled with getting great pictures of the moon. Is there a good setting for that?
I love star/night sky pictures by the way. The first one you posted is beautiful to me! :)

Moonlight is really just reflected sunlight. I always end up bracketing and merging in the correctly exposed moon. For full-ish moon foreground exposures of 10 seconds or so at iso800 f8. For the moon I'll spot meter but its usually around iso100 f8 1/100

Ah! Thanks for the tips. Makes sense. I both admire and fear the moon so capturing it on camera is a struggle for me.
 
I always struggled with getting great pictures of the moon. Is there a good setting for that?
I love star/night sky pictures by the way. The first one you posted is beautiful to me! :)

There is actually a rule (guideline) for correctly exposing the moon. It's called the "Loony 11" rule (a play on "Lunar").

The rule says that if you use f/11 (and this only works at f/11), then you can set the shutter speed to the inverse of the ISO setting.

In other words... if you are using ISO 100, you can take a 1/100th second exposure. If you are using ISO 200, you can take a 1/200th sec exposure.

You use other f-stops (other than f/11) but you have to play the exposure triangle trading game... e.g. if you were using ISO 100 and 1/100th second at f/11, and you decide you'd rather use f/8 (one full stop larger on the aperture and thus collecting double the light) then you could halve the amount of time that the shutter is open (e.g. use 1/200th sec.) Notice how at f/8, the shutter speed is no longer the simple inverse of the ISO. That's why they use f/11... it's the only f-stop at which the simple inverse of the ISO will always work.

Here's an example of the moon taken using the "Loony 11" rule.


Gibbous Moon by Tim Campbell1, on Flickr

The story on the above image is that I was at one of my astronomy club's "beginner's nights". These are more of an excuse to just get out and observe... but we also encourage beginners to bring their telescopes and we're happy to show them how to get their scopes working and locating objects. ANYWAY... someone asked about taking taking photographs of the moon through a telescope and since I happened to have my camera with me, I explained the rule, put the camera on the telescope, focused the scope, set the exposure, and took this. This was taken with just one single shot -- first time -- no guesswork involved. The point of it was to show that if you follow the rule... this image will "just fall out of the back of your camera" with no effort at all.

In fairness... it would be a bit harder to get this using a regular lens. My camera is attached to a 540mm focal length apochromatic refractor (telescope) and it has an f/5.4 focal ratio (it was 101mm of clear aperture). But I am also using a 2x TeleVue "Powermate" (think 2x tele-extender) which effectively gives me a 1080mm focal length and f/10.8 (which is staggeringly close to... f/11)!

The moon has an angular dimension of about 1/2º from edge to edge. If you use a dimensional field of view calculator you can determine how the large the moon would appear in a different focal length lens.

Here, for example: http://www.tawbaware.com/maxlyons/calc.htm (scroll to the section labeled "angular field of view calculator"

If I enter a 55mm focal length (assuming a kit 18-55mm lens) and a 1.6x crop factor (APS-C size sensor... if you have Nikon enter 1.5 instead of 1.6) and tell it to compute. It tells me that the horizontal angular width of the field is 23º. Since the moon is about 1/2º, that means the moon will occupy merely 1/46th of the width of the frame (not very big.) The longer the focal length on your lens, the narrower the angle of view and the larger your moon in the final output. You can, of course, just crop in a little tighter as well.

Ok so that's the whole Loony 11 rule.

But there's another consideration for the moon. It's usually more interesting to shoot the moon when you have some foreground elements of interest. Photos that contain just the moon aren't as interesting unless the moon is filling the frame with lots of detail.

That means it's probably more interesting to take the photograph of the moon just as it's rising above the horizon (and whatever landscape or cityscape may be in the foreground.)

But then you get a new problem where if you do this on "just any night", the moon may not rise until many hours after sunset. If that happens, you won't really see much foreground interest because it'll likely be too dark to expose. Shooting long enough to expose the foreground adequately will probably blow out the moon and you'll just see a white blob.

SO... I find that taking a photo of the moon ONE DAY BEFORE the "full moon" works best. This is because on the day of the full moon, the moon is rising in the east at the same time that the sun is setting in the west. And by the time the moon has a chance to rise high enough above the horizon line to get above trees, buildings, or landscape features, it may be too dark. But if you take the photo ONE DAY EARLIER... then the moon will rise about 1 hour before the sun sets. By the time the moon is high enough to clear obstacles on the horizon, the sun will finally be setting but the sky will still have a dusky blue twilight glow. This gives you a rich blue sky instead of a black sky... and it gives you some amber twilight color on your landscape or cityscape (and if it's a city the lights are likely already coming on.)
 
Thanks for the tips everyone. Yeah, I've had a lot of trouble with noise at higher ISOs. It usually becomes quite noticeable at 1600 or higher. However, it sounds like noise reduction setting/black frames are the way to go and so I'll try that in my next shots to see how it goes.
 
Thanks for the tips everyone. Yeah, I've had a lot of trouble with noise at higher ISOs. It usually becomes quite noticeable at 1600 or higher. However, it sounds like noise reduction setting/black frames are the way to go and so I'll try that in my next shots to see how it goes.

If you enable the in-camera noise reduction (Canon cause this "long exposure noise reduction" but I don't know what Sony calls it and I see you have a Sony a55), it takes a "dark" frame immediately following the normal ("light") frame and of the same duration. That works for single-frame JPEG shots (the noise reduction wouldn't be applied to a RAW shot).

But if you're planning to take star trails, one of the better techniques is to collect a series of 30 second shots and stack them together using something like StarStaX. If the long exposure noise reduction is enabled when you do this, you'll get 30 seconds of capture, followed by 30 seconds of noise reduction (no capture). In other words, the camera is only capturing the sky 50% of the time because the other 50% of the time it's keeping the shutter closed to capture a dark frame.
 
I always struggled with getting great pictures of the moon. Is there a good setting for that?
I love star/night sky pictures by the way. The first one you posted is beautiful to me! :)

There is actually a rule (guideline) for correctly exposing the moon. It's called the "Loony 11" rule (a play on "Lunar")....

Man. I have to thank you, Tim. I feel like if TPF collected all the in-depth, informative, and easy to understand posts you make, they'd have a best-selling photography book. Throw in Derrell's posts as the gear sequel and you guys would make millions. Thank you SO MUCH for this information.
 
I just started attempting milky way photos in the last couple of weeks and all of my research said to use the lens with a wide open f stop, ISO's ranged from 1600 - 6400 with ss's about 20-30 seconds. I did this and they came out with a lot of noise too.

But I then went to youtube to look at video's on how to process these files with LR4 and PSE11. In just about everyone, they did noise reduction to help clean up the image. I tried these methods and came up with 2 images that I really liked. I am planning on trying more this weekend at a different location.
 
Okay, this has already been said but I feel its worth saying again. Noise increases in dark areas of an image due to stray photons that the human eye doesn't see. This is even more apparent in long exposures. If your camera has a long exposure noise reduction setting, use it.

Because of this, you should "overexpose" your night shots; (they should look far brighter on screen than in reality) technically you would be correctly exposing them but that conversation is for another thread. If you want the images to appear as you've seen them you can always bring down the exposure when you edit the image. They will appear much less noisy!!

This is the reason your bright star trail shot is so much better looking than your others. It is correctly exposed.
 
How did you hook up your camera to your telescope?

I'm basically using one of these: Blue Fireball ELIM-T 2" Prime Focus Camera Adapter - For Canon EOS # P-11

There are LOTS of companies that make these (and this isn't actually the same one that I own but I just did a quick search to find an example of one).

This one (for Canon... they make them for pretty much any brand) has a Canon EOS mount just like a lens -- but it has no "glass" (there are 2" filter threads so you can attach a filter if you want). Instead it has the same 2" seat that a 2" telescope eyepiece would have. You attach this to your camera and then attach the camera to the telescope like an eyepiece. The telescope effectively becomes your lens.

There are a few caveats...

1) This a 2" version. Not all telescopes can accommodate a 2" eyepiece... some only take 1.25" eyepieces. There are 1.25" inch versions but depending on the camera and sensor size this may result in vignetting around the corners of the image if the adapter isn't big enough.

2) You can also buy just the "t-ring" (that's the adapter that mounts to the lens but it does NOT have a 2" tube like an eyepiece... instead it has "t-threads" which is an industry standard size thread. From there you can buy the "nosepiece" component separately. Some scopes may have their own rear-cell adapters that end in a t-thread so you buy the "t-mount" designed for your scope and then the "t-ring" / "t-adapter" for your camera. The two halves thread together using the industry standard t-threads.

3) Some scopes cannot come to focus with a DSLR camera attached. Newtonian type reflectors are notorious... some will... many will not. The issue is that they're designed with the assumption that you're going to attach an eyepiece and the focuser has a limited amount of travel. On a DSLR, the sensor is back farther than most other camera types because they have to leave enough space for the reflex mirror. This puts the sensor at a farther distance than the scope expects... as you focus the telescope inward you notice the imaging is just beginning to come to focus for the camera.... and then the focuser runs out of travel before it ever achieves focus. I have heard of guys shimming the primary mirror to shorten the focal length just enough so that the scope can come to focus. If you have a refractor or a catadioptric type telescope (schmidt-cassegrain design or mak-cass design) then you are not likely to have this focus problem... it's mostly newtonian reflectors (and not all newtonian reflectors) that have the problem.

4) Telescopes don't have aperture blades like camera lenses... you have to know the focal ratio of your telescope. You have to pretend you dialed your aperture to the scope's focal ratio and then set the ISO and shutter speed to match that aperture.

5) The moon is easy. The planets are mildly challenging (stacking is usually needed so there's a technique to doing planets). Just about any type of telescope that can focus with a camera attached can be used for this. But deep-space objects (faint fuzzies) are "hard". When you attempt these the type of telescope mount becomes very important. These require long-duration exposures so the telescope has to "track" the object over time. This is trickier than it may seem. You need an equatorial mount (either a GEM or if it's an alt/az type tracking mount it needs to be mounted on a polar "wedge"). An auto-guider is practically a requirement for longer images (more than a couple of minutes but this depends on how precisely you aligned the telescope and also how good the tracking is on the mount.) Deep-space imaging is a bit of a black-art -- you can spend a lifetime learning to get good at this. Learn on the easier stuff and gradually work your way up to the harder stuff.
 

Most reactions

New Topics

Back
Top