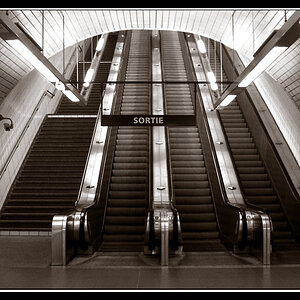
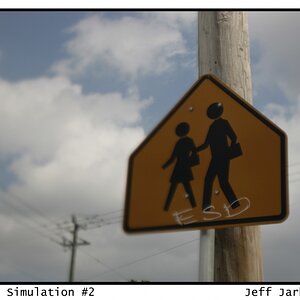
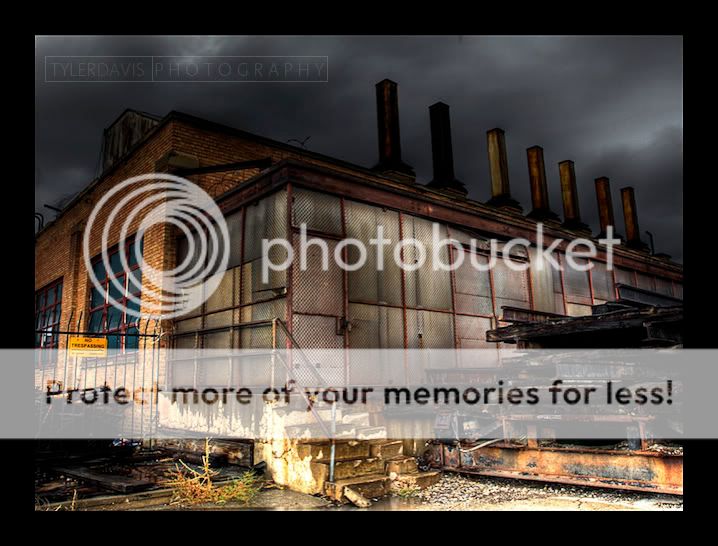
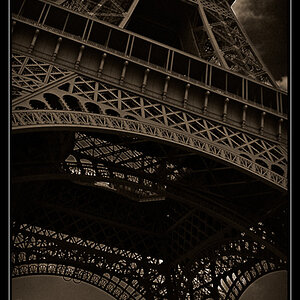
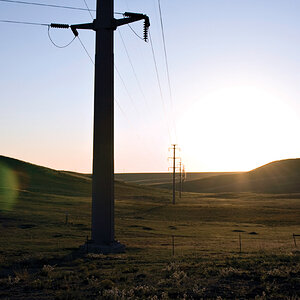
Your first shot is excellent! Your second shot is also very nice, but I think it is a bit bright compared to your first shot. I was hoping for a continuation of the dreary, dark mood of the first shot; I think it is just the bottom part of the second shot that is too bright in some areas..
First looks so good, I agree with the others when they say that the bottom has a little to much light in the bottom too. And maybe you could think about changing your water mark to something else that isn't too distracting?
Thanks for the comments, I suppose I could change the watermark... normally they arn't as intrusive but I just found a ton of my photos on someone elses pbase site, posing as there own... so I'm a little paranoid these days.
Okay, heres my process. #1 (and this may surprise a few of you) its not HDR. I did a bunch of "painting with light layers". Its something like this:
Open image>duplicate layer>desaturate>dodge 20% set to shadows go over all dark details (not entire shadows) that you want to stand out more>burn 20% highlights (go over areas you burned and any areas with chipped paint, cracked wood, rust etc...(those two steps should take quite a long time)>set layer blending mode to overlay>merge visible>channles>green>erase all>hue/saturation/adjust sliders in saturation and darkness working in colors>levels>work to taste>duplicate layer>create a layer mask of anything you want brighter>duplicate layer create another layer mask of anything you want darker>duplicate layer>create a layer mask of anything you want in small highlights>1st layer mask light part (this is where you "paint with light" fill the maks part(s) with white and apply a 1-5px gusassian blur>seto to overlay/screen/soft light/ whatever blending mode looks best>adjust opacity/fill to liking>on dark layer mask keep only the darker parts>guassian blur 1-2px>set to multiply>adjust opacity/fill to liking>repate process on highlights w/out guassian blur>merge visible>copy to new layer>mask off sky>adjustlevels/curves/paint with light if you need to to bring out sky more(if needed)>use dodge/burn process again to bright painted areas>merge visible>duplicate layer>highpass 1-1.5px>set blending mode to overlay>merge visible>adjust hue/saturation, curves, and levels to liking.
Thats pretty much it, I'm sure there was more but you get the idea.


")


![[No title]](/data/xfmg/thumbnail/40/40288-4d5d7a8aa74ddfceb5fb82062d9b21be.jpg?1619739409)