What's new

Laptop shelf for a camera stand

Don Kondra

Been spending a lot of time on here!
Joined
Dec 11, 2007
Messages
1,637
Reaction score
904
Location
Saskatoon, Saskatchewan, Canada
Can others edit my Photos
Photos NOT OK to edit
Greetings,

As I mentioned in an earlier post I have purchased a camera stand.

http://www.thephotoforum.com/forum/photography-equipment-products/310232-delta-1-cs6-jr-camera-stand.html

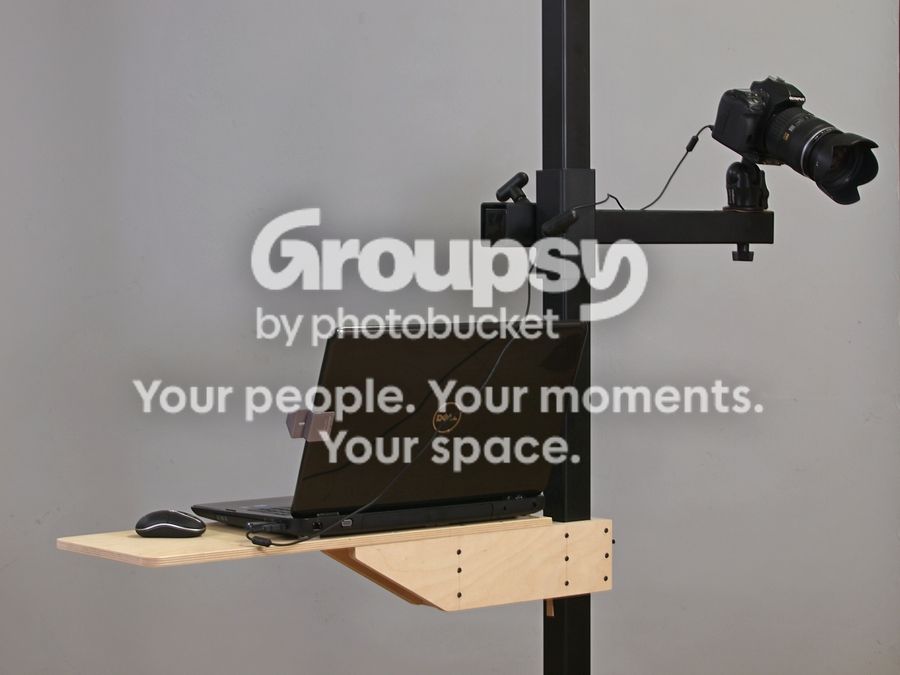
In an effort to eliminate even more "legs" I have built an adjustable shelf to hold my laptop.

This prototype may not be upgraded :sexywink:

Construction details are pretty basic so I'll move straight to the shelf at work...
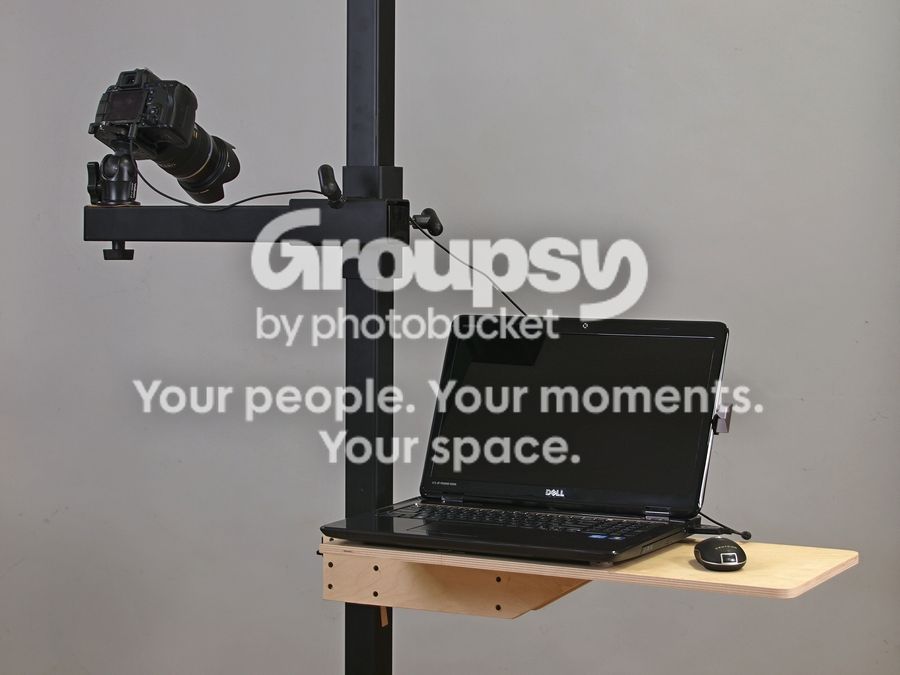
Laptopnfrontonstand_zpsb676948b.jpg


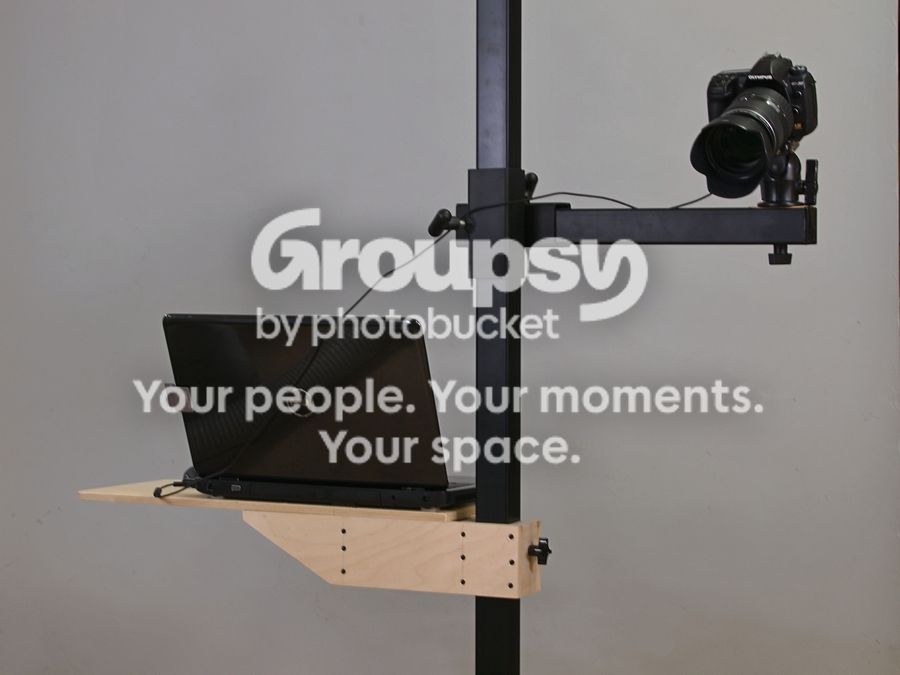
A back view...

Laptopbackleftonstand_zps43ef3c9d.jpg


Another back view...

Laptopmiddlebackonstand_zps172ae81e.jpg


Closer view of the height adjustment...
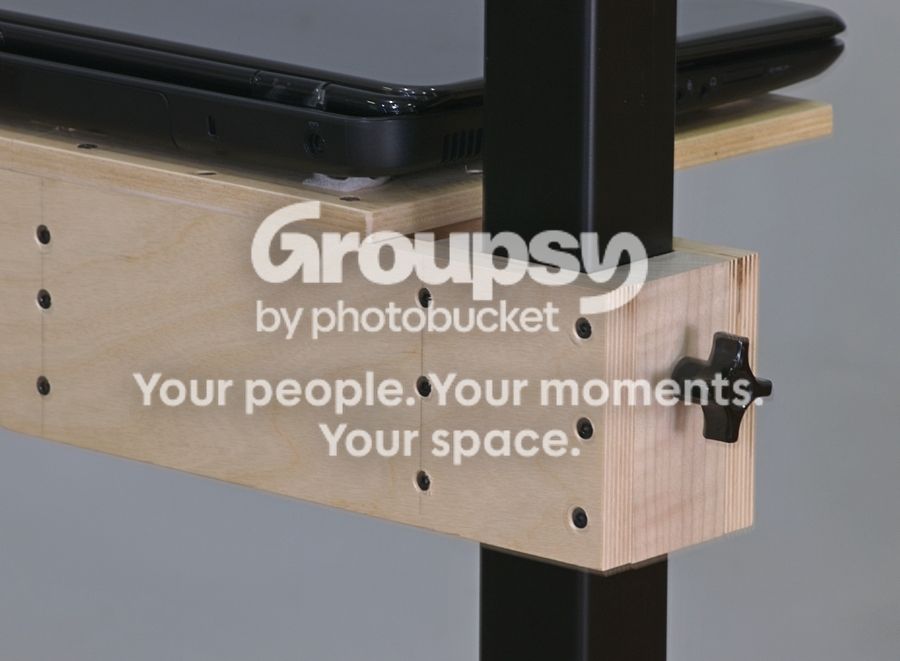
Closeupadjustmentknob_zps25879804.jpg


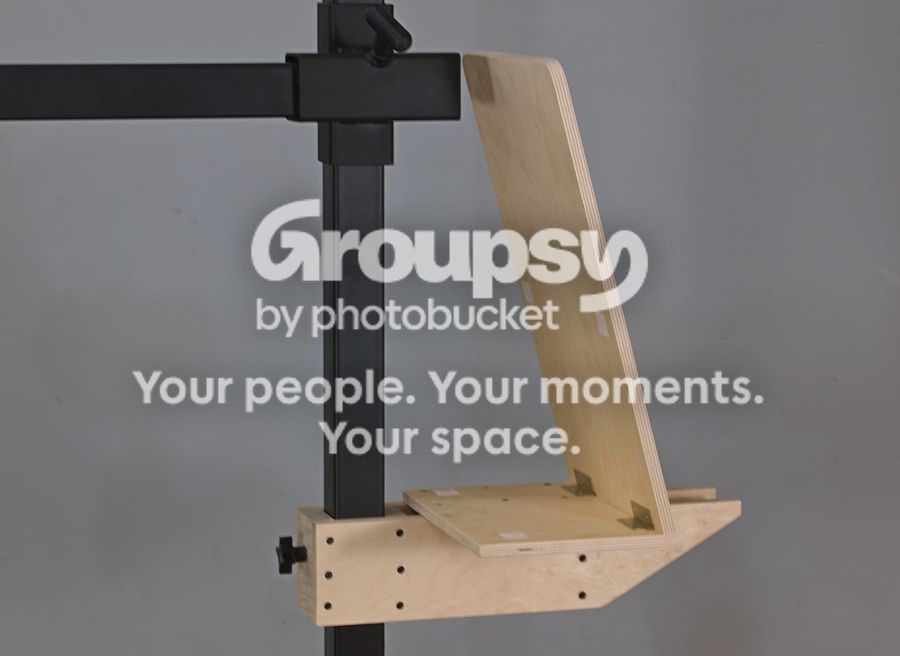
And in storage mode...

Trayinstoragemode_zpsee765ea7.jpg


The laptop is secured to the shelf with Velcro strips on it's stubby little legs.

Please note that After I took the shots I noticed I have "installed" the laptop too close to the center beam. It is actually meant to be 2 1/2" farther right to clear the camera arm at it's lowest position at my shooting table.

Cheers, Don
 
Pretty sweet mods you made, Don!!! Your woodworking and cabinetry skills are awesome,dude! As I looked at it,my only thought was, "What about a catch-rail" on the back edge, so the laptop could not ever get bumped off the platform and fall down and go BOOM!?

Buuuut, you already got that covered with the velcro!
 
So, when you want to get the camera low, below the level of the laptop platform, how do you manage that?
 
Pretty sweet mods you made, Don!!! Your woodworking and cabinetry skills are awesome,dude! As I looked at it,my only thought was, "What about a catch-rail" on the back edge, so the laptop could not ever get bumped off the platform and fall down and go BOOM!?

Buuuut, you already got that covered with the velcro!

Thanks Derrel !

No way was I going to trade tripping over a leg for trashing my laptop :)

You need to pry it off the shelf, he, he...

So, when you want to get the camera low, below the level of the laptop platform, how do you manage that?

That's what the black adjustment knob is for, loosen it and you can move the shelf anywhere... but to get it above the camera arm you do need to slide both up off the main post and change their positions.

The position it is at in the pictures is an ideal height for viewing from a rolling stool I use to catch a quick break when shooting and accomodates the lowest camera postion at my shooting table, aka, my workbench :)

Cheers, Don
 
You know I'm asking because I'm totally going to DIY a stand based in large part on what I'm seeing in your posts regarding yours, right? :sexywink:

I like the idea of a separate arm for the tethered laptop or tablet, so that it can remain in a comfortable viewing position while the camera can be re-positioned anywhere up or down the main post. My original thought was to use the other side of the camera's arm, but after seeing this and thinking about it, I've abandoned that notion for the separate arm.

Not liking the idea of having to slide them both up and off the top of the 6' main shaft to re-position the camera low though, and I really want the easy ability to position the camera anywhere from floor to top of shaft, so I'll be re-thinking their relationship and pole-grasping methods to avoid that.

Much appreciated Don!

Good work on that wood platform too! It looks great! I'm no woodworker, so I'll be doing everything in metal here, but your second arm idea will definitely be a part of the plan.
 
Metal makes it even easier :)

The section of metal that the 2" x 2" camera arm slides into is 2 1/2" x 2 1/2". I would just make two of those, one for the camera arm and one for the laptop arm.

Then when you need to change them for height you simply swap the arms....

Cheers, Don
 
Wow, that's beautiful work Don. I don't know how it will work, but it sure looks well done. I once built a wooden box with no opening.
 
Metal makes it even easier :)

The section of metal that the 2" x 2" camera arm slides into is 2 1/2" x 2 1/2". I would just make two of those, one for the camera arm and one for the laptop arm.

Then when you need to change them for height you simply swap the arms....

Cheers, Don
I suppose I could always just use the superclamp/magic arm setup that I'm currently using with my tripods for holding the tablet:

Macro_With_Tablet_Setup_0233.jpg
 
That would work fine if you can find a grip large enough to attach to the main post.

I'm a die hard mouse user so I needed a larger tray :)

Cheers, Don
 
Are you going to go with the four sided square or round steel pipe ?

The concept of one part sliding in another works both ways :)

You might want to incorporate a counterweight into the build right from the start, there's no telling how long it will take me to get around to it, he, he..

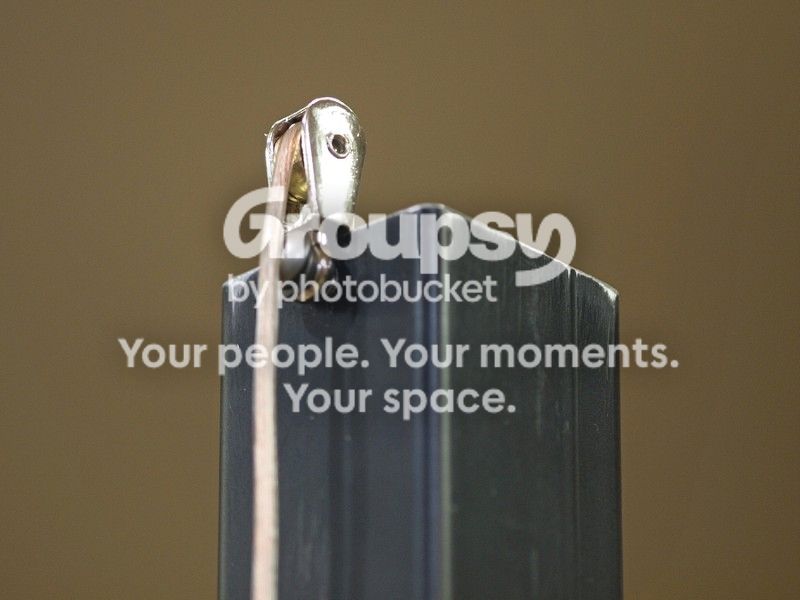
I did pick up a small pulley to attach at the top, now I need to find some lightweight cable and a weight that will fit inside the main column for a counterweight.

Not sure if I want to bother with making a form and melting some lead ?

Cheers, Don
 
Planning to go with the square steel, and have already been looking at pricing for it new, rather than dig through the junk yard in the middle of Michigan winter (finding very reasonable prices new, actually). Also been thinking about a counterweight, same as you, using a pulley and lead weight inside the column.
 
Update....

I was talking to my friend who is a stained glass artist, he offered to solder up some of his scraps and save us the time and effort to build a form, melt and pour a counterweight.

It's not pretty but it won't be seen anyway :)

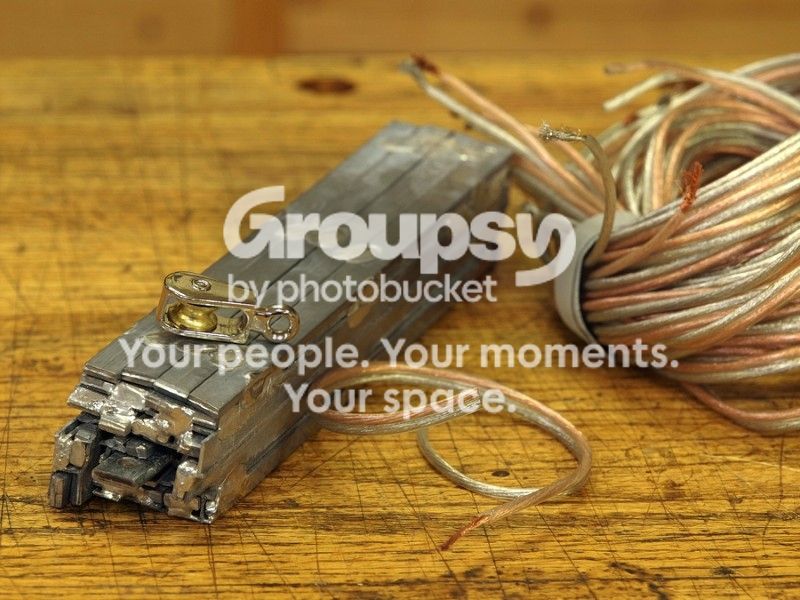
BTW - I figured the weight of the heaviest lens/camera I would use and the metal arm might be 8#. A 1.5" x 1.5" x 8" lead weight is ~ 8#.

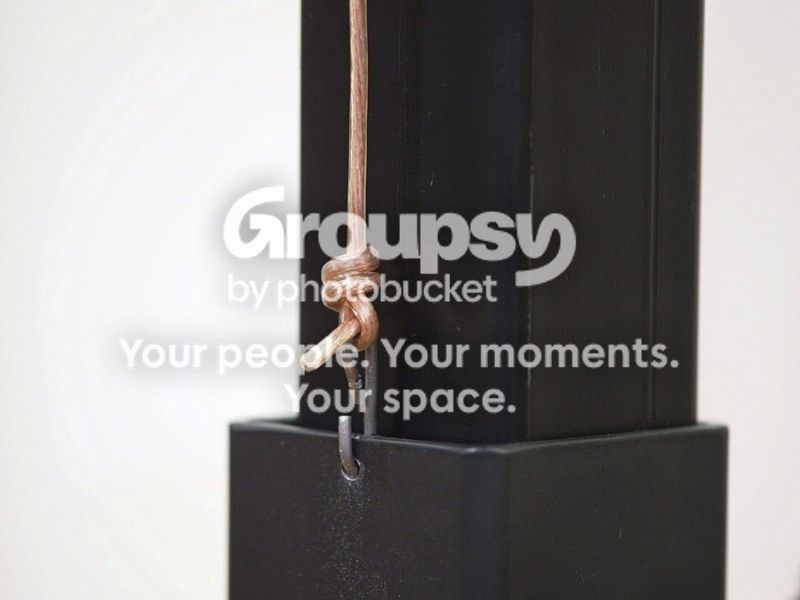
I picked it up late this afternoon and decided to cobble together something with materials on hand, a small pulley and speaker wire..

MaterialsCustom.jpg


I drilled a hole in the camera arm and used a S hook to attach the wire.

CameraarmCustom.jpg


Then I drilled and tapped a hole on the top of the column to attach the pulley (need a slightly larger pulley and the correct screwdriver to fully seat the bolt).

PulleyCustom.jpg


It doesn't exactly "glide" up and down but it doesn't take much effort either...

Cheers, Don
 

Create an account or login to comment

You must be a member in order to leave a comment

Create account

Create an account on our community. It's easy!

Log in

Already have an account? Log in here.

Back
Top Bottom