The exposure for the moon uses the "Loony 11" rule -- which says that if you use f/11 then the shutter speed is the inverse of the ISO setting. E.g. ISO 100 uses 1/100th. ISO 200 uses 1/200th, etc.
You don't have to use f/11... but if you use a different f-stop then you need to trade your stops of exposure accordingly. E.g. f/8 is 1 stop increase in light vs. f/11, so you'd reduce the shutter speed to collect 1 stop less light to "balance the books" by shooting at 1/200th (if using ISO 100).
I never bother to stack for the moon. If the seeing conditions are so bad that I need to use stacking on the moon then it's a good sign that I should probably just wait for a better night.
Planets are another thing... they need stacking.
The moon's "angular" width measures roughly 1/2º (about 30 arc-minutes) from edge to edge.
Jupiter's "angular" width measures merely 42" (arc-seconds) from edge to edge (60 arc-seconds are in just 1 arc-minute and the moon is 30 arc-minutes wide).
That means that while Jupiter is, in reality, much larger than the moon... it's so much farther away, that it appears much much tinier than our moon.
And THAT means that you'll need to magnify Jupiter quite a bit more (nearly 43x larger) to get it in scale to the size of the moon. Atmospheric distortions will have a much more significant effect on the planets than it has on the moon. So when you image planets, you normally do take about a minute's worth of video (30 seconds might be enough) and then use stacking software such as Registax or AutoStakkert. There are numerous YouTube tutorial videos on how to use these if you're having difficulty with them.
Here's a sample following the "Loony 11" rule (ISO 100, 1/100th sec, f/11). This is a single exposure (not a stacked image).
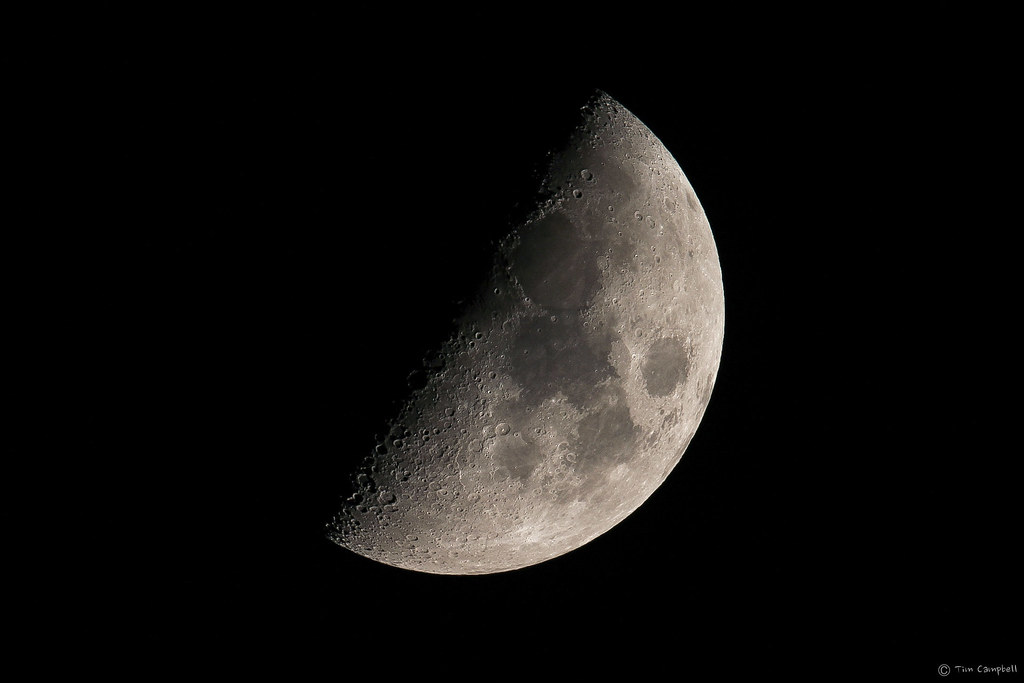
First Quarter Moon by
Tim Campbell, on Flickr


![[No title]](/data/xfmg/thumbnail/35/35880-9a6926237907ab72b42781d9a09698a6.jpg?1734167640)

![[No title]](/data/xfmg/thumbnail/31/31979-ea92aca54ae865842d998c9cec534991.jpg?1734160756)


![[No title]](/data/xfmg/thumbnail/35/35265-c9ea3efd2c618a57ea136e63ad106880.jpg?1734166927)
![[No title]](/data/xfmg/thumbnail/35/35263-86f580cf5d28d23109a45984030a79ad.jpg?1734166920)

