If you want to change somebody's body shape:
1) Make a selection that includes the edges you want to alter, and goes about 50-100 pixels off to either side (more if you need to shift the body's edge more, but that would be a lot), but then hugs the same curve as the edge, roughly.
2) Always keep your selection's edge moving through low contrast areas of the image (big areas of skin, sky, etc.) whenever possible. If you need to cross over a high contrast boundary, swoop in and do it at a very shallow angle, ideally parallel to the direction the morph will be in if you have an option.
3) Feather the selection.
4) Now copy and paste a new layer of that selection.
5) Change the shape, with whatever tool.
What happens then is that the 50-100 pixel "buffer" you had now hides the original position of the body's edge, and since you kept your selection in low contrast areas, it blends easily with the old copy of itself (the squashed skin on one side will look about the same as unsquashed skin next to it, since it doesn't have many lines to notice squashing, and the stretched sky will blend with not stretched sky, etc.).
Where you intersected high contrast edges, either there will be seamless connection more or less (if you were able to get parallel to the direction of morph) or there will be slight mismatch, but it's minimized by having intersected at a shallow angle. it gives you a nice big long section to play with to fix the jump in pixels.
6) fix the edges by gently rotating them to line up with the old and new sides of the body edge. Having a long line of overlap to work with makes this easier (see above)
7) Clone stamp at a low transparency to blend the low contrast areas a bit better
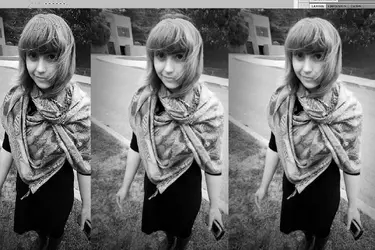
Quick example I did. This is a friend of mine taken with a very wide lens. Let's say I want to morph the top of her head smaller to reduce the lens distortion (I picked the example since it is not an insulting reason to want to morph somebody's body. He head isn't too big, it just is closer to a distorting lens =D)

I made the selection through the trees avoiding any really obvious leaf patterns when possible (staying in low contrast) and then intersecting the high contrast boudnary between her hair and the leaves at a shallow angle, parallel to the direction of morphing (up/down). Then I copied, pasted, squashed, and only had to do a little cloning of the trees above her head, and done. Didn't have to touch the hair at all even (where the selection crossed over).


![[No title]](/data/xfmg/thumbnail/31/31017-dec7e898bd21f99b70534f8d06a4154c.jpg?1734159103)


