astrostu
I shoot for the stars
- Joined
- Aug 1, 2006
- Messages
- 673
- Reaction score
- 17
- Location
- Boulder, CO, USA
- Can others edit my Photos
- Photos NOT OK to edit
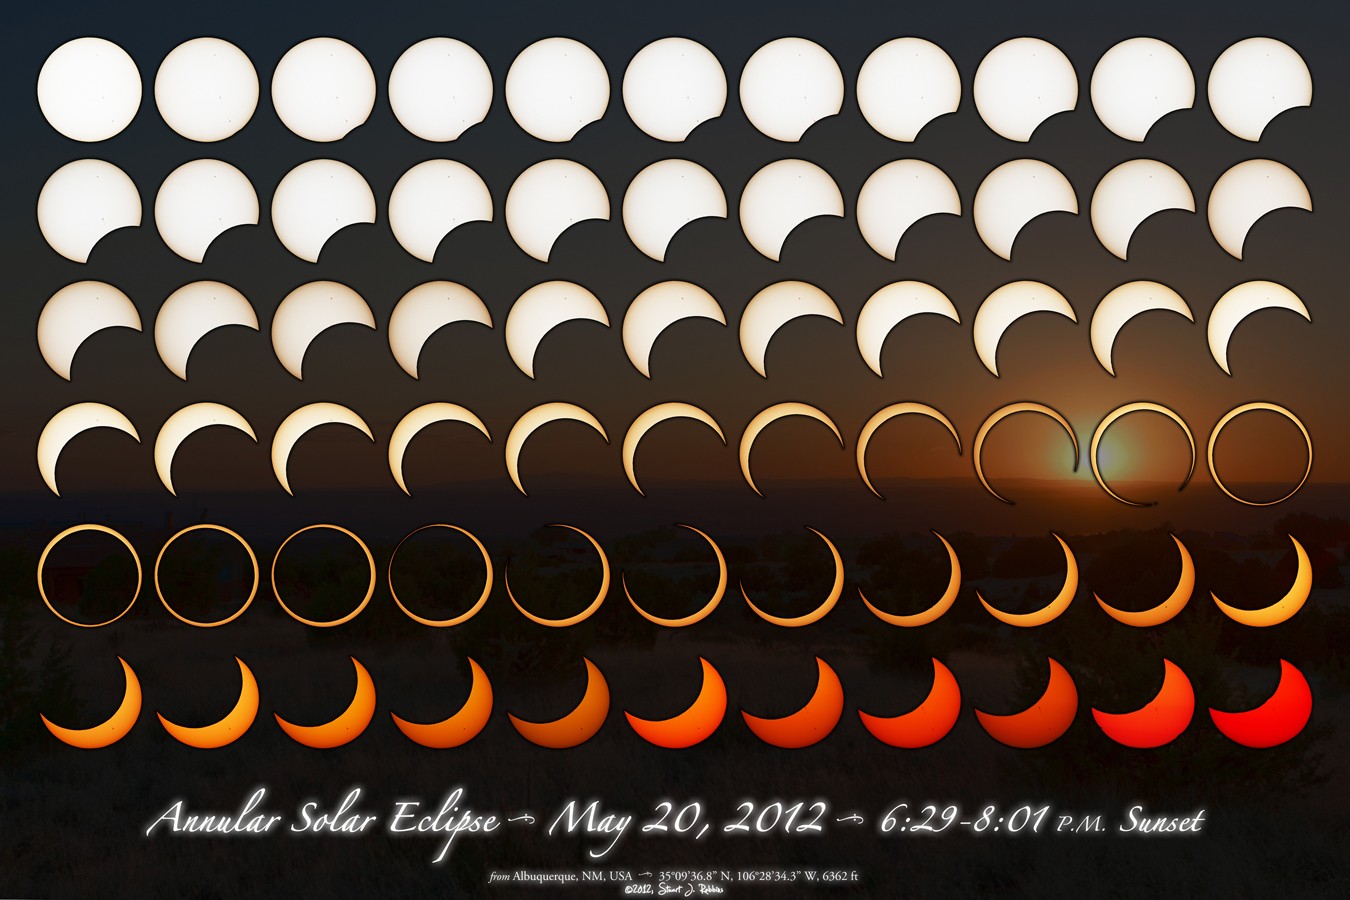
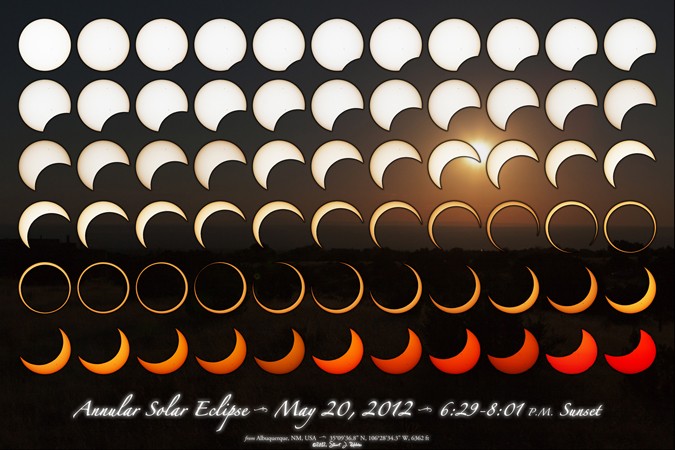
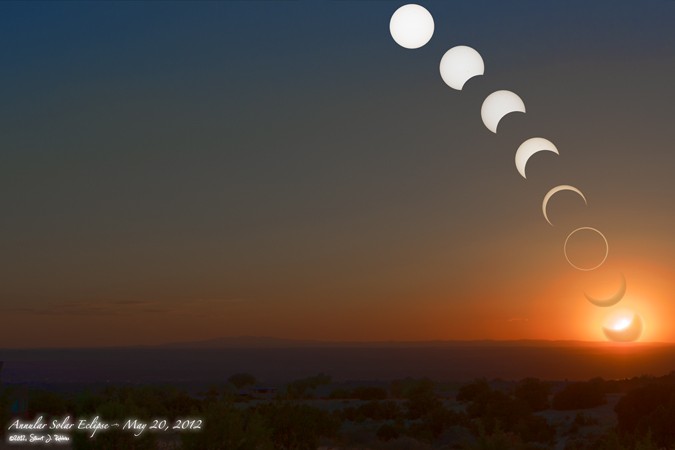
6.24% size Solar Eclipse montage, Type 1b Version 1.2
This compilation of photographs from the May 20, 2012, annular eclipse was generated after a lengthy and involved process.
Taking the Photos
The following setup was used:
- Tripod: Gitzo with ball head.
- Camera Body: Canon 7D.
- Lens: Canon 400mm f/5.6L with 2x extender.
- Filters: Hoya ND400 and B+W ND1.8.
Roughly every 90 seconds, 5 photographs were taken in quick succession throughout the duration of the eclipse. During some of the more interesting parts (beginning, sunset, into and out of annularity), photo rate was increased to roughly every 60 or 30 seconds, but these were excluded from the montage.
Camera settings were:
- f-stop: Fixed at f/11.
- ISO: 100 except for the last few which were at ISO 200 and 400 due to the sun being very dim as it set
- Shutter Speed: Varied between 1/800 sec and 1/20 sec. Without a tracking mount set up, 1/25 sec was the longest possible without noticeable motion blur.
Processing
Step 1: Every set of 5 images was processed in Adobe Photoshop's Camera Raw with a temperature of 4800 (such that the first sun image was white in the middle) and tint of +10. The red/cyan and blue/yellow chromatic aberrations ("fringe") were attempted to be fixed in this, as well, though this was a rough fix. Images were cropped to just the sun. These were then opened as 16-bit color images.
Step 2: Every set of 5 was then manually aligned with the first image by using the Difference blending mode and minimizing the difference.
Step 3: The five layers in Photoshop were combined into a single Stack, and the Stack Mode was set to Median to attempt to reduce the noise from atmospheric turbulence. A small amount of sharpening was added via Unsharp Mask to the Stack with a radius of 3 px.
Step 4: They Stack was duplicated and the individual color channels (RGB) were extracted as B&W layers. (The duplicate was then removed.) These RGB layers were manually aligned again via the Difference method to remove the chromatic aberration as much as possible. For the images as the sun got lower in the sky, a small Scale Transform was performed on the R layer to get it to align properly with the G and B (scaling was between 99.5% and 100.2% and was occasionally just in height or width).
Step 5: The individual color layers were then colorized by adding black to R/G/B gradient adjustment layers, and the G and B formerly B&W layers were set to Screen in the Layer Mode. Two small Curves adjustment layers were then added, the first to slightly darken the image such that it had the same contrast and luminosity as the original, and the second so that the black point was black. These were all uniformly applied via a custom Action for all the sets of 5 images. This was then saved as a 16-bit PSD file and then flattened and saved as an 8-bit JPG file.
Step 6: These were all then compiled into the montage shown above. In this process, all images were rotated relative to the first sun image such that prominent features (sunspots and then light filaments) were overlapping. Some of the colors in the last dozen suns (during sunset) was not a smooth progression from the yellowing disk to deep red, so Hue/Saturation adjustment layers were added and the Hue adjusted between +3 and +14.
Step 7: A Curves layer was added to the overall montage to bring the center of the first few suns up to roughly 95% full-white.
Step 8: The black background was removed from each sun image with a simple Magic Wand Selection (20 tolerance). A small black Stroke and black Shadow were added to the Layer Styles.
Step 9: The background image was added, taken roughly 5 minutes before the sun dipped below the horizon as an HDR with exposures 1/60-1/500 sec (f/4.5, ISO 100). Text was added to the bottom.
The final, full-sized image is 72.1" by 48.067" at 300ppi, each sun being roughly 6" in diameter at 300ppi. Seeing was good enough and the images high enough resolution that you can separate individual member sunspots in the groups (when the sunspots were not covered or the sun too low).
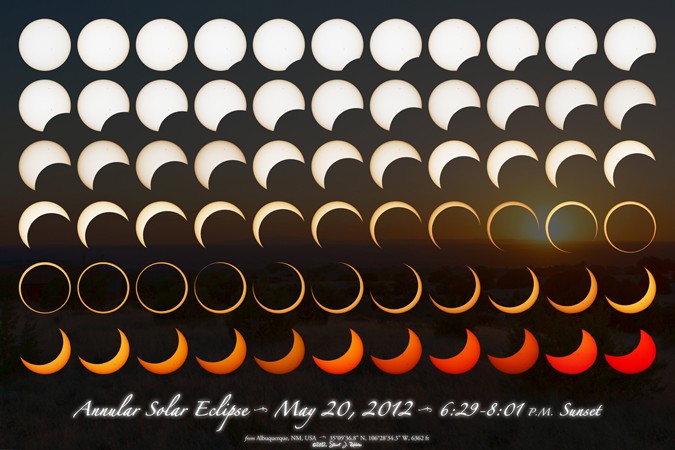
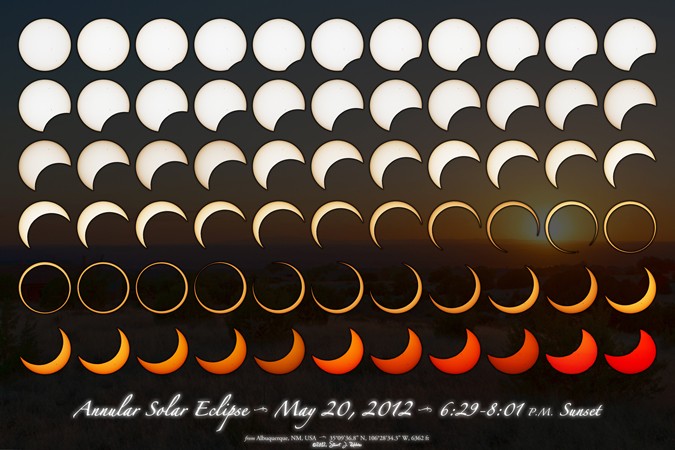
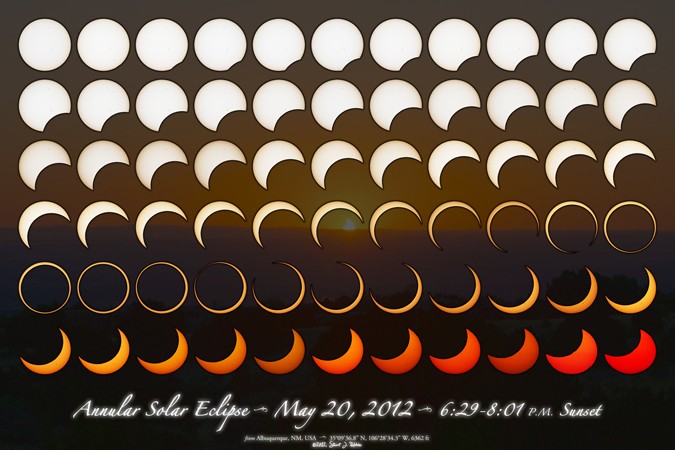
All that said, I'm trying to figure out how to best present these. First, there's the variation on the montage above. I'm a very linear thinker, and this grid-like display obviously reflects that. Within that, I have a few variations. Which do you think is best?
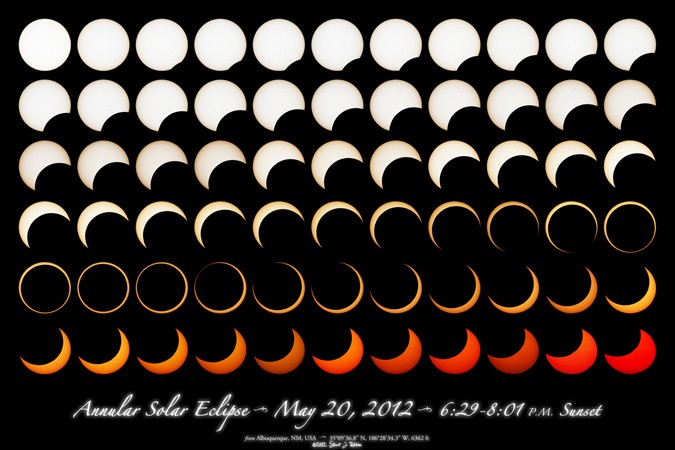
3.12% size Solar Eclipse montage, Type 0 Version 1.2

3.12% size Solar Eclipse montage, Type 1a Version 1.2
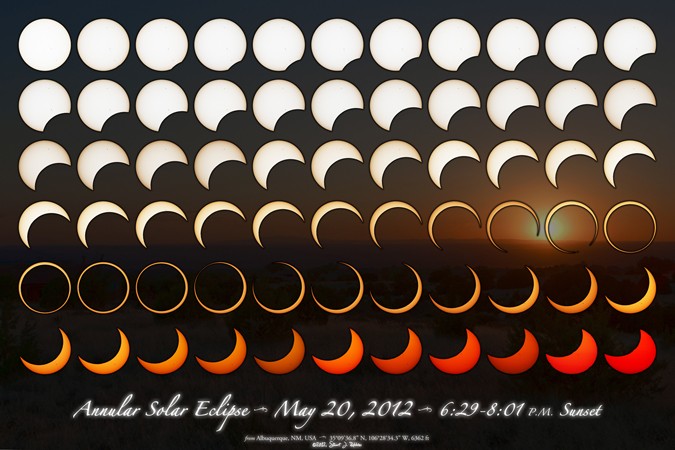
3.12% size Solar Eclipse montage, Type 1b Version 1.2
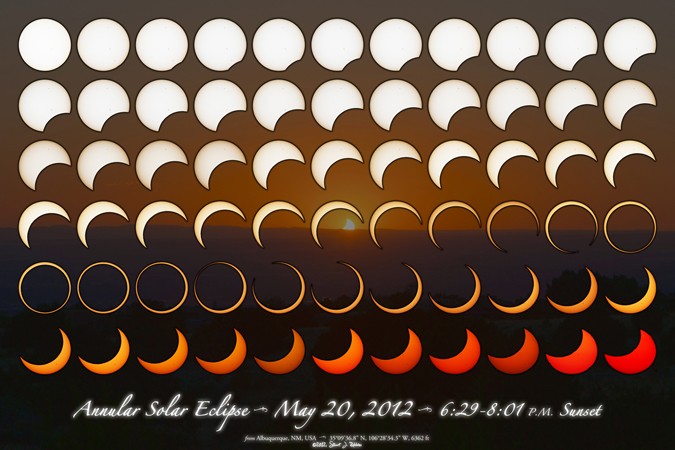
3.12% size Solar Eclipse montage, Type 2 Version 1.2
3.12% size Solar Eclipse montage, Type 3 Version 1.2
Beyond that, what's a good way to display these? I had thought I could do a "path through the sky" type of display, but unfortunately since the annular eclipse was only 94.4% (one of the absolute least-covered eclipses possible since the moon was almost exactly at apogee during this), the sky was still incredibly bright around the sun during the eclipse, and so I couldn't get a "clean" sky image to do this ... anything I do would be incredibly obviously photoshopped since it would just be the sun on top of some random sky image. And I don't have other ideas.
Also thinking of maybe making a movie montage? I have 75 final frames plus I took a bit of HD video of the sun coming out of annularity and the sun setting.
I'm also trying to decide if I should correct the vertical distortion in the images as the sun set. The distortion is relatively minor, maybe only ~5% until the last few shots when it's closer to 10-15%.
Thoughts?
")


![[No title]](/data/xfmg/thumbnail/42/42253-fef7e43227f484b1a95dd6d85c03bd40.jpg?1734176623)


![[No title]](/data/xfmg/thumbnail/39/39290-dfb3e819bd94a7f30797638ae1ae27cf.jpg?1734173258)


![[No title]](/data/xfmg/thumbnail/39/39289-c5ea6a611707fdd5786347f4a67d63ae.jpg?1734173256)
