BrentC
Been spending a lot of time on here!
- Joined
- Jan 8, 2017
- Messages
- 3,576
- Reaction score
- 2,336
- Location
- Brampton, Ontario
- Can others edit my Photos
- Photos NOT OK to edit
How would I go about stitching together one or more Raw files manually? The reason I am asking is that I have a shot I took of a bird in flight and unfortunately the one really good shot has the bird bottom left corner. I really need to put space in front of him but he's right at the edge. Now there are two things I could do but not sure how to do it within PS or LR.
And I need to do this in Raw because I probably needs some manipulation after I put it together.
1.
There is lots of useable blue sky in back of the bird. I was thinking of stitching multiples of the same image together, therefore extending the blue sky in front and bottom of the bird and then cropping. Think of it as four square box, top right original image, three copies on the other three so I get the blue sky from back of the bird in front with a crop.
The only way I can see to stitch Raw file in PS and LR is panorama, which obviously doesn't work. There must be an easy way to do this?
2.
Somehow cut out a section at the back and attach it in front and bottom extending the image.. Once again, I want to do this in Raw.
Hope this all made sense. Am I missing some obvious editing function? I can't seem to find anything in a search, I just keep getting links to how to do panoramas.
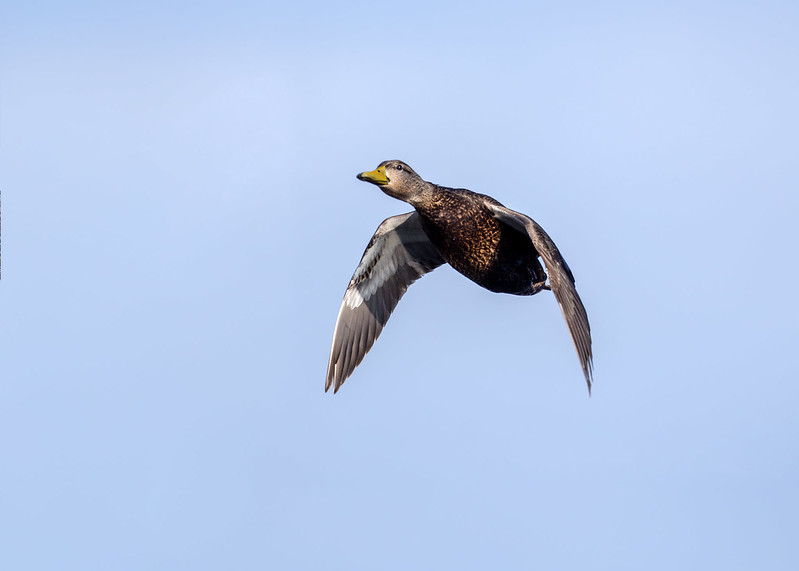 American Black Duck

![[No title]](/data/xfmg/thumbnail/32/32810-094482c1ef1c76eae62a96107013a72e.jpg?1734162496)


![[No title]](/data/xfmg/thumbnail/32/32808-9d1f657a1903d3bdbd67ea830397d62c.jpg?1734162491)


![[No title]](/data/xfmg/thumbnail/32/32811-2108d3f1ed7b5806eb452fc776aac668.jpg?1734162499)

