Soft grad & Hard grad

junqi

TPF Noob!
Joined
Dec 18, 2014
Messages
67
Reaction score
0
Can others edit my Photos
Photos NOT OK to edit
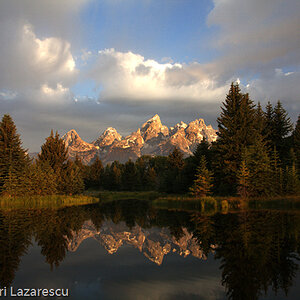
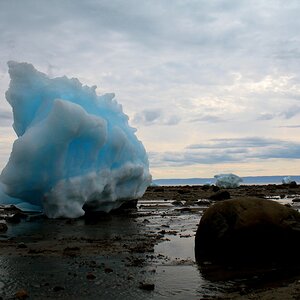
i am puzzle about this. even though i brought some gnd filter i do not understand when to use it and what is it for. can anyone guide me when to use soft grad gnd and hard grad gnd and how it works ?

thank you very much.
 
Hard grads have a much more defined fall off, so the transition between the tinted and clear areas is more rapid. These are generally best deployed upon an uninterrupted horizons, like a seascape. Soft grads tend to be best used when the horizon is broken by a building, hillside etc, as the fall off is much more gentle and the difference in exposure in the final image, pretty munch unnoticeable to the eye.

You deploy a GND to balance areas of an image. For example, if you are shooting a landscape/seascape and there is a sunset, you are going to run into exposure issues. You can either expose for the sky and get a silhouetted foreground, or correctly expose the foreground and get a blown out sky, void of details. By placing the GND on the brightest part of the image, you reduce the amount of light hitting the sensor in that area. This will bring the exposure values closer in line to the dynamic range of the sensor, leaving you with an image with detail in both foreground and background.

For example, lets say at ISO 100, 1/100 sec, the foreground/landmass may be f/4 to get correct exposure. The sunset sky at the same ISO and shutter speed may be f/22. That's 5 stops different and you can't expose for both simultaneously. You'd either have to bracket the shots, exposing for the sky and the ground separately and combine the images in post processing, or use a GND to bring the exposures more into line.

Thanks for the explanation by the way do you know how can i capture this photo? Singapore - pulau ubin Flickr - Photo Sharing

how to actually obtain 2 different color on the sky and water ?
 
Well it may have been that colour (although not as saturated as that) in real life. The easiest way to do this type of thing though is not at the time of capture but by applying a colour gradient filter inside Photoshop.
 
Here's a side-by-side.

On the left is my Lee 1-stop (0.3 density) "soft" grad. On the right is the 1-stop "hard" grad. (BTW, keep in mind that these 1 stops probably look more like a 2 stop because you're seeing light go through and have 1 stop reduced, to hit the paper... then reflect back out and have another stop blocked on the way back. A 1 stop filter won't block this much light when the light only passes through the filter once.)

IMG_6300.jpg


Hopefully the very gradual change vs. the somewhat rapid change are extremely obvious.

As for why you'd care...

Imagine you are shooting a landscape and there's a very obvious horizon line in the shot... you'll probably reach for the filter on the right. This allows you to get somewhat even darkening of the sky without dimming the land and helping balance the image.

But now imagine you're shooting an image where elements from the ground are breaking the horizon line and extending up into the sky - say... a tall building. If you use a "hard" edge grad, you'll see this obvious point on the building where the building suddenly goes dark as you follow up from bottom to top. If you switch to the "soft" edge grad, you won't notice any abrupt change in brightness.

Here's a pretty good video to watch to help understand the filters and while the start with examples... one of the examples is in a forest and they show how a soft-edge is the better option in that scenario.

 
Here's a side-by-side.

On the left is my Lee 1-stop (0.3 density) "soft" grad. On the right is the 1-stop "hard" grad. (BTW, keep in mind that these 1 stops probably look more like a 2 stop because you're seeing light go through and have 1 stop reduced, to hit the paper... then reflect back out and have another stop blocked on the way back. A 1 stop filter won't block this much light when the light only passes through the filter once.)

View attachment 95043

Hopefully the very gradual change vs. the somewhat rapid change are extremely obvious.

As for why you'd care...

Imagine you are shooting a landscape and there's a very obvious horizon line in the shot... you'll probably reach for the filter on the right. This allows you to get somewhat even darkening of the sky without dimming the land and helping balance the image.

But now imagine you're shooting an image where elements from the ground are breaking the horizon line and extending up into the sky - say... a tall building. If you use a "hard" edge grad, you'll see this obvious point on the building where the building suddenly goes dark as you follow up from bottom to top. If you switch to the "soft" edge grad, you won't notice any abrupt change in brightness.

Here's a pretty good video to watch to help understand the filters and while the start with examples... one of the examples is in a forest and they show how a soft-edge is the better option in that scenario.


Thanks for the guidance appreciate :D
 

Most reactions

Back
Top