Anyone not really like Portra?

If I get streaks, I just use a clean, fresh, microfiber towel and a puff of breath on the dried negatives and wipe. It works and I haven't scratched any negatives yet. Sometime you have to puff and wipe a few times. I only use that microfiber towel for wiping negatives. You could also re-spool and re-wash in distilled water but I haven't done that.

Tap water works good with HC110, I just run the water until it get 20°C, I have already squirted 22 ml of HC110 in the graduated container, then fill up to 700ml with the tap water, stir well. Then fill up my stop bath container @20°C tap water.

I already have poured my rapid fix in my container and checked it with hypo check, a couple drops is all you need, if the drops turn gray or cloudy, fixer is spent. I always have a fresh, spare rapid fix handy just in case. Rapid fixer is reusable. I use Ilfords because it's on the shelf at camera store.

I've already poured my final wash of distilled water and a couple of drops of dawn dish soap in the container. Then I use two square Tupperware containers and fill them with hot water to warm up the fixer and final wash, I usually do this in between agitations of development. Sometimes it takes a couple fill ups of hot water, depending on my basement temp. Once they hit 20°C to 21° C , I pull them out.

When I get to the wash stage, I run the water until its 20°C and rinse for 5 min on the nose and agitate twice during the wash time. I have read the temp on the wash stage is not critical, TOTALLY WRONG at least with HC110 and TriX. I have logged enough to notice a huge difference in the emulsion, it cups if you wash in cold, hot, or longer than 5 min. 5 min at 20°C makes the film dry nice and flat, no cupping. In the beginning, I had to reverse roll the negatives back into the canister for a day to flatten them out.

I have found, even in a cold basement, that once the product hits 20°C, it stays steady for at least 5 or more minutes.

Mass Dev app works good, although the volume mixer portion doesn't so I go on the website to get my volumes. I have sent emails to them but still not fixed.

You can pick these up at any Automotive paint supply store. This is what I use for stop bath, fixer, and final wash. I use a permanent marker on them to label, stop, fix, wash. Universal Mixing Cups 1 QT 5 PC Set

I have two different size graduated pitchers for developer, one goes up to 1000ml and the other 1500 (for double batch). I picked those up second hand at a camera store.
 
Last edited:
Great advice! Thanks!

For me the problem will be the opposite - even in the middle of winter the temperature rarely gets below about 15°c, and during the day it still gets up to about 28°c most days. Coming into summer now, even night time temperatures will be at least 25°c. Id say water out of the tap after its been running for a few minutes it will be cool enough, but Ill most likely be working in a room where the aircon has been running for a few hours prior to starting, and using an ice bath.
 
A customer just brought in 8 rolls of Portra 400. All rolls looked fantastic.
FYI, my lab uses a Noritsu V50 C-41 processor that we monitor with control stripes. We also use a Noritsu 1800 series scanner.
 
Yeah I think its hard to say "I dont like x or y film" as a general statement - it depends on the subject and the look you are going for. So far from my limited experience and from what Iv seen around the web, its not ideal for the types of pictures Im interested in because of the softness of the colours. Although on the same note I keep coming back to the picture on the previous page I did with the blurred grasses in the foreground and think it worked really well there.

Continuing with the slight drift off topic - I moved all my music to a hard drive (it was literally taking up half the disk space on my computer lol) and got the scanner set up. So far with the very quick scans I took from some of the UltraMax negs I did, Im not disappointed with the results at all - the colour correction seems to be better than on the prints from that roll, and the software is a bit funny, but not overly difficult to use. I had to laugh at one of the scans I tried with full resolution, 48 bit tiff file - it came out to 1.19 GIGAbytes!! It took 10min just to open the file! Some of the more reasonably sized jpeg scans I tried (I really was just quickly scanning one strip in between when my parents dropped in and I was getting ready to go out) looked alright, but had some ghosting (I think they werent flat in the tray or something).

Also interestingly, I scanned one of the prints from the UltraMax I actually liked. The print had the yellow cast, but because of the subject matter and colours I liked the effect, but lo and behold the scanner corrected the colour and I ended up with more life-like colours :biglaugh: 
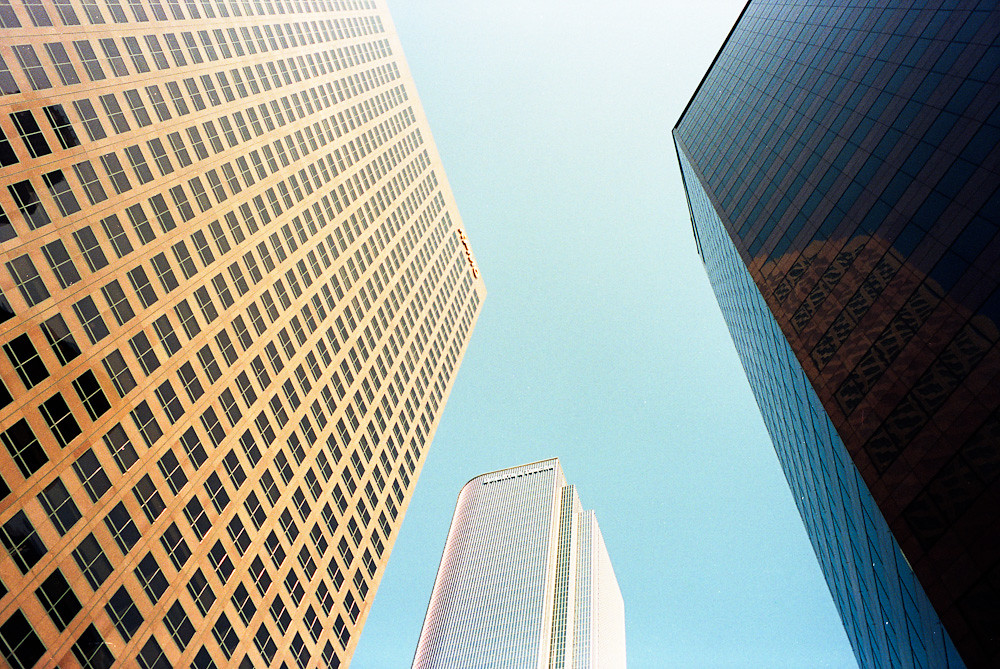
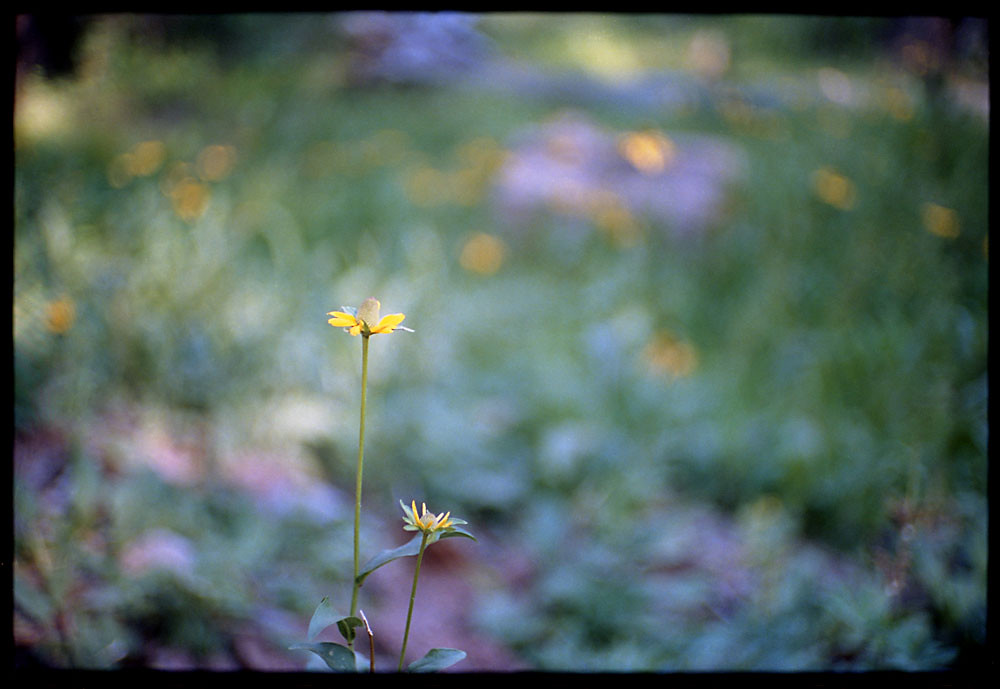
I still quite liked it, so Ill upload it when I get home again, while Im scanning in the negatives from the Portra.
 
So it looks as though it was the scans that were the problem. Im fairly happy with the results I got from the Epson v370 - I was getting really blurry images at first, scanning at full 12000 DPI resolution, but I realized that's probably higher than the resolution of 35mm film itself, so I switched to 4800 DPI, and voila! Images that were almost as sharp as the scans from the camera shop, but better colours and less grain and noise. For scanning prints, the highest resolution setting worked well.

Im going to have to retract my dislike of Portra too because with better scanning they mostly came out quite nice. Still probably not my preferred film for the kinds of pictures I like to take, but quite nice, with soft colours and smooth grain.

Below is a link to the gallery where Iv uploaded all the scans, so you can see how the ones on the previous page compare to my versions - luckily I didnt actually have to change much on any of them aside from slight increases or decreases in contrast, brightness and saturation (and I used unsharp mask on all of them, because why not?). The thing I realized, trying to upload the pictures for comparison, is that they are way bigger files than the shop scans, which is probably also part of the problem. A couple of the first ones have a bit of dust - or more likely cat hair from my black cat - on them, which I plan on wiping down and rescanning, and I accidentally ruined the negative of my favourite one by scratching it. On a couple I also used the software's "colour restoration" which ups the saturation and I think tinkers a bit with the levels.

KP436-4

Here is one Iv compressed the crap out of to put in the thread because I thought it was beyond saving (shop scan on the left, my scan on the right).
C555077-R1-33-34A.jpg img034.jpg
 
@Kramertron2000 . I use gimp to scale my pic down. Copy upload images from folder to desktop.

Drag image to Gimp, Image/scale/select widest part and type in 1200 and hit the chain link to keep aspect ratio. File/export, make it 100% quality, and it's done, file will be small and with nice resolution for viewing on here.

As previously said, I usually drag a copy of the pic I'm posting on my desktop first so I can keep the original in good order in case I want to print it. After I've uploaded scaled jpeg, I just delete them off my desktop.

I could tell it was the scans, seen it before in my own scan methods in the beginning. My scanner says 4800 DPI for negatives but it doesn't do any better than 2400 in my tests. I've even done them at 3200 and it really makes no difference that I can see other than file size. Maybe would notice in prints? I don't know, I don't print real big color images anyway so nothing to compare.

Glad your sorting it out, thanks for the update.
 
Ill give GIMP a go next time. Thanks for the suggestion. Id say the shop just sets its scanner to auto and lets it do its thing, which will obviously result in inconsistencies unless every shot is perfect to begin with, and its developed perfectly (also probably not possible using a machine they just set and forget). Being a fairly low volume industry Id say a camera shop that pretty much exclusively sells digital stuff they probably dont keep the c-41 machine maintained as well as they should, and likely barely even know how it works. The local shop though is looking at starting up film processing again so they dont have to keep sending it to Cairns and back, and they seem to be very interested in hearing suggestions, so next time I go in I might suggest they make sure they actually look at the scans or a preview before putting them on a CD so they can make the quick and minor adjustments needed to make the pictures look like they should. Its something that literally takes a couple of minutes (especially if they can scan the whole roll at once rather than 4-6 frames at a time), but makes a world of difference.

I think the reason the scanning software suggests 4800 DPI, but over 2000 doesn't seem to make a difference is that average 35mm film probably doesn't have a resolution of much more than 2000 DPI, but some particularly fine grained ones might (not that its really directly convertable like that though). So they would just be covering their bases. I have to say my results were the same, but I just went with the higher resolution because I now have plenty of space on my computer since I moved all the music, so I might as well squeeze as much out of the scans as I can. Interesting the 24000 DPI scans were actually worse for me though (Im guessing it again has to do with the resolution of the film itself, and the software trying to pretend extra dots are there when they arent or something).
 
So it looks as though it was the scans that were the problem. Im fairly happy with the results I got from the Epson v370 - I was getting really blurry images at first, scanning at full 12000 DPI resolution, but I realized that's probably higher than the resolution of 35mm film itself, so I switched to 4800 DPI, and voila! Images that were almost as sharp as the scans from the camera shop, but better colours and less grain and noise. For scanning prints, the highest resolution setting worked well.

The Epson V series scanners have a max scanning resolution of 4800 PPI. But will have a max interpolation (software makes it bigger) res at 12800 DPI. 4800 is a good size scan and should give you up to a 20x30 print.

Great info here on image size..... Photoshop image size and resolution
 
Awesome! Thanks for the info. The 'manual' that came with the scanner was a single page telling me how to install it in poorly translated english, and that's it. No doubt epson has a proper one online somewhere, but its a pretty straightforward device, just information like that is helpful for scanning stuff other than photo prints (which come out quite nicely at 12800 DPI by the way).
 
Me? Im using Photoshop elements (not sure which version, it just came with my computer, which is about 5 or 6 years old). For scanning though Im just using the Epson software that came with the scanner. I like to avoid too much post processing, except for special effects though - its one of the reasons I like shooting film.
 
Portra 400 is my favorite color film. It does tend to scan kinda green-ish, but I always adjust the colors to something I like.
 
Those are really nice!

I have to admit, Iv warmed up to it sinceI scanned the negatives myself. It also scanned a lot more easily than the fuji superia I though I liked better based off the shop scans (after scanning myself that's no longer the case - the fuji was a bit of a pain to get right and the ends of the strips wouldnt flatten easily).

I like the grain from portra, and for some things the colour pallet works really well. Its probably still not going to be my film of choice for plant or landscape pictures, but I think it would go nicely in my Trip 35 for day to day stuff (when I dont have that loaded with black and white).
 

Most reactions

New Topics

Back
Top