What's new

Complete newbie, need confirmation about what I (think) I understand.

GertjanGoetynck

TPF Noob!
Joined
Nov 10, 2013
Messages
38
Reaction score
3
Location
Belgium
Hey all!

First of all, a bit of background info.

At the moment I do not own a dSLR camera, the only camera I own is an olympus tough TG 1.
I mainly bought this camera for kayakking and backpacking trips. I simply thought the nature was too beautiful to NOT capture and have memories off.

Lately however, I became unsatisfied with the image quality of this camera (while still good, it could've been ALOT better) and the lack of control it gives (maybe this is the reason I am not satisfied with the image quality? It doesn't let me finetune the settings?) so I am starting to look into the dSLR world.

Unfortunately my first dSLR camera is months away (I already have a model in mind that should be suited for outdoor, hiking etc. Unfortunately it isn't exactly cheap..), but I decided to start reading about (nature) dSLR photography to at least lessen the learning curve when I finally do have the camera :)

Now for how I think I understand things, and need some confirmation of..

Firstly, the aperture.

The aperture value determines 2 things. The depth of field (focus) and the amount of light that hits the sensor.
A higher aperture value means a smaller opening, which leads to a less shallow depth of field (more is in focus) but also less light hitting the sensor.

Next the shutter speed.

The shutter speed, is like the name says, how fast the shutter closes. A faster shutter speed allows you to freeze a movement without blur, but also lets less light hit the sensor since it is open for a smaller amount of time. A slow shutter speed can be used for artistic reasons (for example for photographing waterfalls or flowing water in general, something I will SURELY experiment with) or for practical reasons (letting more light hit the sensor which results in better low light photography).

Next step, the ISO.

The ISO determines how sensitive your sensor responds to light.
In general a lower ISO is always better since it results in less noise, but sometimes you simply need a higher light sensitivity to lighten up your otherwise dark picture.

These three elements combined result in the exposure of the picture.

The way I see it, the shutter speed and aperture are the 2 main parts of exposure, and the ISO is something you adjust to keep the picture from being under or over exposed. You can always adjust the other settings too to perfect the exposure, but the way I feel is that you should try adjust the ISO setting first since apperture and shutter speed are set in a specific way for a reason that may not have anything to do with exposure, while ISO is mainly used to handle the light sensitivity.

This is where I get slightly confused though.. When should you use the exposure compensation setting (one of the few settings I can manipulate on my camera, and I find myself using it ALOT) and when should you adjust the exposure by changing one of the 3 variables that define the exposure of a picture?

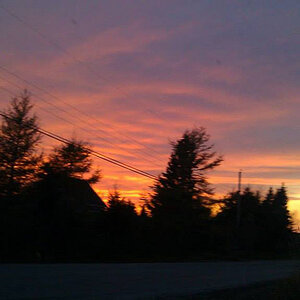
Also, on the subject of exposure. I simply love the effect of photographs where one element is nothing but a dark silhouette, but the background is clear. How is this effect achieved? Is it done by lowering the exposure compensation until all the details in the shadows are lost, resulting in a pure black silhouette? I already know that you need a lightsource behind the subject you want a silhouette of, but this seems to be where most guides about photographing silhouettes stop..

Thanks in advance for any feedback and my apologies for this huge wall of text!
 
Wow, long post. First off, welcome. Secondly you do have a pretty good basic understanding of exposure.

For me, ISO is the last thing I adjust, or the first depending on how you look at it. I set my ISO to 100, sometimes 200 to get the least amount of noise in my photo. (higher ISO gives more noise and the threshold depends on the camera) Now, if I can get the DOF (depth of field) and the shutter speed I want without re-adjusting the ISO, then I'm golden. If I can't then the first thing I try to adjust is the shutter speed, and if that isn't an option then I change the ISO. One of the main reasons I do this in digital is because I also shoot film and changing your film speed on the fly isn't very practical.

One thing you should now look into learning about is metering. A DSLR will have a reflective light meter built in, and that meter will tell you if you are getting the correct exposure. You can use exposure compensation if the meter tells you something is "correct" but the results are consistently darker or lighter than what you find acceptable.

Out of curiosity, what camera are you considering?
 
Your spot on!
Once you go to a DSLR, you'll forget all about the camera in your phone and those ridiculous point and shoot cameras. They serve a purpose but you obviously recognize their shortcomings. Please allow me to be blunt; once you go DSLR, nothing else will do.

Don't get sucked into the 'more is better', more megapixels, more features (that may not be useful to you) because those all come with a price. A good entry level DSLR, weather sealed like the Pentax K5 would do you fine perhaps. Depending on your budget you could get more camera than you need, looking towards the future. Or you could buy used and get that last year model higher option camera at a more reasonable price. Pay attention to how the controls are laid out; some like a top LCD, some don't care. Some like the mode/master control knob on the left or right. What is available in your area as to brands, that may have a bearing; I love my Pentax however, no one in my area sells them in a store. All online. Nikon is much more available.
Enjoy!
 
Thanks for the replies!

About the metering, my Point and Shoot Olympus actually has the metering option aswell :) I always had a rough understanding about what the graph shows, but it wasn't until yesterday that it finally "clicked" and I think I have a good idea of how to read it now :)

The camera I am looking into is the Nikon D7100, it seems to be perfect for my needs. Not too big and heavy, which is handy for backpacking trips of a week or longer. Weather sealed, which is a must for me since during outdoors camping I may run into issues with rain or dust, and apparently very good image quality aswell :) What sort of worries me is the possibility of an "updated" version comming out shortly after buying it. Less than a year after I bought my Olympus Tough TG 1 the Olympus Tough TG 2 came out, while the 1 wasn't even released a year before! That sort of felt like a kick against the shin, despite the specs being close to identical. I could've saved quite a bit of cash if I just waited a bit longer buying the TG1.

It may be a bit expensive for a first dSLR, but I fail to see the use of buying a cheaper one knowing I won't be perfectly happy and will likely end up replacing it anyways down the line. I may aswel skip right to the stuff I really want :)

I will surely keep on using my TG 1 and I plan to actually take both cameras with me on hiking trips. The dSLR for more "serious" pictures where I have time to set up, and the Olympus for situations where I don't feel comfortable using the dSLR (during heavy rain, while kayakking, ... ) or when I simply lack the time to set up a dSLR :)

The camera choice still has alot of time to change though, I may even go Canon instead of Nikon since I got nothing tieing me to either brand right now :)

Thanks alot for the replies!
 
Last edited:
When should you use the exposure compensation setting (one of the few settings I can manipulate on my camera, and I find myself using it ALOT) and when should you adjust the exposure by changing one of the 3 variables that define the exposure of a picture?

You know a good deal so this is just a tiny bit tacked on the end.

You tell the camera how to measure the needed exposure through adjusting the metering modes; whether to average out the entire scene, to pay more attention to a group of areas in the center or to measure directly on a single spot. However you direct it, the camera will read that area and give you back the exposure that will make that area medium grey.

Well, what if you want the tone recorded for that entire_screen/area/spot not to be middle grey but to be darker or lighter?
That's when you use the exposure compensation.
It is a command that says that overrides the cameras decision and makes the scene darker/lighter.

For example, I am shooting an outside scene, the sun is very bright but the faces of people are in shadow under hat brims.
The camera will want to make all the sunny scene medium grey, thus the faces will be forced into blackness.
So I use the EC to increase the exposure a stop or so to make certain the faces will have enough exposure to be retrieved.

Another example: I shot pictures of a church choir of a black church near my home for their directory. The choir was all in brilliant white robes, that teh camera tried to expose as medium grey. Their faces would have been much too dark to print well. I used EC to raise the exposure about 1.5 stops. The choir robes were overexposed slightly but easily recoverable, their faces were exposed perfectly.

I hope that makes sense.
 
When should you use the exposure compensation setting (one of the few settings I can manipulate on my camera, and I find myself using it ALOT) and when should you adjust the exposure by changing one of the 3 variables that define the exposure of a picture?

You know a good deal so this is just a tiny bit tacked on the end.

You tell the camera how to measure the needed exposure through adjusting the metering modes; whether to average out the entire scene, to pay more attention to a group of areas in the center or to measure directly on a single spot. However you direct it, the camera will read that area and give you back the exposure that will make that area medium grey.

Well, what if you want the tone recorded for that entire_screen/area/spot not to be middle grey but to be darker or lighter?
That's when you use the exposure compensation.
It is a command that says that overrides the cameras decision and makes the scene darker/lighter.

For example, I am shooting an outside scene, the sun is very bright but the faces of people are in shadow under hat brims.
The camera will want to make all the sunny scene medium grey, thus the faces will be forced into blackness.
So I use the EC to increase the exposure a stop or so to make certain the faces will have enough exposure to be retrieved.

Another example: I shot pictures of a church choir of a black church near my home for their directory. The choir was all in brilliant white robes, that teh camera tried to expose as medium grey. Their faces would have been much too dark to print well. I used EC to raise the exposure about 1.5 stops. The choir robes were overexposed slightly but easily recoverable, their faces were exposed perfectly.

I hope that makes sense.

I think this does make sense :) You basically decide which area is most important to be well exposed, the darker or lighter ones? Looks like this is the solution to some snow pictures I took last year :) The snow looked way darker on the picture than it looked like in real life, but the trees were exposed perfectly. So in this situation I would've had to decide what was most important, the trees or snow, and then proceed to changing the exposure through exposure compensation to bring out what mattered most?
 
I think this does make sense :) You basically decide which area is most important to be well exposed, the darker or lighter ones? Looks like this is the solution to some snow pictures I took last year :) The snow looked way darker on the picture than it looked like in real life, but the trees were exposed perfectly. So in this situation I would've had to decide what was most important, the trees or snow, and then proceed to changing the exposure through exposure compensation to bring out what mattered most?

In general yes, trying to keep the important parts exposed well enough so that they can be edited well and yet keep the highlight and shadow detail that you need.

Search and read about 'dynamic range'
 
Given that you're wanting a camera for kayaking, the D7100 may not be the best option, actually. (I know, actually. I own a D7100 and love to kayak and raft when I can). Realistically, the Olympus OM-D series (either EM-1 or EM-5) may be the better option. They're better weather sealed, smaller, and more portable, which in a kayak is something important, unless you have the room. But to be fair, it doesn't have to be an OM-D. There are a decent variety of mirrorless cameras out there, which is the key.,..mirrorless.

I'm not trying to dissuade you against the D7100. It's a fantastic camera, which again, I own. But it IS on the bulky side. Sometimes, like in kayaking, smaller is better.
 
Given that you're wanting a camera for kayaking, the D7100 may not be the best option, actually. (I know, actually. I own a D7100 and love to kayak and raft when I can). Realistically, the Olympus OM-D series (either EM-1 or EM-5) may be the better option. They're better weather sealed, smaller, and more portable, which in a kayak is something important, unless you have the room. But to be fair, it doesn't have to be an OM-D. There are a decent variety of mirrorless cameras out there, which is the key.,..mirrorless.

I'm not trying to dissuade you against the D7100. It's a fantastic camera, which again, I own. But it IS on the bulky side. Sometimes, like in kayaking, smaller is better.
For kayakking I will mostly rely on my olympus tough though :) If I take my future SLR at all on kayak trips, it will be safely tucked away in a weather sealed container until it's time to set camp. Last kayaktrip had some unexpected rapids flipping my kayak (and the kayak of 6 more people who I saw pass by) and I'd hate to ruin an SLR like that, while I know my Olympus Tough can handle that sort of abuse. I'd happily trade in image quality for the endurance of my olympus in situations like that.
 
Fair enough.

So yeah...go with the D7100. I couldn't recommend it more!
 
Dont forget the ND filter if your wanting these long exposures of waterfalls etc in daylight hours where its just too bright to get a decently long exposure time. Takes me back to my first time trying to get a stream long exposure without a filter in direct sun light wondering why cant i make these amazing dreamy looking streams.
Im sure how prepared you already are this was already in your shopping list or knew plenty about it.
 
For me, ISO is the last thing I adjust, or the first depending on how you look at it. I set my ISO to 100, sometimes 200 to get the least amount of noise in my photo. (higher ISO gives more noise and the threshold depends on the camera) Now, if I can get the DOF (depth of field) and the shutter speed I want without re-adjusting the ISO, then I'm golden. If I can't then the first thing I try to adjust is the shutter speed, and if that isn't an option then I change the ISO. One of the main reasons I do this in digital is because I also shoot film and changing your film speed on the fly isn't very practical.

First, you're doing better than I did when it comes to understanding exposure. There's a heck of a learning curve with this. Second, don't get too caught up in the equipment-no matter what you buy, you'll find someone saying IT'S THE GREATEST THING EVER and someone else saying THIS IS THE PATH TO SATAN. If you find the equipment that works best for you (and some here may be a huge help in that regard), great things can come from that.

Wyogirl, you hit it on the head. Most cameras, you can do ISO 400-800+ without serious noise. More than 200 and mine's got some issues. 1600 is generally useless with my setup.
 
Dont forget the ND filter if your wanting these long exposures of waterfalls etc in daylight hours where its just too bright to get a decently long exposure time. Takes me back to my first time trying to get a stream long exposure without a filter in direct sun light wondering why cant i make these amazing dreamy looking streams.
Im sure how prepared you already are this was already in your shopping list or knew plenty about it.
Can a polarization filter work for limiting the light too? I was planning to buy one to reduce water glare and to saturate colors a bit more :)
 
There's always that risk that the camera can end up in the water. A weather-sealed camera really just means it's "splash" resistant. It if goes underwater... it's GOING TO LEAK. If you roll the kayak the camera is going to take on water and there's a very strong chance (depending on how far under it went and how long) that it could result in serious permanent damage. You can get an underwater housing, but they aren't cheap -- and for a DSLR, they're actually pretty big and bulky. You can get truly waterproof underwater enclosures for point & shoot cameras (even very high end point & shoot cameras) for far less.

I'd be pretty nervous about taking a DSLR kayaking without a true underwater enclosure. Everything else is fine (hiking, camping, no problem) -- in fact if you _really_ want to be safe you can get rain-jackets for the camera that aren't very expensive and would keep any DSLR camera dry even in a heavy downpour (and _many_ camera bags come with rain jackets designed to fit the bag.)

You may actually want a different camera just for kayaking.
 
When I kayak (and it is a wet sport the way I do it), I use a Canon D10 waterproof camera. On land and away from dunkings, I use my DSLR (a Canon T1i). Some kayakers I know put their DSLR gear in a large pelican case on the front of their kayak, but that's really awkward, gets in the way of paddling, and still does not assure the safety of the camera gear if water gets in when the case is open. When I cross-country ski or hike, it's the D10 that goes with me. It's built to be bounced around, and despite various dunkings (over a 1,000 by now), and wipeouts on ski trails, it's still working just fine. Sure, the image quality isn't as good as the DSLR, but I don't have to worry about retreiving various bits and pieces, or trying to dry it out.
 

Create an account or login to comment

You must be a member in order to leave a comment

Create account

Create an account on our community. It's easy!

Log in

Already have an account? Log in here.

Back
Top Bottom