Critique...

MommyOf4Boys

TPF Noob!
Joined
Dec 20, 2005
Messages
2,386
Reaction score
51
Location
Alabama - just moved here from Texas
I Posted this photo in the General Gallery back in February. I have recently been learning new techniques on retouching skin other than the boring gaussian blur or median technique and would like to know if what I have come up with is a good technique (if it looks fake or just right).

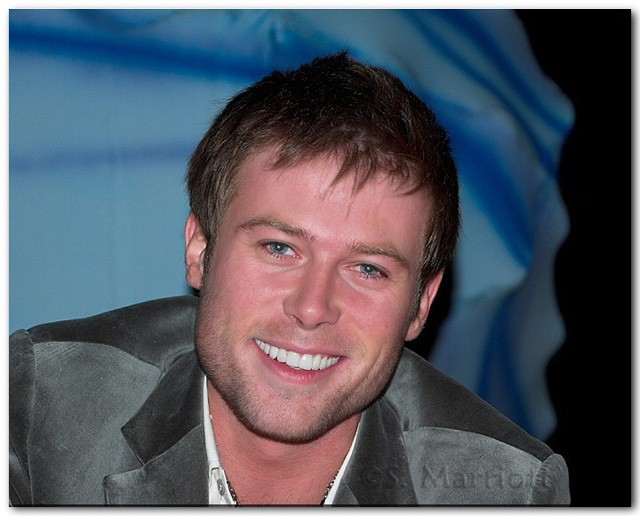
This is the original photo that I posted, no facial touchup at all:
JacobYoungframedwm11.jpg


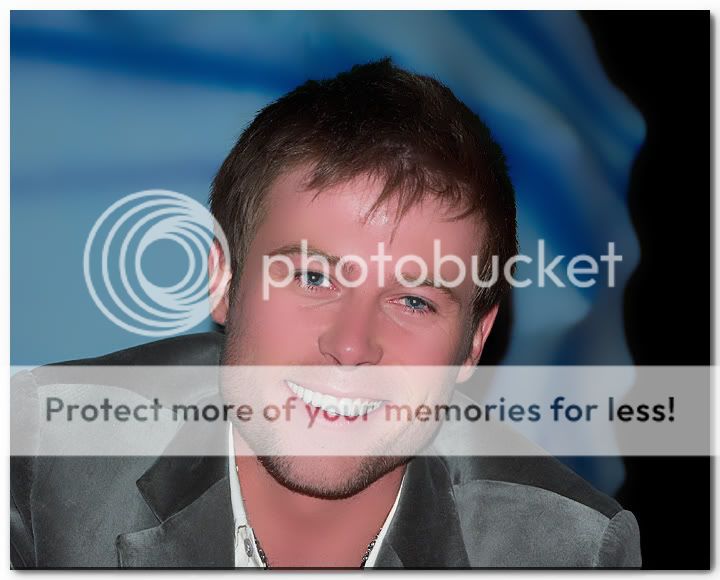
And this is the version using my new skin technique:
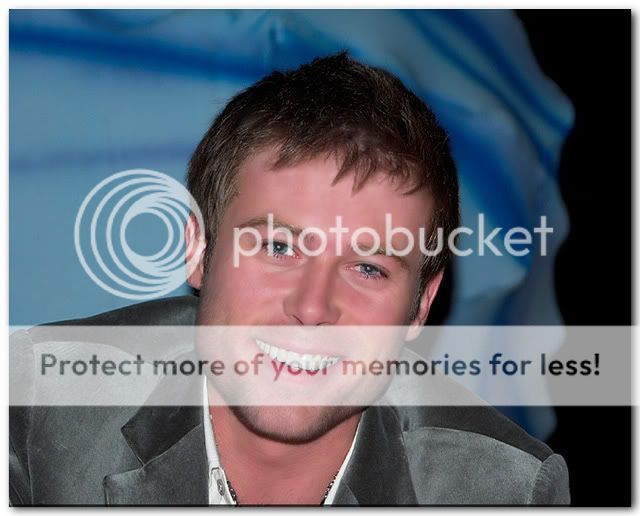
JacobYoungframed1.jpg
 
Nice photo, very paparazzi/newspaper style. (Meant in a positive sense)

Personally, I do believe the edited version is a tad bit too plasticy for my taste, though I will say I do like how you toned down the stubble as well as brightened the eyes. One suggestion that might work is to use the history brush on say 30% set at the 'open' part of the history section meanwhile working on your edited which will help to bring back some definition of the lines and curves of his face.

Good job otherwise :)
 
Peanuts said:
One suggestion that might work is to use the history brush on say 30% set at the 'open' part of the history section meanwhile working on your edited which will help to bring back some definition of the lines and curves of his face.

I have never used the history brush before..thanks for the advice. I will try that next time. Do I just go over the mask with the history brush or when I am done? How does the History brush work?
 
For most of the photoshopping (is that even a word?) I use The Photoshop CS2 Book for Digital Photographers written by Scott Kelby and I must say, I have never used a more comprehensive and informative book, so if you have the oppurtunity or need, I would highly recommend picking it up.

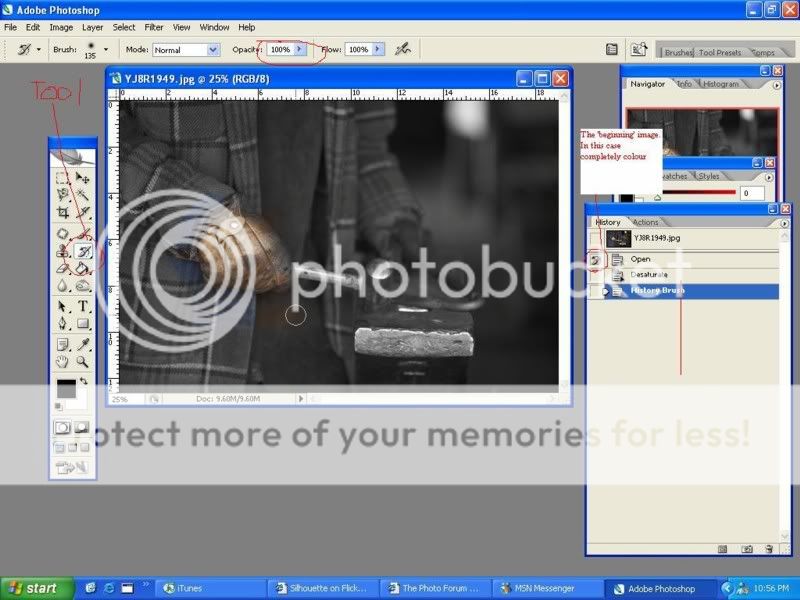
The history brush (from my understanding of it) will essentially 'erase' the steps in between and bring back the original (or where ever you happen to specify) image. I will take a quick screen shot and post it in a few minutes.

Edit:
Okay, here is a quick version where I desaturated and then 'coloured' the colour version back into the picture. I just highlighted where the opacity can be changed. Now, unfortunately a little 'blurb' didn't save, but the red line coming from 'desaturate' should read, "Prior to the "History Brush" being highlighted, this was"

historybrush.jpg


Now, I am probably not the best to be asking for this type of advice seeing as I myself am on a very steep learning curve.
 
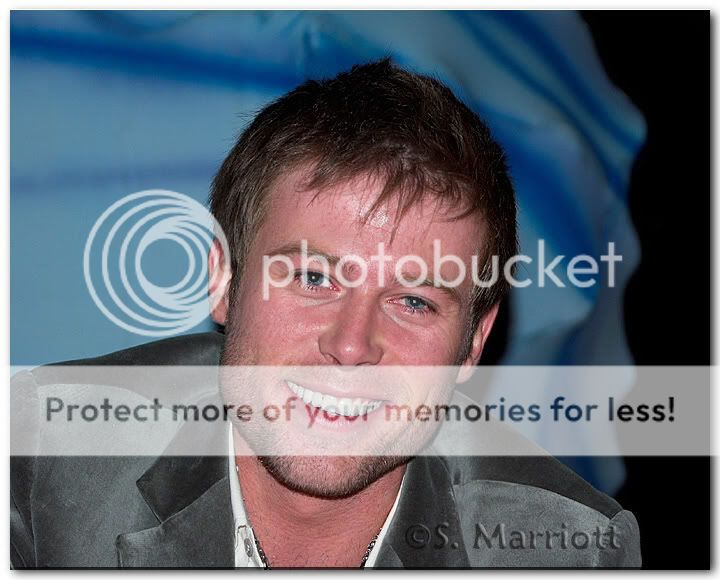
You can also make a copy of the background layer, do any destructive edits on that, and then change it's opacity. The orginal will show through. As an example, I took your edited version, copied it over the original (after matching the sizes), and set its layer to 60% opaque.

JacobYoungframedwm11-mod.jpg
 
Oh, and I think one of the issues with the original is that it looks oversharpened to me. If your camera has a sharpness setting, I'd turn it down. The edited version looks too soft, but sharpening that would need to be selective, since the already sharpened areas get even worse.
 
ahh, yes Peanuts, I do essentially the same thing with a layer mask over the duplicated layer that I do the editing in..next time I will mask out the facial lines that need to be a little stronger with a med. opacity brush.'
Thanks for the comments Mark, it really helps to know where to go from here. It was my first attempt at this new technique and finding out what I need to fine tune really helps a lot.
 
Still looking shiny and plastic to me..your first edit was better, in my opinion, though still not to my taste. I do really like Marks edit (Mark, you are an invaluable tool on this forum, btw! :) ) and am thankful he posted it. Very helpful info.

Sara, in my opinion you are taking too much texture and lines out of his face...I'm not a photoshop expert though, so I coudln't say how to fix it without taking it and experimenting myself (and I can't right now cuz I"m at work)
 
Thanks core! :D

I agree with her. It does look rather plastic.
Another issue with the original you are starting with is the direct lighting from the on-camera flash. This is going to make it a bit more difficult to get pleasing results from your edits.
 
markc said:
Thanks core! :D

I agree with her. It does look rather plastic.
Another issue with the original you are starting with is the direct lighting from the on-camera flash. This is going to make it a bit more difficult to get pleasing results from your edits.

I agree with the flash spots on his face..I have been trying to get rid of that huge one on his forehead. I rarely ever use my flash, but it was late at night during Mardi Gras and I just kind of snapped the photo really quick just because I like him and wanted his photo LOL! The first time I edited this photo, it came out looking more like yours. I just used a simple gaussian blur and reduced the opacity along with bringing back the eyes, etc with a mask. I was just trying to do something different and this glamour type effect I am trying to do may be better to use on females instead of males who need more of a rugged look?
 
I like that edit a lot better from what you've tried so far. It looks like you might have gone too far to cyan though. Adjusting color is tough. I find it best to let it sit after an adjustment and then come back to it.
 
Another thing to try is dupe layers of different areas. For instance, I heal blemishes on original layers, then make a dupe, go in and fix the eye crinkles, lower opacity until it looks nice and natural, then go back to the original, make a dupe, and start hitting the mouth area, and lower opacity again.
Same things for teeth brightening, eye whitening, and gausian blurs. It sounds like a lot of work, but once you get used to it, you can crank it out in less than 4 minutes for each photo.
 

Most reactions

New Topics

Back
Top