What's new

Difficult Question About B/W HDR Images Taken Without A Camera

SEN5241

TPF Noob!
Joined
Apr 18, 2013
Messages
7
Reaction score
0
Location
Evanston, IL
Can others edit my Photos
Photos OK to edit
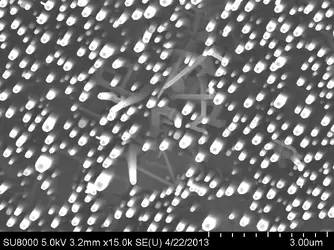
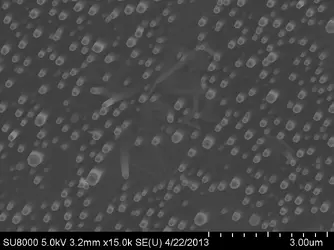
I work in a lab and take many images using electron microscopes. The images that result are always in black and white since they image using electrons and not visible light. There are a number of instances where I believe an HDR type combination of images would be helpful. Some samples end up with areas of extreme contrast differences for a number of reasons. Also, anything with a hole in it can be a problem (holes are always dark). I also thought it might just end up looking cool!
I took a few test images, some oversatured, some under, to see if i could accidentally figure out how to make it work (as I normally do). The problem is (using Photoshop CS4) it's asking me for a lot of information that I don't have, because it doesn't exist. F stop, film speed, etc.
I'm attaching a few of my horrific test images. I'd love to start a new revolution in this area. If anyone has any ideas, let me know.
 

Attachments

  • $File16.webp
    $File16.webp
    263.4 KB · Views: 153
  • $File17.webp
    $File17.webp
    340 KB · Views: 158
  • $File18.webp
    $File18.webp
    243.3 KB · Views: 160
You simply need to make up numbers. Make them all the same except for shutter speed. Insert different numbers for shutter speeds so they're the same number of stops apart as what they were exposed for.

I agree..... there's some great potential there. Having access to higher resolution originals, along with knowing the precise exposure data, will be even better.

MicroHDR.jpg
 
I think I tinkered around a little bit with some numbers. I think my test images were not very good to start off with.
The main problem is there is no exposure data. These were not taken using film or a camera or any kind of CCD or anything. They're collected by a special electron detector. Brightness and contrast is about all I can adjust. In the microscope, changing the brightness moves the whole histogram up and down, and changing contrast will spread the histogram vertically to include more or fewer gray values.
So when I take the images, I don't have a really good way to quantify that this image is X amount overexposed and this image is Y amount underexposed, etc.
I'll try to get some more better images. More images with smaller differences in B/C.
 
$File16.webp

In PS the histogram was way out..... changed values and added slight contrast.
 
yeah I know the histogram was way off. I took the images that way and didn't adjust them afterward. Should I do that? If I do, then I end up with better balanced images, but with big areas that are over or under saturated.
 
I think I tinkered around a little bit with some numbers. I think my test images were not very good to start off with.
The main problem is there is no exposure data. These were not taken using film or a camera or any kind of CCD or anything. They're collected by a special electron detector. Brightness and contrast is about all I can adjust. In the microscope, changing the brightness moves the whole histogram up and down, and changing contrast will spread the histogram vertically to include more or fewer gray values.
So when I take the images, I don't have a really good way to quantify that this image is X amount overexposed and this image is Y amount underexposed, etc.
I'll try to get some more better images. More images with smaller differences in B/C.


So here is my question. Are you actually gaining dynamic range when doing this?

About the line above that I highlighted in bold. Is it not possible to get something close to the edits people have posted by adjusting those setting?

I have never done what you are doing so these are just general questions.
 
Yeah, the first image of mine, file16 is a normal type of image you might take and then in photoshop stretch the histogram to make the gray levels better and less washed out. so you would end up with an image similar to ones that have been posted, which are also somewhat similar to ones i've done myself.
Now I fully admit, this might never really work. Nothing special might ever come out of this, but I think it's worth trying. Maybe on friday i'll have some time to come up with some better examples.
This is a brain teaser for the experts of whom i am not.
 
Just move the black point up and the white point down. Put a very slight S into the curve:

File16points.jpg
 
Duplicated layer 2 times. Adjusted the contrast of the bg layer a bit and adjusted the duplicate layers to make it lighter and used layer mask to paint areas using brush set to 40% opacity to make it darker.
 

Attachments

  • $File18.webp
    $File18.webp
    371.3 KB · Views: 132
ok, i've got a better example now. This is a typical issue you might have taking these types of images. You have edges that are bright and oversaturated, and to compensate for it, you end up with either an extremely dull, washed-out image OR areas that are too dark and undersaturated.
There is a function on many electron microscopes that will automatically adjust the brightness and contrast. That usually gives you a slightly dull image (which is easily fixable by adjusting the levels). Usually from the auto function i will need to take the brightness down a little and the contrast up a little, and that usually gives you a pretty good image.
So what i did here was i took several images in different states FROM the auto B/C. Turning the contrast OR brightness (not both at the same time) up or down a medium amount. the images are named accordingly. Cont-1 is half a turn down from ABC, Cont+1 is half a turn up from ABC. ok?
These are the original sized images, 1280x960. I can take them larger, like 5120x3840, but it takes forever. It's just a test. I also did not adjust the levels of any of the images. they might also be slightly misaligned, sorry.
i'm sure this is doable, i just fear the secret lies in taking the images in some super-specific way that is not very repeatable.
 

Attachments

  • $Bright+1.webp
    $Bright+1.webp
    91 KB · Views: 136
  • $Bright+2.webp
    $Bright+2.webp
    84.8 KB · Views: 134
  • $Bright-2.webp
    $Bright-2.webp
    85.4 KB · Views: 124
  • $Bright-1.webp
    $Bright-1.webp
    104 KB · Views: 151
  • $Cont+1.webp
    $Cont+1.webp
    150.1 KB · Views: 136
  • $Cont+2.webp
    $Cont+2.webp
    158.3 KB · Views: 137
  • $Cont+3.webp
    $Cont+3.webp
    168.2 KB · Views: 124
  • $Cont-1.webp
    $Cont-1.webp
    78.9 KB · Views: 129
  • $Cont-2.webp
    $Cont-2.webp
    61.2 KB · Views: 131
Are you actually getting more data out, with multiple "exposures" set up differently, or are you simply rendering the same underlying data in different ways?

HDR techniques run the risk in these contexts of distorting scientific data, so be cautious. If tonal values actually carry scientifically interesting data, you need to be careful. If you're just measuring structures or whatever, you just need the edges to stay put obviously. If you're making pretty pictures to increase the grant-getting chances, the sky's the limit!
 
these are all different images i took using, i guess you can call it different exposures (even though that's not really what's happening). we have the super bright areas that we're losing information on, and then we have these dark areas that we're also losing information on. I want an image where we can see it all clearly at the same time.
indeed, people are always freaked out by changing anything, even the levels, on a scientific image, which is ridiculous. if you're just taking measurements, then you really don't care how pretty your image is. exact tonal values or not usually significant, since it's so easy for them to come out differently in the microscope. they're usually only important inside the image in which they appear, i.e. this area is brighter than this area. but for publications or other display-related reasons, taking cool pictures is helpful. Using this sample as an example, some samples are just difficult to get good images from, due to the extremes in contrast, which i was hoping this technique might help rectify.
this is kind of a confusing conundrum since very little of the taking of these microscope images is similar to regular light photography.
 
um, the first one is just a very ductile (squishy) metal fracture. the other one is nanopillars. so they're these little thin needles sticking straight up.
 

Most reactions

New Topics

Back
Top Bottom