What's new

Editing question.

CameronDelray

TPF Noob!
Joined
Sep 27, 2008
Messages
62
Reaction score
0
Location
Florida
Can others edit my Photos
Photos NOT OK to edit
I am a fan of bright colors. I like pictures that really POP.
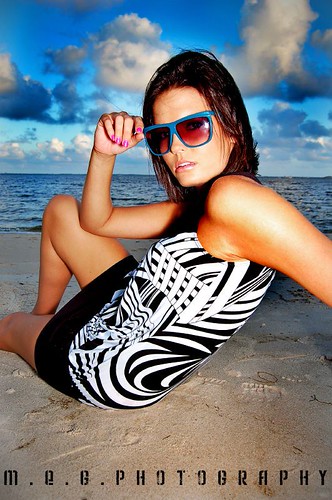
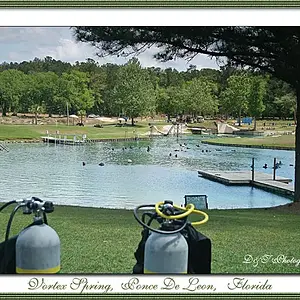
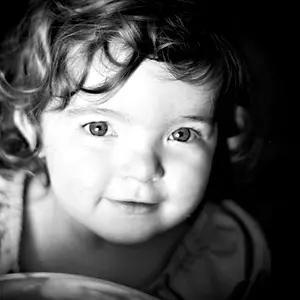
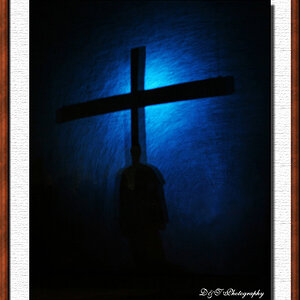
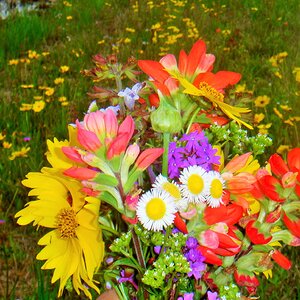
Here are some portraits from a local photographer. I don't want to get EXACTLY the same style, because then mine wouldn't be original, but I'd like to know how to achieve bright colors that just simply pop like this, but also keeps the subject, and scenery very smooth. Any suggestions? ((Also, is picture #2 taken with a fisheye lens?))

[ THESE ARE NOT MY PHOTOS ]

1.
2818805363_1c654710bb.jpg


2.
2716118750_0aac22259e.jpg


3.
2900679909_055b0f1a48.jpg
 
1. Contrast layer: Curves layer to adjust color (use black eyedropper to click on black on image, use white to click on white in image, if looks strange hold down alt key and press reset and start over) and then adjust contrast with minor S curve.
2. Lighten layer: Click on background, then ctrl-J to copy it. Put that layer in screen and lower opacity to taste. Mask out anything else you want darker.
3. 50% gray layer for lightening skin: Add new blank layer, fill with 50% gray and put it in overlay blending mode, then use a soft white brush with lower opacity and brush over skin to lighten. If you mess up just brush over areas you want back with a soft black brush. You can then lower the opacity of this layer if needed to taste. This is not always necessary, but sometimes I want a slightly lighter desaturated skintone.
4. Hue/Saturation layer: Add saturation (40 - 50% or to taste), put layer in color, then fill layer mask with black. Use a lower opacity white brush and paint in background and anything you want really colorful. You can also adjust the opacity of this layer if needed.
5. Selective color layer: I take away cyan and add yellow to red, then add extra yellow to yellow, add more black to black. Play around with this, it is to taste!
6. Burn edges layer: Click on background, ctrl-J for copy of background. Use burn tool set at low opacity and burn edges to taste.
7. Sharpen layer: Click on background, ctrl-J for copy, move above lighten layer. Use high pass filter (adjust setting where you see light outline of what you want sharpened), then put that layer in overlay, and adjust opacity to taste. Or just use a unsharp mask on this copied background layer to taste.
8. Top layer to custom set the entire effect: Make a new blank layer on the top. Hold down alt key and go to Layer<Merge Visible. This should merge all of your layers into the top layer without affecting any of your other layers. Make visible this layer and your background, turning off all of the other layers (as seen in the picture). Then adjust opacity of the top merged layer to taste. Then flatten and save!

 
No. she has them for PSE and reg. PS...

google how to instal Actions with PS or CS2, you can also find other actions made specially for CS2 and 3 by googling it as well. These save a lot of time! ;)
 
For starters, these women were all retouched. Here is a link to a retouching tutorial that I refer to often. I use CS2 also and have come up with some nice results. Retouching does take quite a while to learn so if you got some time on your hands, go for it.

http://retouchpro.com/tutorials/?m=show&id=209

Whoever was taking these photos spent some time and mad skills on retouching them in CS3.
 
hmm, after looking at m.e.g.'s photostream, I enjoyed what I saw. She did a pretty good job at bring out her subject's eyes. Some things on her photos are a little off though. I found some wickedly distorted photos. At first, I was thinking super wide angle lens or possibly fisheye but some are so funky it looks like they were warped in photoshop. Also, some of her skies were noticeably over burned without smooth transition. Overall, she did quite well. She has got some serious talent and is probably on her way to making some big bucks.
 
I see here that everyone is all about the photo shop, and I don&#8217;t want anyone to get me wrong, Photo Shop is a great tool, but it is not a replacement for skill. The pictures shown are strong because the photographer has good technique and excellent lighting.
Good Technique and good lighting is the key. Practice them when you are out shooting, not sitting behind your computer.
 
Yeah, she is definitely a very talented photographer.
I'll try what you guys said, sdesha and maulrat.
Thanks for your suggestions.
 
((Also, is picture #2 taken with a fisheye lens?))

no, it was taken with a standard 10mm lens. and since these pictures were taken on a nikon d50, i would assume it was either the sigma 10mm or tamron 10mm, but i could always be wrong.
 

Create an account or login to comment

You must be a member in order to leave a comment

Create account

Create an account on our community. It's easy!

Log in

Already have an account? Log in here.

New Topics

Back
Top Bottom