With all due respect, there is a lot of misinformation and partial information in this thread. Don't always assume what any random person on the net tells you is correct... and that includes me.
I try not to, but I will take each with a grain of salt and expand from them if they work. 
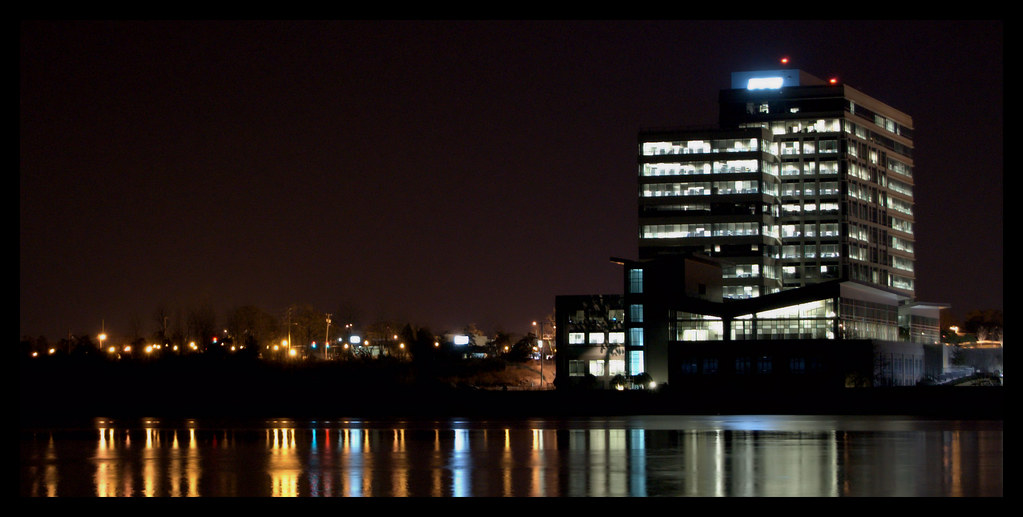
First off, I don't really see any noise in these, so I don't know what folks are talking about. Granted, I'm on my 15" laptop screen, but seriously... I don't see any appreciable level of noise, even in the dark areas (where noise could be prevalent even in lower ISO pictures on shorter exposures)
Well not these so much as my others, the first one is pretty grainy to me 
I don't know what kind of camera you are using, but most of the cameras with the long-exposure (previously called longer shutter) resulting in noise problems were older CCD based cameras. The sensor heats up horrifically, causing errors in the readings, resulting in noise. Now I'll be honest in that I haven't gone to check in on whether my theory here is exactly correct, the core of the problem is essentially the same... long exposure=heat=noise. Still, I don't see noise in your images.
 I'm using a D40 and the equipment in my sig
Composition elements aside, there are some technical tricks to making night photography work. They are:
- Shoot in RAW(!) - This will allow you to do a couple critical things and not worry too much about off light readings since light colors are really wacky at night. I do shoot in RAW, for PP reasons... Thanks!
- Overexpose!!! You want to purposely overexpose your image slightly (note that this really only works with RAW). The image you see in your display on your camera should show the detail of parts of the frame that you don't even really quite want to see and the parts you DO want to see should be slightly overblown. Why? Because you can back the brightness down in post processing to darken up areas, but you CANNOT brighten up a pitch black space in post processing to bring in details that the camera simply did not record. This takes a bit of practice to get the hang of pushing it far enough without pushing it too far. Good point, I'll take this into consideration
- bracket! Take several pictures of varying exposures so you have multiple options available to you when you get home and don't have to necessarily go back. I tend to do this anways, since I'm in a learning phase, to see what works best
- Aperture matters in more ways than one... did you know a smaller aperture will cause refraction of the light around the aperture blades, resulting in stars? The trick is you don't want to stop down so much that you lose too much sharpness in the overall image. Generally most lenses will give a nice star effect around F/8.So never really want to shoot wide open either? I'll try some around F/8-11
- Focus manually - you said yourself you couldn't focus... that's because there isn't enough light and/or you are too far away for your focus assist light to help. Flip to manual focus. It's not easy, but it works. I'll give it a shot, I'm afraid I'll fubar the shots though lol
- If focusing long distances manual-focus to infinity on your lens. Be aware that some lenses are mismarked, so check your mark during the day and make a small mark on your lens so you know where true infinity is.Ah ok, thanks!
- EDIT: I forgot... put it in ISO 100 or 200 (whatever is your lowest native ISO) and lock it there. If you have a tripod, there's no real reason for you to have high iso. 200 on mine... I'm going to do this from now on
- EDIT: I hope you have a remote shutter release... if you don't, but one. If you can't, set a 5-10 second delay and do a timed release on your camera. DO NOT just press the button and take a picture while the camera is on the 'pod. Camera shake=not your friend. I do, bought one the first week I got the camera
Those are some of the basics. There are some other really nasty tricks like shutter lock-up and stuff, but start with these.
Thanks again, and awesome shot! :thumbup:
Here's one of my more recent shots taken at night: (by way of example)