goliath
TPF Noob!
- Joined
- Jan 8, 2008
- Messages
- 41
- Reaction score
- 0
- Location
- Montréal
- Can others edit my Photos
- Photos OK to edit
I'm starting to explore the path of HDR images and read on quite a few forums and tutorial.
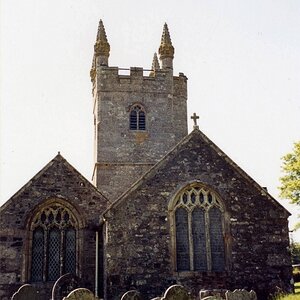
I decided to try one using PS CS3 from a single RAW image from which I save a 0, a +2 and a -2 EV in 3 jpeg. When merging to HDR, the highlights were totally blown out so I save another version at -4 EV and run through the process again. The highlights were still awful so I uncheked the file with +2 EV, leaving PS to use the 0, -2 and -4 to process the HDR. Then I convert the 32 bit HDR to 8bit image, adjusting result using local adaptation curve. The result is still quite poor. Some tutorial talk about importing a layer of the original image and use mask in some area to correct the highlight (which I did not do for the picture below). I found the process quite time consuming ...
#1 - HDR from PS CS3 from a single RAW file

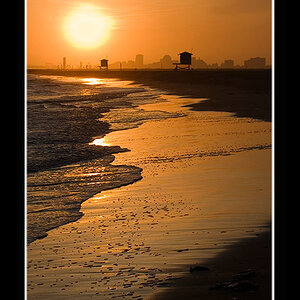
Then I came across a tutorial to create a "layered HDR" image. I tried the tutorial with the same jpeg I had created with different EV. The initial result was really not convincing so I played a little bit with layers/mask/blending mode to improve the output but it still look washed out (look at the trees to the right). Faster process than #1 but still time consuming and results is not so good.
link to tutorial http://photoshoptutorials.ws/photoshop-tutorials/photo-manipulation/layered-hdr-tone-mapping.html
#2 - "HDR" from layers/mask

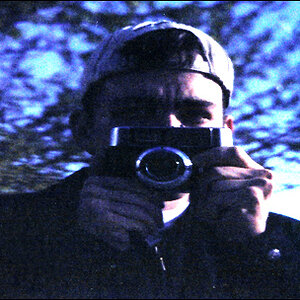
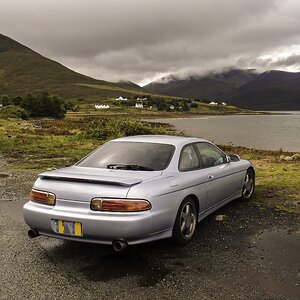
Then I decided to try the simple image/adjustment/shadow-highlights on the original jpeg. 30 second process and look at the result ... I find it much better than #1 and #2 and it took less than 1/10 of the time.
#3 - simple shadow/highlight adjustment in PS CS3

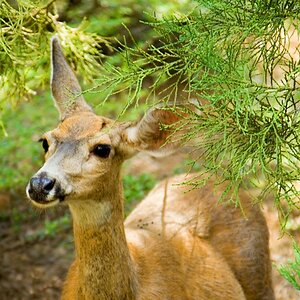
From what I understand, an "HDR image" is an image that has a greater dynamic range than "normal image" because the bit depth is more important (and thus allow for more variation in intensity for each color channel). But when it comes to saving back to jpeg format (8 bit), the information available in shadows and highlights is bring back to the 0-255 scale +/- in the "midtones", which is about what the shadow/highlight process does when you look at the resulting histogram.
I know the original image may not be the ideal candidate for HDR image as the lighting conditions are not that extreme but still, can someone help understand why the "fake" HDR and "layered HDR" are so bad compared to the simple shadow/highlight?
#4 - original image with 0 EV adjustment in jpeg format

Thanks
I decided to try one using PS CS3 from a single RAW image from which I save a 0, a +2 and a -2 EV in 3 jpeg. When merging to HDR, the highlights were totally blown out so I save another version at -4 EV and run through the process again. The highlights were still awful so I uncheked the file with +2 EV, leaving PS to use the 0, -2 and -4 to process the HDR. Then I convert the 32 bit HDR to 8bit image, adjusting result using local adaptation curve. The result is still quite poor. Some tutorial talk about importing a layer of the original image and use mask in some area to correct the highlight (which I did not do for the picture below). I found the process quite time consuming ...
#1 - HDR from PS CS3 from a single RAW file
Then I came across a tutorial to create a "layered HDR" image. I tried the tutorial with the same jpeg I had created with different EV. The initial result was really not convincing so I played a little bit with layers/mask/blending mode to improve the output but it still look washed out (look at the trees to the right). Faster process than #1 but still time consuming and results is not so good.
link to tutorial http://photoshoptutorials.ws/photoshop-tutorials/photo-manipulation/layered-hdr-tone-mapping.html
#2 - "HDR" from layers/mask
Then I decided to try the simple image/adjustment/shadow-highlights on the original jpeg. 30 second process and look at the result ... I find it much better than #1 and #2 and it took less than 1/10 of the time.
#3 - simple shadow/highlight adjustment in PS CS3
From what I understand, an "HDR image" is an image that has a greater dynamic range than "normal image" because the bit depth is more important (and thus allow for more variation in intensity for each color channel). But when it comes to saving back to jpeg format (8 bit), the information available in shadows and highlights is bring back to the 0-255 scale +/- in the "midtones", which is about what the shadow/highlight process does when you look at the resulting histogram.
I know the original image may not be the ideal candidate for HDR image as the lighting conditions are not that extreme but still, can someone help understand why the "fake" HDR and "layered HDR" are so bad compared to the simple shadow/highlight?
#4 - original image with 0 EV adjustment in jpeg format
Thanks

")