Timoris
No longer a newbie, moving up!
- Joined
- Mar 14, 2011
- Messages
- 284
- Reaction score
- 34
- Location
- Australia
- Can others edit my Photos
- Photos NOT OK to edit
By no means should this (short) review be taken as professional. I've decided to write this up because;
A- I like writing
B- Most if not all Reviews I've seen of this camera are more about the hardware and not the overall USE/Feel of the camera.
This is merely why I greatly enjoy my W3.
Background:
I was paid with a Nashika n8000 for a small photography job a few months back and was always apprehensive of using it. The restrictions on shutter speed and aperture are one thing, but it's the lack of knowledge of how my experimentations with 3D would turn out, as printing the negatives with Snap 3D goes for 50$ a roll. An expensive way to experiment.
I then found out about the Fujifilm Finepix W3. BINGO! I could capture, preview and manipulate the images to a certain extent in camera. Beautiful!
So how does it roll?
Well, It's everything I expect out of a point and shoot. It's slower, much more clumsy and cumbersome to use than a Reflex, but it does the job.
Also, the HUGE Lenticular screen is awesome. Prepare for some oohs and ahhs when showing off at work. And you WILL show off.
A neat feature is that you can adjust the Parallax (amount of superimposition of the images), which is important if you do macro or shoot individual Left and Right images. By doing so, you can bring your subjects to life even more, reduce the 3D effect when they start giving you a headache or if the image just doesn't "work".
There are three "Colour Modes". Normal, Chromatic (which saturates the colours) and B&W. I keep it on Chromatic as the pictures look better with higher saturation in 3D. Anyways, if I wanted true colours I'd be using my Reflex ;-) .
The flash adjustment is ... well... present. From what I can tell, Forced flash is full power, red eye adjust is softer. BY how much? No idea. I did not find any way to modifying the strength of the flash other than the 5 preset controls which are not descriptive of how strong it will be.
Using the camera is like using a Lomo, do what you can from what you know, the rest is up to the camera.
Picture Quality:
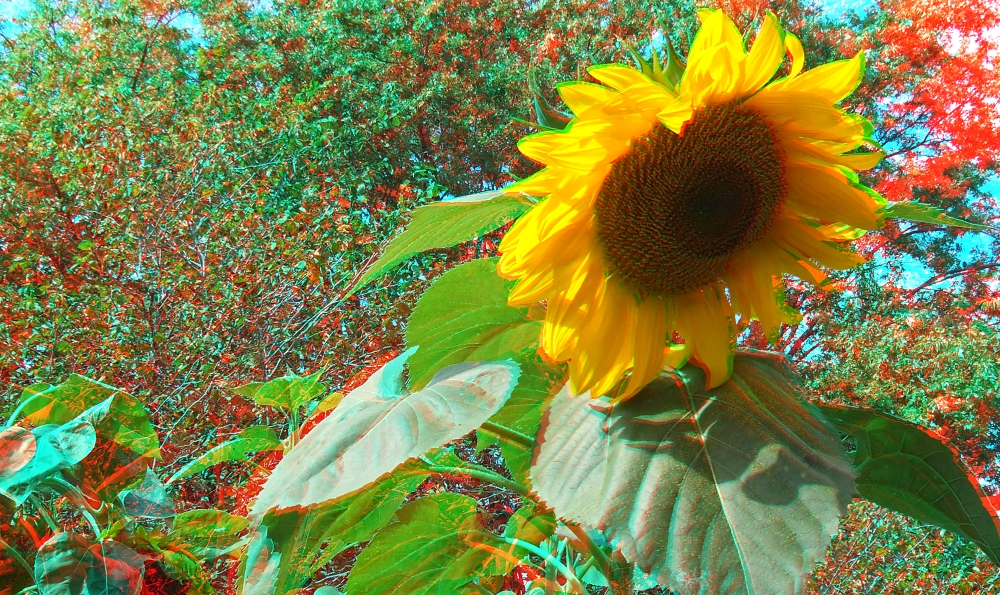
There is one artifact that I quite enjoy although some of you might not. If there is a spot of high brightness, such as reflection off of a white surface or the Sun glare peeking over some hedges, the colour will bloom over the surrounding subjects. (See below for example. Please ignore the sheer lack of photogenicisity of the capture. I needed an example )
)

I enjoy this as it brings added interest to the some pictures. Now it doesn't look bad, in certain contexts it can most definitely be used. There is no lens hood so we just have to work with it.
There is noticeable noise starting at ISO 400 so I try and shoot at 200 and below or with flash. Worst comes to worst, I up the ISO and reduce part of the noise in post, but that does make the picture "softer".
Post Processing:
The meat of it!
This is where I decided to obtain this 3D camera over... well... its previous iteration and all of two Camescopes. As a photographer, unless you MacGyver a 3D contraption there are not many options (Yes, Loreo is a thing).
So is it possible to have the same amount of control with the MPO (Multiple Picture Object) files as with a RAW file?
Yes and no. Yes, you are able to extract and modify the file, then rebuild it but you have to be careful of how much you modify or what you are using as it will damage the JPEG (poor, brittle things they are). So you are limited.
BUT, all in all, in the end, if you apply your Photography Theory it does make for some nice pictures.
For a Point and Shoot, that is.

I used StereoPhoto Maker to convert the Left and Right views of the MPO into a Half Coloured Anaglyph. Why Half-Coloured? Certain colours, like green, "fight" over each eye, giving off a flickering effect which is mostly avoided in half colour. Also, the picture looks more full, as though the Red and Cyan complete what is missing.
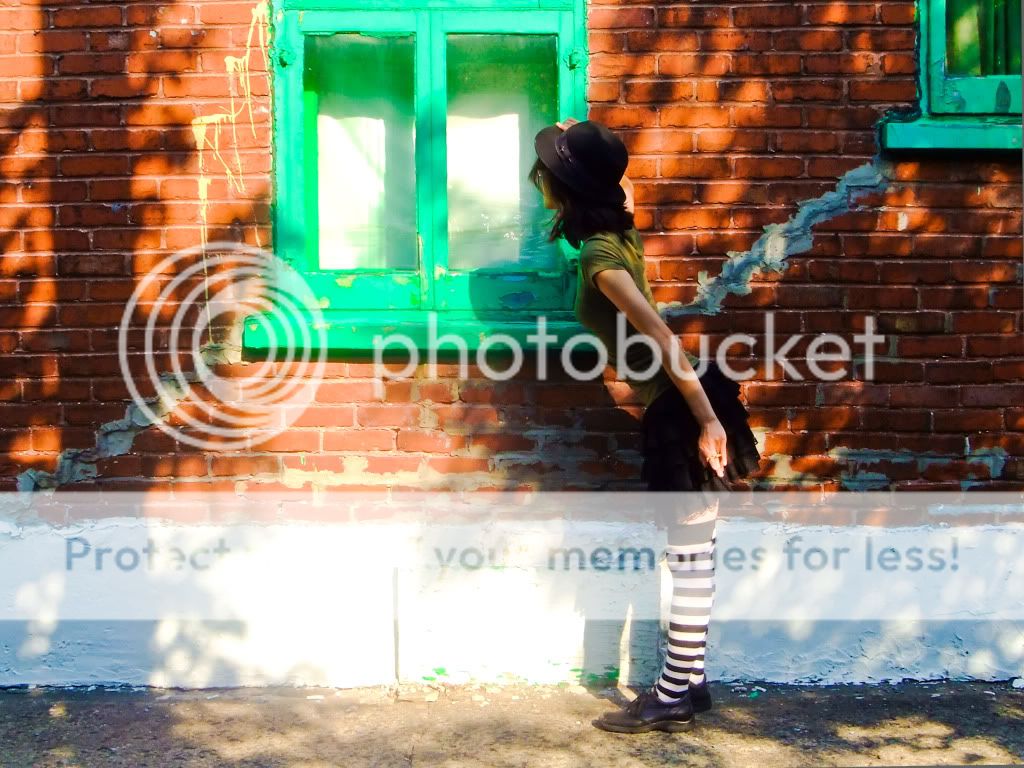
Having objects - er, people, in front of flat surfaces is a way of bringing out the subject. It works best with appendages going towards the camera or playing with levels. In this case, Blinds, window bars, head, body, arms. Just don't have things sticking out too far or too close to the camera, resolving the parallax means either the foreground is out of focus or the background is an open portal to the 7th level of hell.
It's very easy to blowout whites and blacks. Point and shoot means having a smaller sensor.

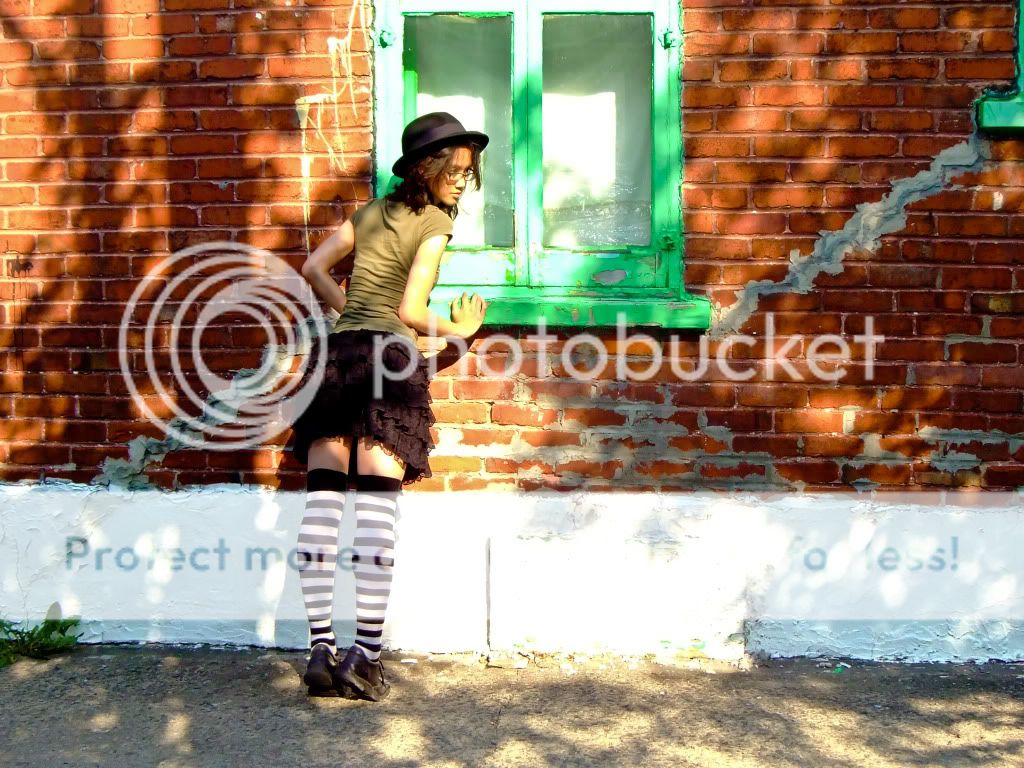
In 3D this looks pretty awesome, the leaves, the cloths line going away behind the tree. It's better to shoot for depth than "in your face". You want to be drawn into the picture, not intruded upon. (See above description of portal to 7th level of hell)
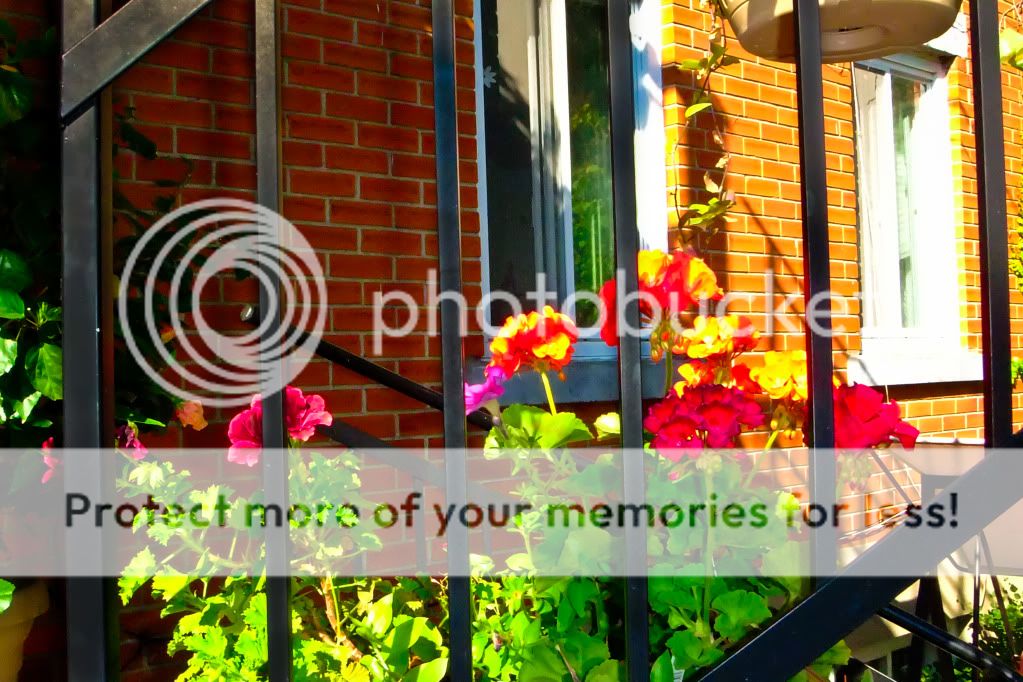
Get overlapping subjects. In this example you could peek behind the bars and view the flowers, Blade Runner style.
The close flash gives shadows, generally unwanted in photography, but in 3D it makes images pop out even more.
Note the chromatic aberration.
A- I like writing
B- Most if not all Reviews I've seen of this camera are more about the hardware and not the overall USE/Feel of the camera.
This is merely why I greatly enjoy my W3.
Background:
I was paid with a Nashika n8000 for a small photography job a few months back and was always apprehensive of using it. The restrictions on shutter speed and aperture are one thing, but it's the lack of knowledge of how my experimentations with 3D would turn out, as printing the negatives with Snap 3D goes for 50$ a roll. An expensive way to experiment.
I then found out about the Fujifilm Finepix W3. BINGO! I could capture, preview and manipulate the images to a certain extent in camera. Beautiful!
So how does it roll?
Well, It's everything I expect out of a point and shoot. It's slower, much more clumsy and cumbersome to use than a Reflex, but it does the job.
Also, the HUGE Lenticular screen is awesome. Prepare for some oohs and ahhs when showing off at work. And you WILL show off.
A neat feature is that you can adjust the Parallax (amount of superimposition of the images), which is important if you do macro or shoot individual Left and Right images. By doing so, you can bring your subjects to life even more, reduce the 3D effect when they start giving you a headache or if the image just doesn't "work".
There are three "Colour Modes". Normal, Chromatic (which saturates the colours) and B&W. I keep it on Chromatic as the pictures look better with higher saturation in 3D. Anyways, if I wanted true colours I'd be using my Reflex ;-) .
The flash adjustment is ... well... present. From what I can tell, Forced flash is full power, red eye adjust is softer. BY how much? No idea. I did not find any way to modifying the strength of the flash other than the 5 preset controls which are not descriptive of how strong it will be.
Using the camera is like using a Lomo, do what you can from what you know, the rest is up to the camera.
Picture Quality:
There is one artifact that I quite enjoy although some of you might not. If there is a spot of high brightness, such as reflection off of a white surface or the Sun glare peeking over some hedges, the colour will bloom over the surrounding subjects. (See below for example. Please ignore the sheer lack of photogenicisity of the capture. I needed an example
)
I enjoy this as it brings added interest to the some pictures. Now it doesn't look bad, in certain contexts it can most definitely be used. There is no lens hood so we just have to work with it.
There is noticeable noise starting at ISO 400 so I try and shoot at 200 and below or with flash. Worst comes to worst, I up the ISO and reduce part of the noise in post, but that does make the picture "softer".
Post Processing:
The meat of it!
This is where I decided to obtain this 3D camera over... well... its previous iteration and all of two Camescopes. As a photographer, unless you MacGyver a 3D contraption there are not many options (Yes, Loreo is a thing).
So is it possible to have the same amount of control with the MPO (Multiple Picture Object) files as with a RAW file?
Yes and no. Yes, you are able to extract and modify the file, then rebuild it but you have to be careful of how much you modify or what you are using as it will damage the JPEG (poor, brittle things they are). So you are limited.
BUT, all in all, in the end, if you apply your Photography Theory it does make for some nice pictures.
For a Point and Shoot, that is.
I used StereoPhoto Maker to convert the Left and Right views of the MPO into a Half Coloured Anaglyph. Why Half-Coloured? Certain colours, like green, "fight" over each eye, giving off a flickering effect which is mostly avoided in half colour. Also, the picture looks more full, as though the Red and Cyan complete what is missing.
Having objects - er, people, in front of flat surfaces is a way of bringing out the subject. It works best with appendages going towards the camera or playing with levels. In this case, Blinds, window bars, head, body, arms. Just don't have things sticking out too far or too close to the camera, resolving the parallax means either the foreground is out of focus or the background is an open portal to the 7th level of hell.
It's very easy to blowout whites and blacks. Point and shoot means having a smaller sensor.
In 3D this looks pretty awesome, the leaves, the cloths line going away behind the tree. It's better to shoot for depth than "in your face". You want to be drawn into the picture, not intruded upon. (See above description of portal to 7th level of hell)
Get overlapping subjects. In this example you could peek behind the bars and view the flowers, Blade Runner style.
The close flash gives shadows, generally unwanted in photography, but in 3D it makes images pop out even more.
Note the chromatic aberration.
Last edited: