HOW TO UPLOAD AND POST A PICTURE
There are two ways you can post a picture on TPF. You can host your photos through a third party hosting website, such as
Flickr,
SmugMug or
Photobucket; or, you can upload directly to the forums own gallery.
What follows is a step by step guide to posting from flickr, photobucket and also using the subscriber option on the site.
Flickr:
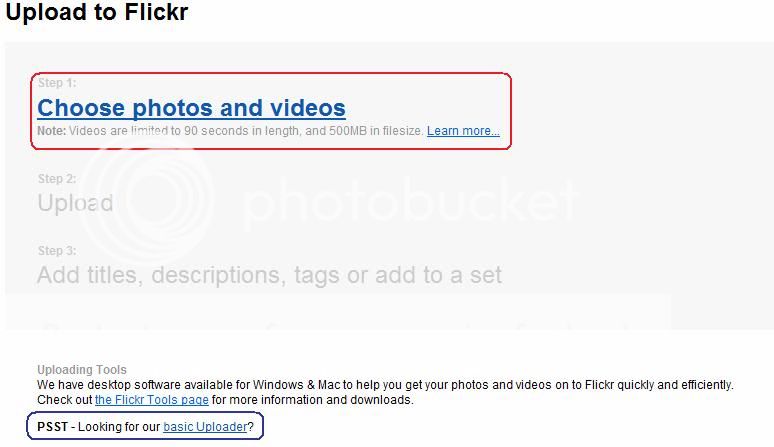
Once you are signed up, you need to upload the pictures you want to post from your computer onto Photobucket. To do so select "Upload" from the far right hand side of the flickr main bar. This will take you to the following page:
From there select the blue text listed under Step 1 "Choose Photos and Videos", this will open up a browser window of "My Computer" from your computer. From there you can navigate to your photo folder and select the photos you want to upload. Note that you can hold down the left mouse button and drag a box around a group of photos to upload them all at once and you can also hold the ctrl key to select multiple photos individually in the same folder.
Once you've selected the photos click the "open" button in the bottom left hand corner of the window; the screen will now change to a list displaying the photos you've added. You my select the "Add More" to add additional photos from other folders or now click the "Upload Photos and Videos" tab to start the uploading process.
A completion bar will appear as the upload process takes place, being replaced by "Add a description" after the uploading is complete. You may use this now to add descriptions, tags and titles to the photo(s) you've uploaded to flickr as well as place them into groups if you so choose.
With the photos added to flickr navigate to your photostream (select "You" from the title menu). From this window now click on the photo you want to add to the forum to be taken to the photos page. There are now two ways you can show this photo on the forum from flickr;
1) The BBCode share method
Click on the "share this" drop down menu located just above the photo. This will open up a new miniwindow. From the list that appears select the "Grab the HTML/BBCode" line and select the size that you want to share from the little dropdown menu. Make sure to click the BBCode icon and then copy the text in the main window shown (highlighted in red). Note that clicking once in the text window should automatically highlight all the text - you then just need to rightclick and copy or press ctrl+v to copy.
Paste that text into the post on the forum and the photo will be automatically embedded into the thread at the stated size, in addition the photo will have a link to the page placed below it and will also link back to the main photo page on flickr when the photo itself is clicked.
2) The URL share method
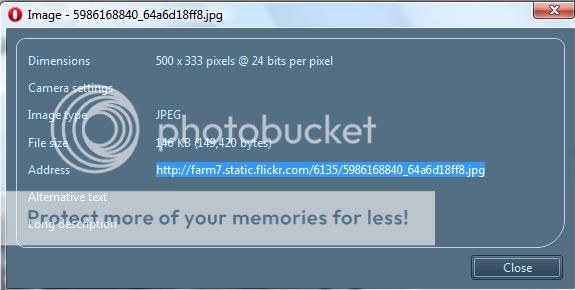
Right click on the photo itself and a miniwindow will appear, from the displayed options select the size that you want to show on the forum. If you left click on the photo by accident you will be taken to the "Blackscreen" version view, just left click again to be returned to the normal mode.
Once the photo has loaded right click on it and go to properties/image properties and in the little window that opens copy the "Address" line - that is your direct url for that size of this photo.
Note some browsers will have a "Grab/copy" url command when you right click so you can use that if you prefer.
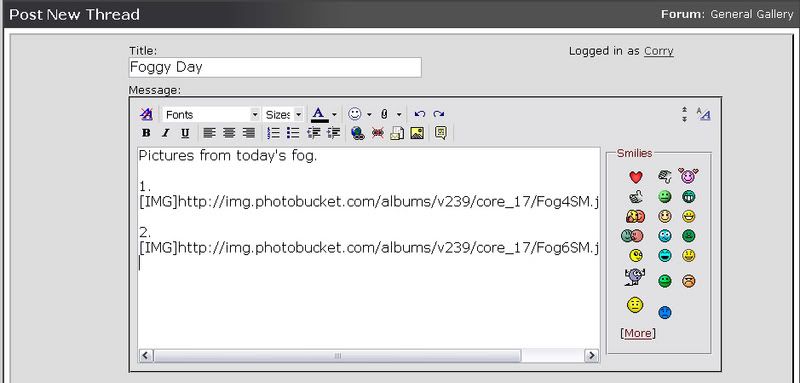
Now that you have the address of the photo copied go to your post new thread option on the forum and in the text window place the url you copied between image tags as following:
[ img ] paste the url here [ /img ]
without using spaces. This will place the photo at the selected size into the thread itself when posted.
Posting from Photobucket
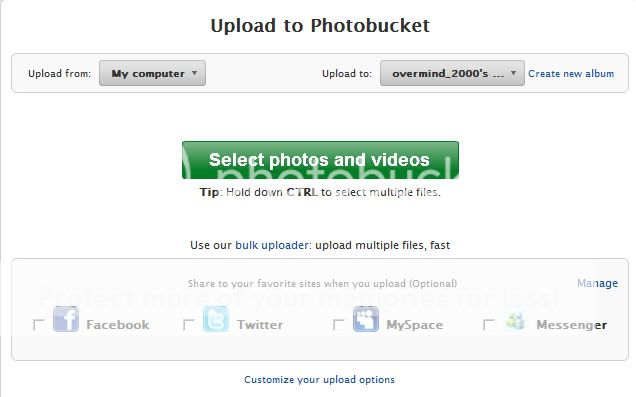
Once you are signed up, you need to upload the pictures you want to post from your computer onto Photobucket. You will notice on your main page of your account along the top bar menu is a green option "Upload now" click once to be taken to the uploading page, which will look like this:
From this page click on "Select photos and videos" this will open up a browser window of "My Computer" from your computer. From there you can navigate to your photo folder and select the photos you want to upload. Note that you can hold down the left mouse button and drag a box around a group of photos to upload them all at once and you can also hold the ctrl key to select multiple photos individually in the same folder.
Once you've selected the photos click the "open" button in the bottom left hand corner of the window and the photos will start to be uploaded to Photobucket.After the upload is completed the page will refresh and you can choose to "vie album" or upload more photos. Select "View Album" for now to be taken to the main album page that you added the photos to (if you've not setup specific albums on photobucket they will all be added to your main one).
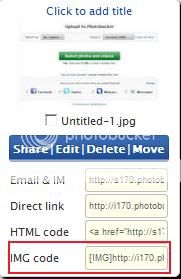
On the album page you will see a list of your uploaded photos as smaller thumbnails, from the displayed photos move your mouse over the thumbnail picture. A new mini window will open up dispalying a list of sharing options - for now go to the bottom option which is "IMH code" and click on the image code text. The text will be automatically "copied" and a small "copied" phrase will replace the text box content for a moment once this is done.
Paste the tagged url that you copied from Photobucket into your text editor box on The Photo Forum, making sure to leave spaces and to number each picture, if you are doing more than one. It's also a good idea, if you have a large amount of images, to split it into more than one thread. This makes it much easier for people to view and comment on your photos.
Click 'submit thread', and you have just posted your pictures!
Uploading to the forum directly - using the site Gallery
You can use the sites own gallery to host your photo online before linking to them in threads. Note that all members may use the site gallery, however storage space is limited. You can extend the amount of storage space you have by becoming a paid subscriber to the forums:
http://www.thephotoforum.com/forum/payments.php
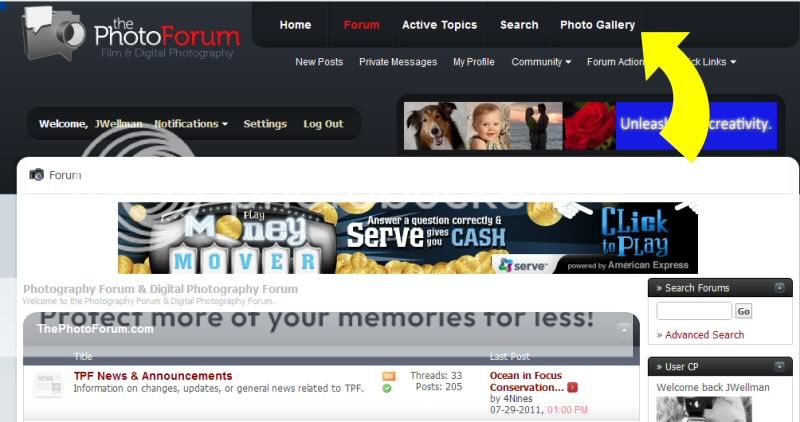
To do this first open up the gallery using the link in the top right hand side of the sites main menu:
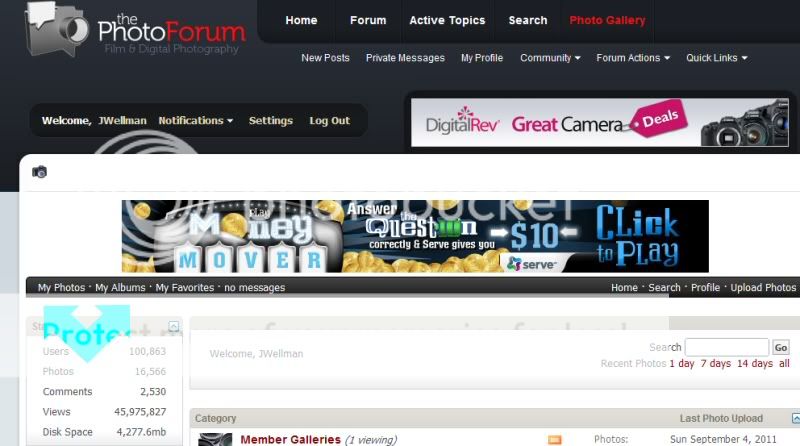
Then from the new page that appears select the "My Albums" link in the upper left corner of the page
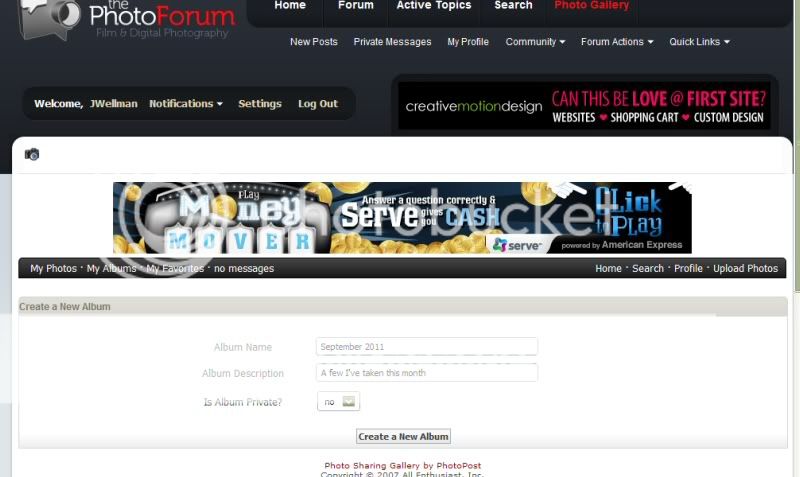
From the new page the first task is to make an album for your photos to go into, for ease of categorising your photos in the gallery. Click on the "Create new Album" link just above the main bars in the page. In the new window that opens you canenter a title, a short description and also set the privacy settings for the new Album. By default they are not set to private.
Once made you'll be returned to the albums control page from before and now the album will appear in the list, along with the marked "Upload Photos" link. Note that there is also a similar command button in the upper right side of the gallery pages. Clicking on either takes you to the main uploading page for photos onto the site.
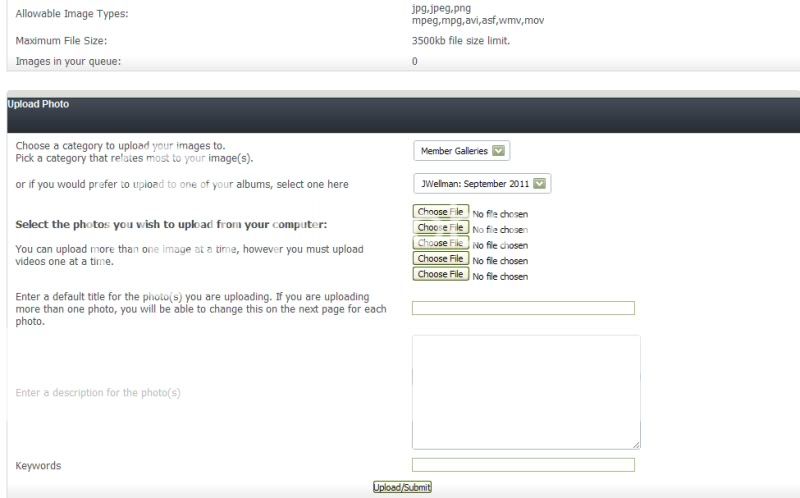
From this menu you can select the album to be uploaded to, enter a title for the photos, a description and keywords (note these will be applied to all the photos uploaded in this session, if you wish to use different lables/titles you can enter these in separatly in the following page of the process).
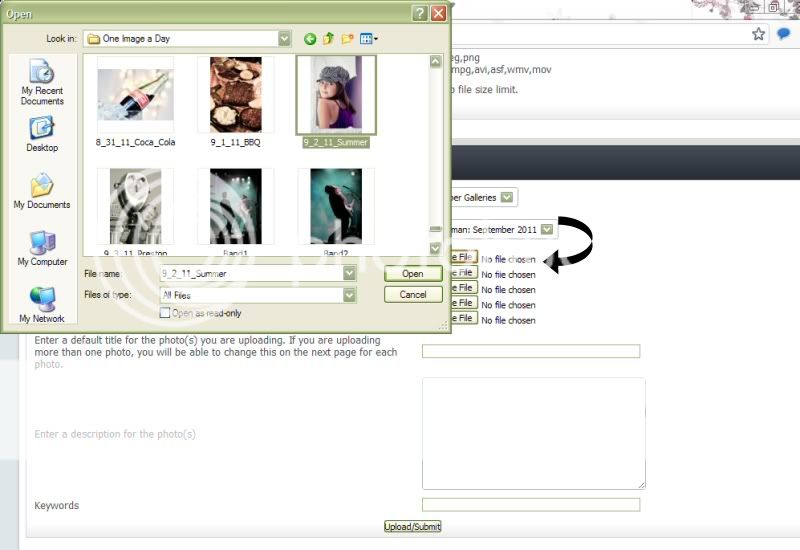
Clicking on the "choose file" buttons will open up a default browser window; from there you can navigate to your photo folder and select the photos you want to upload. Note that you can only upload one photo per "choose file" command button, however you can upload up to 5 at a time using all 5 of the buttons.
Once you've selected the photos and entered in and details you can click the "Upload/Submit" button from the bottom of the page.
Note that under the first upload/submit button there are some further options with regard to site voting and noticifcations as well as commentary from members of the site, you can set these to yes and no at your own discretion; by default they are set to yes. There is also an option to upload to the site from a different website address; in case you wish to show photos that you've previously uploaded to another hosting service.
There is also a second Upload/submit button, this works identically to the first.
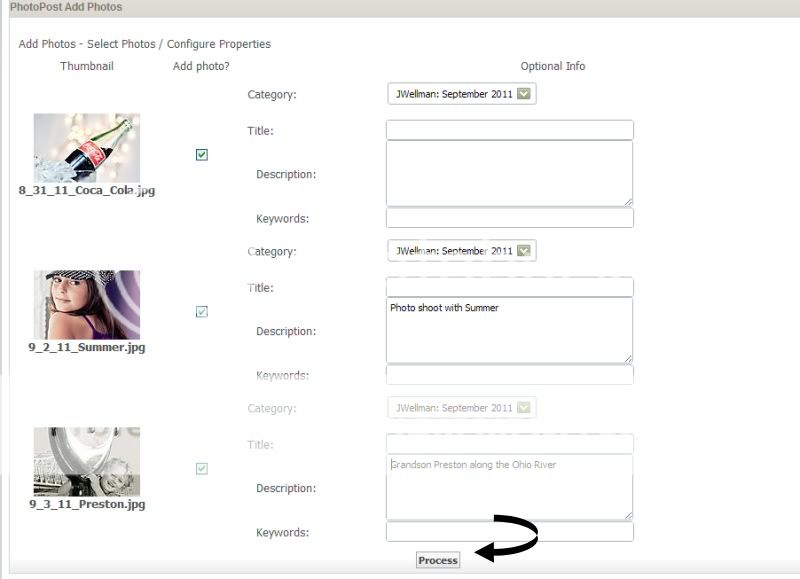
Once uploaded you are then taken to a photo management page, where you can adjust titles, descriptions and keywords on a photo by photo basis.
Once you've made any changes that you wish to the specific photos you can click the "Process" button to complete the uploading stage. Note if you click off this page without making any changes and without clicking process your photos will still be uploaded and in the originally selected album.
Now that your photos are uploaded into your own album on the site you can click on the individual photos in the album to get to their page, from this page you have a selection of auto generated links and codes that you can use to show your photos on the forum.
Just click and copy the "Linked Medium" and paste the text into your new thread/new post box. The photo will now be embedded as a medium sized and clickable image, which upon clicking will show your photo to the viewer.
")