Lensbaby effect action for photoshop

Johnboy2978

No longer a newbie, moving up!
Joined
Oct 21, 2004
Messages
1,797
Reaction score
30
Location
Southwest Virginia
Website
www.johncountsphotography.com
Can others edit my Photos
Photos OK to edit
I've been playing around trying to re-create why effect a Lensbaby has on an image, but I'm not quite there yet. It seems that it would primarily be selecting an area, feathering it quite a bit, then applying a blur.

Has anyone made an action to do this that they could share?
 
yep..... i make a duplicate layer, add radial blur... (change it from spin to zoom in the radial blur window)... you can also move the direction point in the window to were you want it on the image. After you've applied it, use a layer mask to re-focus the sweet spot area by subtracting the effect from the layer. Then your pretty much there, you can also add distortion to the direction of the blur if you want.

As for an action, i havent made it into one... mainly because its impossible to know what area/how much, etc blur to add to a specific image. Also the technique above only takes a few mins so its hardly worth making an action.

Give it a go and try, i find its quite effective but like IR techniques isnt 100% genuine looking.... if i find one of my pics i'v used it on.. i'll post it here.
 
^^^^^ yep.... thats the best option.... either buy one or win one!....... (probably buy one :lol: )
 
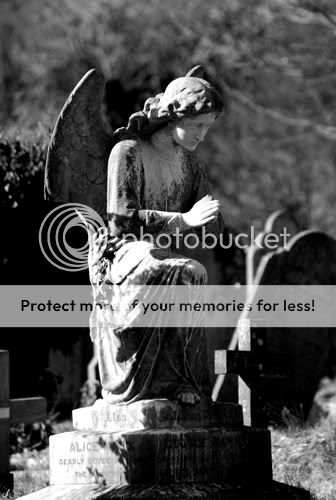
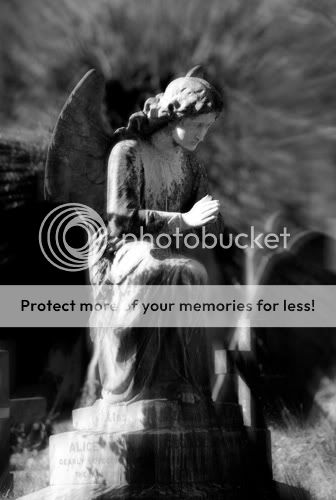
here's one conversion... not my best, the sweetspot should probably be a little tighter..... and i added more light to the bottom half to give a different effect for the picture..... but if you look at the top section... thats what your sorta going for.

Before;
angel-before.jpg


...and after
angel-lb.jpg
 
A little....... the bottom part isnt too bad but the tops not right........ also LB's tend to give you a tighter focal area...... the best thing to do is study as many LB shots as you can (the LB gallery would be a place to start!)... and see how it reacts to things. If the filter seems like its going overboard.... take it down loads.... apply it.... and do another layer with another mask and do the process again but this time brushing through only the areas that need attention..... the more you do it the easier it becomes, so try it out on various images.... some will always work better than others.
 
FWIW,I have a Lensbaby but often help the effect along in Photoshop.

Here is what I do (for 6-8mp images). First take the image you want to try. Then duplicate the background as a new layer (CTRL+J) then got to filters>> blur>>box blur and select 20 then click OK. You now have a boxy looking blur.

Then make a layer mask on the new layer and click on the layer mask. Then select the Gradient Tool, make sure your foreground color is black and your background color is white. Select the "Radial Gradient" from the top tool bar. It is the one with the white circle with black around it. Then click in the center where you want your sweet spot to be and then drag it off the picture. You will then have a clear sweet apot with box blur getting more blurry along the edges. If you don't like the first result just click and drag again. The gradient tool will delete the first gradient and make a new one. You can do this as much as you like just remember where on the screen you stopped your dragging. You can also touch up your sweet spot a bit by using a soft black brush.

When you have the sweet spot where you want it flatten your layers and then duplicate the new background layer. On the new layer select filter>>blur>>gausian blur and select 50 then click OK. Then make a layer mask and repeat the gradient tool you did in the first step and if you used a soft black brush do that again also. (note in the first step you could also ALT click on the layer mask and then copy it to the clipboard and then paste it in this step, but I often like to play a bit)

I then adjust the Opacity down to around 30-60% depending on how the image looks. The trick here is that you are blurring the box shaped blur, this double blurring gives you a very dreamy look with a bright clear sweet spot.

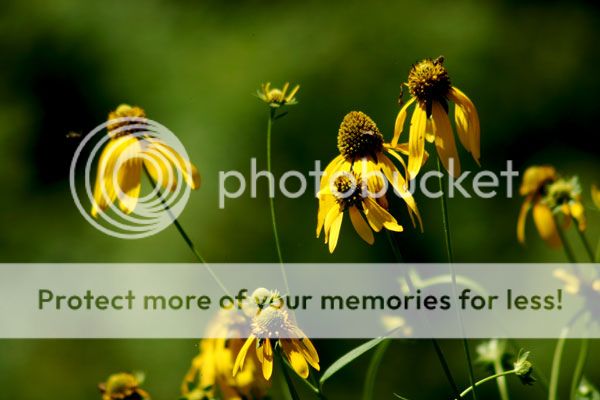
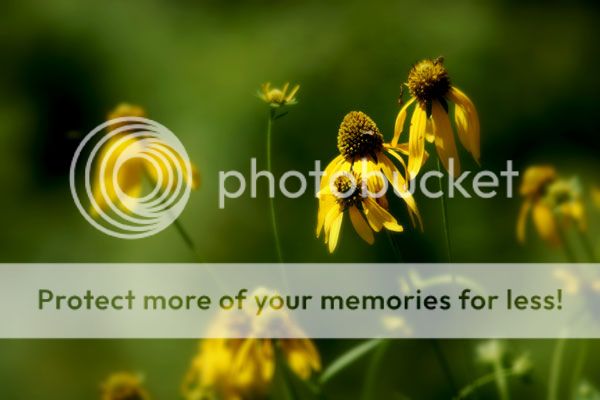
While this works great with LB images it also worls great with Non LB Images like this one.

The Before

flower2.jpg


The After

flower.jpg


Note this picture was not taken with a LB but rather a normal lens.
 
Good stuff wally, i like your version too, gives a nice soft effect to the blur :thumbup:
 

Most reactions

Back
Top