What's new

My First Shot with a Dslr Canon 650d (T4i)

okwori12

TPF Noob!
Joined
May 13, 2017
Messages
65
Reaction score
27
Location
Nigeria
Can others edit my Photos
Photos NOT OK to edit
Am actually learning the are of photography, so please tips and suggestions on how to improve is highly welcome.
The pics are taking with a 18-200mm lens, f3.5.
 

Attachments

  • _MG_0145.webp
    _MG_0145.webp
    157.2 KB · Views: 177
  • _MG_0042-1.webp
    _MG_0042-1.webp
    49.9 KB · Views: 170
Good deal! Keep posting! Reading about photography or watching videos is a good way to learn. Taking photos is also very valuable as a learning method.
 
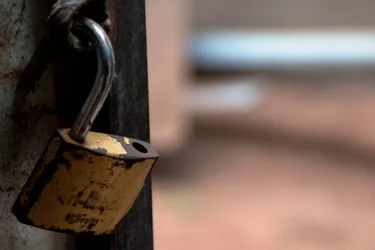
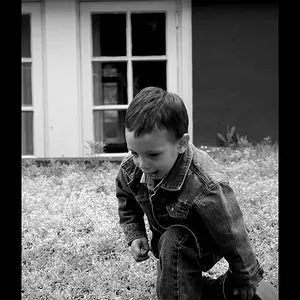
I really like the pose of the first shot and the composition of the second shot, but the focus on both seemed a bit soft. If I'm seeing this correctly, it could be caused by either a very slight 'miss' of focus by the camera, or a shutter speed too slow to eliminate movement during capture. Thanks for sharing and keep posting!

EDIT: looked at the EXIF data- the 1/200 shutter speed of the first images MIGHT be fast enough to prevent motion blur, but the 1/500 speed on the 'lock' shot should certainly have been fast enough- barring a significant shake in your hands.
 
Thanks so much. My hands still experience some shake during capturing. Am still trying to be stable.
 
_MG_0359.webp
pbk3.webp
Here is another set of Pics
 
Good deal! Keep posting! Reading about photography or watching videos is a good way to learn. Taking photos is also very valuable as a learning method.
went through you page and i saw some amazing photos. You are great. Am getting there soon.
 
Good deal! Keep posting! Reading about photography or watching videos is a good way to learn. Taking photos is also very valuable as a learning method.
153967747.bI3NjFCf.jpg
What settings and lighting gives you this quality?
 
I took this photo in low light condition. please any comment? am still learning. i just started photography this week with my first dslr canon 650d (T4i). Help me with tips on how to improve. thanks
 

Attachments

  • _MG_0138[1].webp
    _MG_0138[1].webp
    592.5 KB · Views: 164
I shot that photo a few years ago, with a Nikon 24-megapixel full-frame camera and a Nikkor lens. Most likely it was shot with the 70-200mm f/2.8 AF-S VR-G lens, the "first version", and was shot at f/7.1 or f/8 most likely. The lighting was Speedotron brand studio electronic flash, with the 202 Variable Focusing flash head, fitted with a round, 11.5-inch diameter metal reflector, with two or three layters of frosted white mylar diffusing material on the front of the reflector; see the small,pin-point eyeball catchlights?

There is no problem with you using the photo I took...it was a a web upload, and I do not care if peple use, download, or re-post those kinds of shots I have put up on the web. No need for the photo to be linked to or whatever...it's an instructional photo, as are most of my pBase sample pics.

Using the metal-type flash reflectors in smaller sizes,like 11.5-inch, gives a crisp shadow, a smalkl eyeball catchlight, and some definition to the lighting; ADDING the diffusion material to the front of the reflector softens that crispness to a degree, yet the under-chin shadow is still there, and there is a slight nose shadow too. The pure white background was made by a second flash, fired at a white fabric on a PVC pipe frame. The small flash size (11.5 inches, quite small these days!) causes the nose, face,lips, and so on to pick up some very slight highlights that hel;p to define the shape of the face, and to show the skin texture a bit.

 
I shot that photo a few years ago, with a Nikon 24-megapixel full-frame camera and a Nikkor lens. Most likely it was shot with the 70-200mm f/2.8 AF-S VR-G lens, the "first version", and was shot at f/7.1 or f/8 most likely. The lighting was Speedotron brand studio electronic flash, with the 202 Variable Focusing flash head, fitted with a round, 11.5-inch diameter metal reflector, with two or three layters of frosted white mylar diffusing material on the front of the reflector; see the small,pin-point eyeball catchlights?

There is no problem with you using the photo I took...it was a a web upload, and I do not care if peple use, download, or re-post those kinds of shots I have put up on the web. No need for the photo to be linked to or whatever...it's an instructional photo, as are most of my pBase sample pics.

Using the metal-type flash reflectors in smaller sizes,like 11.5-inch, gives a crisp shadow, a smalkl eyeball catchlight, and some definition to the lighting; ADDING the diffusion material to the front of the reflector softens that crispness to a degree, yet the under-chin shadow is still there, and there is a slight nose shadow too. The pure white background was made by a second flash, fired at a white fabric on a PVC pipe frame. The small flash size (11.5 inches, quite small these days!) causes the nose, face,lips, and so on to pick up some very slight highlights that hel;p to define the shape of the face, and to show the skin texture a bit.

I get those accessories with time. For now i only have the canon T4i and its kit lense. No external flash. But thanks for commenting.
 
Keep practicing, keep shooting photos! Your pictures will get better with time and more photos made. Try some tissue paper or thin, milky-white plartic material taped in front of the camera's pop-up flash. You can achieve a LOT with small amounts of equipment if the equipment is used well, and if the concept for the photo is good.
 
Keep practicing, keep shooting photos! Your pictures will get better with time and more photos made. Try some tissue paper or thin, milky-white plartic material taped in front of the camera's pop-up flash. You can achieve a LOT with small amounts of equipment if the equipment is used well, and if the concept for the photo is good.
Thanks so much... I will do just that.
 
Thanks so much. My hands still experience some shake during capturing. Am still trying to be stable.
Holding the camera steady is very important. Tripods and monopods are very helpful. Grip the camera firmly, mash the camera against your nose, tuck in your elbows into your gut ... you now have created a triangle of support for the camera. Your left hand should be flat and under the camera (either holding the camera body or the lens if shooting with a long lens) and your right hand firmly gripping the edge of the camera. DONOT get excited and punch the shutter release button down. Know how far down you need to go to release the shutter. Put pressure on the shutter release button to partially depress the shutter, then, at the right time, s-q-u-e-e-z-e the button to release the shutter.

Remember that practice makes perfect. Have fun on your journey.
 
Thanks... I tried a setting of 1/60 shutter speed, and aperture of f8 on auto ISO, using the AI servo. The result was very sharp..
 
I also applied your method and it works
 

Create an account or login to comment

You must be a member in order to leave a comment

Create account

Create an account on our community. It's easy!

Log in

Already have an account? Log in here.

Back
Top Bottom