What's new

ok, let me have it. Both barels

In my humble opinion stick your camera on AV mode...then it will adjust shutter speed for you :) Also stick to around f4...then you will have more depth of field to play with and more leeway if you make a focusing mistake. Use your camera's center focus point and always try to focus on her face...then move slightly to recompose your shot so she's not so in the center. Put your camera's ISO to around 800-1250...so to make sure indoors you have plenty of shutter speed to work with so your photos aren't blurry due to hand shake. Never let your shutter speed get to below 1/60th. So again to restate your settings...Shutter speed no lower then 1/60thISO 800-1250AV ModeCenter focus pointDon't try and add in any flash just yet... You will only confuse yourself more. Oh and make sure your meter in your camera reads in the middle :)And just have fun shooting and experimenting...don't get discouraged just yet haha.

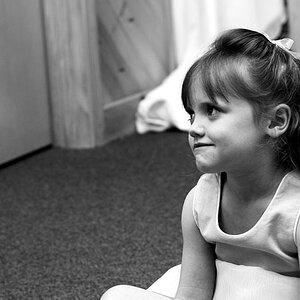
Thank you. I do know I had it in AV mode. After that, all that other info, I don't remember what I had set. I was fiddling around with everything due to panic mode. Take a shot, it was blurry, make an adjustment(any adjustment) then reshoot. Don't remember what the settings were I tried because so many were bad pics. Definitely forgot the whole metering issue. chalk it up to a bad experience and learn from it. The model is a friend of mine and was super patient with me so that helped. She's going to do more shots for me down the road too. She's an outdoorsy kinda girl so I hope to get some of those kinds of shots too. Once mother nature cooperates. Been fricken cold here lately.
 
I don't think there is any reason for anyone to be giving you exactly shutter speeds and apertures and ISO's as the light is going to be different for each shot if you move the subject around. Indoors, just a few feet can make a large difference.

If you are handholding a 50mm on a crop body, then you need to be at least at 1/80th OR bracing yourself against something. If you brace, you can go much lower, but then even more so the subject must hold still.

In my opinion, getting a non-motion-blurred image trumps noise which trumps depth of field which trumps image quality. In that order.

So first and foremost, you want an image that is not motion blurred due to either subject movement or hand shake. So in this situation where you have low light, you first choose an appropriate shutter speed. Brace yourself against a wall and maybe you could even shoot at 1/15 handheld if you are careful and the subject doens't move. Use a tripod and of course you can go lower, but at some point, the subject can only hold so still.

Secondly, choose aperture (Manual mode for the win). For a single person, DoF isn't a big factor unless they're very close to you so I recommend opening it up GENERALLY. However, I know that the 50 1.8 is very soft at 1.8, so try 2.4 or 2.8. 2.8 is SIGNIFICANTLY sharper than 1.8.... Canon EF 50mm f/1.8 II Lens Image Quality

THEN, choose your ISO to expose the image properly. If it ends up being 3200, that's fine; 3200 noise is better than a blurry image.

And make sure you choose the apporpriate white balance. Your images above have a strong orange color balance. This usually happens when you shoot under tungsten while using auto white balance. AWB, at least on the camera's I've used, is pretty conservative and doesn't go far enough. If the light is tungsten, select tungsten.

Now you can take some shots and make minor adjustments. Motion blur still present? Up your shutter speed a stop and compensate with aperture and/or ISO. You'll have to compromise but when you shoot in manual, it quickly becomes second nature to know what settings you are currently on (because you're the one that chose them, not the camera) and you know where you have wiggle room.

Just my opinion.

 
I don't think there is any reason for anyone to be giving you exactly shutter speeds and apertures and ISO's as the light is going to be different for each shot if you move the subject around. Indoors, just a few feet can make a large difference.

If you are handholding a 50mm on a crop body, then you need to be at least at 1/80th OR bracing yourself against something. If you brace, you can go much lower, but then even more so the subject must hold still.

In my opinion, getting a non-motion-blurred image trumps noise which trumps depth of field which trumps image quality. In that order.

So first and foremost, you want an image that is not motion blurred due to either subject movement or hand shake. So in this situation where you have low light, you first choose an appropriate shutter speed. Brace yourself against a wall and maybe you could even shoot at 1/15 handheld if you are careful and the subject doens't move. Use a tripod and of course you can go lower, but at some point, the subject can only hold so still.

Secondly, choose aperture (Manual mode for the win). For a single person, DoF isn't a big factor unless they're very close to you so I recommend opening it up GENERALLY. However, I know that the 50 1.8 is very soft at 1.8, so try 2.4 or 2.8. 2.8 is SIGNIFICANTLY sharper than 1.8.... Canon EF 50mm f/1.8 II Lens Image Quality

THEN, choose your ISO to expose the image properly. If it ends up being 3200, that's fine; 3200 noise is better than a blurry image.

And make sure you choose the apporpriate white balance. Your images above have a strong orange color balance. This usually happens when you shoot under tungsten while using auto white balance. AWB, at least on the camera's I've used, is pretty conservative and doesn't go far enough. If the light is tungsten, select tungsten.

Now you can take some shots and make minor adjustments. Motion blur still present? Up your shutter speed a stop and compensate with aperture and/or ISO. You'll have to compromise but when you shoot in manual, it quickly becomes second nature to know what settings you are currently on (because you're the one that chose them, not the camera) and you know where you have wiggle room.

Just my opinion.

Some of the best advice I've read in this forum. Should be stickied for the rest of us noobs
 
This video helped me understand how to select my settings. You might want to check it out.

 
Last edited by a moderator:
do you all think this flash shot is better than all the other shots?

Better, no. Sharper, yes. So there is marked improvement in that area. I would say for beginning try working with natural sunlight and get a feel for how different types of light effect your exposures. Indoors is not the easiest or best place to start.
 
do you all think this flash shot is better than all the other shots?

Better, no. Sharper, yes. So there is marked improvement in that area. I would say for beginning try working with natural sunlight and get a feel for how different types of light effect your exposures. Indoors is not the easiest or best place to start.

I agree, I personally wouldn't recommend practicing with flash. If you're at your kid's birthday party or something and don't want to blow it, flash away. But when practicing as you are here, it's easier to comprehend what is happening if you are using a constant light.
 
If you do want to experiment with your on camera flash, a very simple and inexpensive way to make better photos with the one directional flash is to bounce it upwards. This can be achieved with a business card and a rubber band.

404807_10150482249356912_500091911_8855712_722873834_n.jpg


408610_10150482237146912_500091911_8855663_452692692_n.jpg


I posted these photos of my girlfriend's old T1i (the only camera that I can find with a pop-up flash) for a friend to help them take better Christmas photos with minimal investment. This trick works great for the 50mm focal length on a crop frame. Any shorter, and you'd see a shadow from the business card. You may need to adjust your flash compensation, and stick to around ISO 400, but the light will be much more even and softer w/o the annoying shadows you'd normally find on pop up flash photos.
 
wow, definitely some great advice here guys. Thank you so much!
 

Create an account or login to comment

You must be a member in order to leave a comment

Create account

Create an account on our community. It's easy!

Log in

Already have an account? Log in here.

New Topics

Back
Top Bottom