See-Thru shots

jocose

TPF Noob!
Joined
Sep 16, 2005
Messages
3,059
Reaction score
118
Location
dans la pissoir
Website
www.musingsofjocose.com
Can others edit my Photos
Photos NOT OK to edit
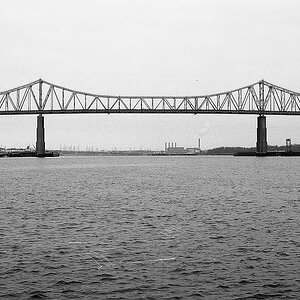
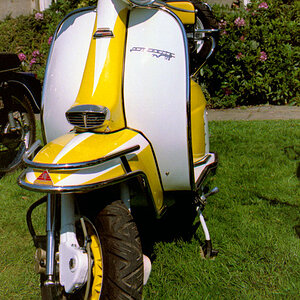
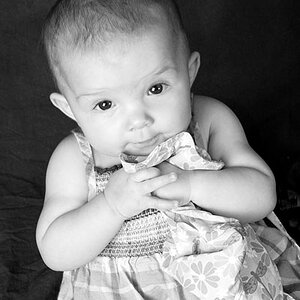
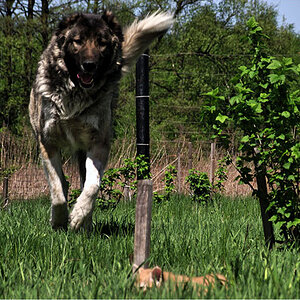
I posted the first two earlier in a thread I dedicated to xmetal, but I see that others are interested as well, so let's start the latest TPF craze!

xmetal1.jpg


xmetal2.jpg


20060129193357_img_5552.jpg


IMG_5560.jpg
 
I don't have the merest idea as to how these are made so i won't be able to contribute much to the thread, but still I think your pics are great! Esp the laptop :thumbup:
 
Alexandra said:
I don't have the merest idea as to how these are made so i won't be able to contribute much to the thread, but still I think your pics are great! Esp the laptop :thumbup:

I'm still learning and getting better, but the concept is relatively easy...just take the shot twice, once with the laptop (for example) lid up and once with it down, then copy the one into the other as a second layer. go to the open one, grap the keyboard, feather it some, save it to a third layer, and play with the opacity.

Does that make sense?
 
I use the eraser tool for a more exact see through area.

Now I have to look around for other stuff that opens and closes and whatnot....
 
  • Like
Reactions: Rob
thats a cool pic, never would have thought of using a model to do that
 
  • Like
Reactions: Rob
jocose said:
I'm still learning and getting better, but the concept is relatively easy...just take the shot twice, once with the laptop (for example) lid up and once with it down, then copy the one into the other as a second layer. go to the open one, grap the keyboard, feather it some, save it to a third layer, and play with the opacity.

Does that make sense?
Sure does. Thanks!
But it's gonna take me months to do it myself :lol:
 
  • Like
Reactions: Rob
Hey I didnt know people did this...I was trying it the other day but I didnt really know what I was doing and I was partly seeing if the camera I found worked. Anyways its the fridge idea again..
53850929-M.jpg
 
obviously a lot of thigs done in PS on thjis. I used these colors and filters to fit my web page. It does need some work, as I am not too pleased with the "see thru" areas yet. I will try more later I guess. Also, I didnt know if I should fade the left eye out, or leave the camera covering it. Any suggestions would be great! (It was hard to get the two shots to match up!)
guklgdul.jpg
 
VERY cool effect. When I'm up to speed (which won't be anytime soon at the rate I'm going) I'd love to give this a try.
 
Makin' these shots!


1. Get the shots together in Photoshop.

tut16qt.jpg


2. Copy and paste the 'closed' image over the 'open' image and line them up. Now you have two layers, the 'closed' over the 'open.'

tut22ia.jpg


3. The erasor tool. This is what I prefer to use however if you want the entire 'closed' pic to be faded, as in the laptop above, you can fade the entire layer out with a filter, I think.:scratch: You can use the erasor for the whole thing, just remember that if your Opacity (top center in Photoshop) is set to anything lower than 100%, everytime you erase something, at 50%, for example and let go of the mouse button, then click it again, you will be erasing what you just erased by another 50%. Go ahead and experiment, Crtl + Alt + Z = Undo.

tut37kn.jpg


4. When using the erasor, you can set size, style and strength. Arrow points to style, the size can easily be changed by moving the slider at the top of the box. For this pic, I used the fuzzy lookin brush at 200 pixels and 4% opacity. The 4% opacity means I had to erase several times to get a clear view of what was beneath. Also note for this pic, I had to go to the 'open' pic and erase the open top thing. I used a paintbrush with the backround color so it would blend nicely. And you're done, hopefully...

tut44em.jpg


Now just merge your layers together (Ctrl + Shift + E) and you can save as a .JPEG.

I use Photoshop 7.0.
 

Most reactions

Back
Top