Wanting to jump into automotive photography

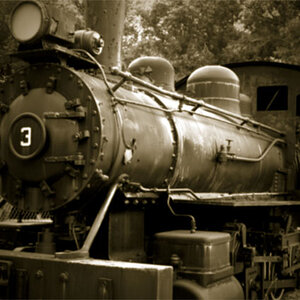
Yup, actually, most shots like these do not even have the engine running. Mostly done with a push in order to reduce motor vibration.


I am currently scoping out the market for this type of photography in my area before i make the jump and start building it.
 
OOOOOOhh! Why use the term "rig"?? Rig could mean ANYTHING on a photography forum! Had you used the word camera support or camera holder or anything, that would have made sense to me.

Anyways about 3 years ago I was looking into this but I wanted a way to use a camera from inside my car as I raced down the track.

Here is what I did via exerpt from my private personal car website :

[FONT=trebuchet ms,arial,helvetica]How is it done: I've always wanted a video camera in the car, but when I did some research on the net, I found some incredible prices for various ways to attach a camera into a car safely. Incredible as in uber-expensive! Liking one basic idea I saw, I took it and went to see if it could be adapted to the way I needed it. After a very crude BETA-1 test of what you see below, I liked it and will make another improved version later this spring or summer, but for now, this one works really well, is sturdy and is CHEAP! One thing that I like is that it can be pointed to the back to film some good "passing shots" (someone suggested that its good for filming some back-seat action... lol).[/FONT]

[FONT=trebuchet ms,arial,helvetica]Parts List:[/FONT]​


[FONT=trebuchet ms,arial,helvetica]3 - ¼ by 2½ inch bolts[/FONT]​

[FONT=trebuchet ms,arial,helvetica]1 - ¼ by 1½ inch bolts[/FONT]​

[FONT=trebuchet ms,arial,helvetica]4 - ¼ inch lock nuts[/FONT]​

[FONT=trebuchet ms,arial,helvetica]4 - ¼ inch washers[/FONT]​

[FONT=trebuchet ms,arial,helvetica]2 inches of plastic hose (it was 42 cents a foot, I bought a foot, but will only use a couple of inches)[/FONT]​

[FONT=trebuchet ms,arial,helvetica]1 - 1"x34" box aluminum (mine came in a 60" length, enough to make 2 if you make it a touch smaller)[/FONT]​

[FONT=trebuchet ms,arial,helvetica]4 - Plastic end caps (just ask for plastic chair caps!)[/FONT]​

[FONT=trebuchet ms,arial,helvetica]This is the camera with all the parts ready to be assembled![/FONT]​

[FONT=trebuchet ms,arial,helvetica]
2463712423_2705f6da0a.jpg
[/FONT]​


[FONT=trebuchet ms,arial,helvetica]
2463712529_ef3af33e30.jpg
[/FONT]​


[FONT=trebuchet ms,arial,helvetica]Instructions:[/FONT]​


[FONT=trebuchet ms,arial,helvetica]1. Cut the box aluminum to the proper lengths. The short piece is about 14 inches long and the long piece is 20 inches. At this point you can decide on the position of the camera in the car. If you want it more towards the center of the car just extend the length of the 20 inch piece. Then temporarily tape the two pieces of box aluminum together with electric tape. Mark the position for the three ¼ inch bolts, and drill the holes with a ¼ inch drill bit.[/FONT]​


[FONT=trebuchet ms,arial,helvetica]2. Remove the electrical tape and bolt the two pieces of box aluminum together with the ¼ nuts, bolts and washers. After you have bolted it together, take your headrest and mark the location for the holes for the headrest posts to be drilled. Drill the holes first with a smaller drill bit. Then step the holes up to the final ½ inch size. Be careful while drilling these holes, since you are drilling in between the two pieces of aluminum the drill bit will have tendency to slip to one side or the other.[/FONT]​


[FONT=trebuchet ms,arial,helvetica]3. The next step is to drill the ¼ inch hole at the end of the longer box aluminum piece for the camera bolt will be placed. [/FONT]​


[FONT=trebuchet ms,arial,helvetica]4. After you have finished drilling all the pieces you will need to go back and clean up all holes and cuts you made, especially the ½ inch holes for the headrest posts. Make sure there are no sharp areas left on any of the pieces. I used a dremel tool with a sander disk (it fits the ½ inch holes perfectly). You can also use a file or just a sheet of plain old sand paper. After you are finished sanding, cut a piece of the plastic tubing just wider than the box aluminum.[/FONT]​


[FONT=trebuchet ms,arial,helvetica]5. The last step is to assemble all the pieces and do a test fit on the headrests. With all the bolts loose you should be able to slide the headrest posts into the rubber sleeves (it should be a little snug). If you can't, go back and sand a little off the ½ inch post holes. Retry. If everything fits, tighten the bolts down and make sure the mount is firmly attached to the headrest. That's it! You just built yourself a camera mount for you car for under $35. Now go out and get some awesome video![/FONT]​


[FONT=trebuchet ms,arial,helvetica]A few more pictures:[/FONT]​


[FONT=trebuchet ms,arial,helvetica]
2463712347_582bcdfc0b.jpg
[/FONT]​

2463712217_938cf732fb.jpg

2463712095_d9e1957805.jpg


I used it to take pics via remote control from my Nikon E8800 or Sony video camera.

VERY cheap to make and uber-easy! Hope it gives you an idea. :)
 

Most reactions

Back
Top