Kerbouchard
TPF Noob!
- Joined
- Apr 1, 2010
- Messages
- 2,697
- Reaction score
- 575
- Location
- DFW
- Can others edit my Photos
- Photos OK to edit
You really haven't 'recovered' any data. You have simply created new data to replace what was not there to begin with.
The 'data' is there. It is just in a different channel. If I would have had a bit more time, it would have been better balanced. Like I said, it's just a 2 minute edit.
As is, I would probably put my version over the original at about 60% opacity to create a final. With the original file, a lot more data could have been recovered(or as you prefer, recreated).
Last edited:

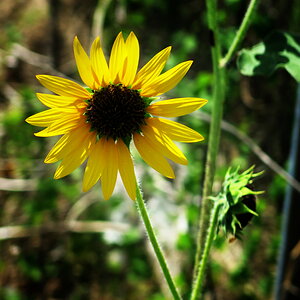
") . Create an empty layer above the background layer. Paste a copy of the blue channel into that empty layer and set the blend mode to Luminosity. The tone response of the blue layer is now the tone response of the image. The result is a disaster since you only want the blue channel tone in the blown highlights, not the rest of the photo -- you need a layer mask. You'll have to add a highlight layer mask to the blue channel. You've got tone now but you're still missing color where the original highlights blew to white. Create another empty layer above the blue channel layer and sample a highlight color from the background layer. Paint bucket that color into the empty layer and set the blend mode to Multiply. Again you'll need a layer mask to restrict the color to the highlights. In the illustration below I marked locations where the blue channel was clipped, the color there now is from my flat color layer -- you see it in the leaf. It's color without texture and as such is non-photographic -- beyond repair.
. Create an empty layer above the background layer. Paste a copy of the blue channel into that empty layer and set the blend mode to Luminosity. The tone response of the blue layer is now the tone response of the image. The result is a disaster since you only want the blue channel tone in the blown highlights, not the rest of the photo -- you need a layer mask. You'll have to add a highlight layer mask to the blue channel. You've got tone now but you're still missing color where the original highlights blew to white. Create another empty layer above the blue channel layer and sample a highlight color from the background layer. Paint bucket that color into the empty layer and set the blend mode to Multiply. Again you'll need a layer mask to restrict the color to the highlights. In the illustration below I marked locations where the blue channel was clipped, the color there now is from my flat color layer -- you see it in the leaf. It's color without texture and as such is non-photographic -- beyond repair.


![[No title]](/data/xfmg/thumbnail/31/31035-96228fec87f6f8e8b5f3db4e93e99189.jpg?1619734580)