2nd time doing dog portrait.

zombiesniper

Furtographer Extraordinaire!
Staff member
Joined
Jun 23, 2015
Messages
8,525
Reaction score
6,427
Location
Petawawa, Ontario
Website
www.trevorbaldwin.space
Can others edit my Photos
Photos NOT OK to edit
Lat time was a little dark so on to try number two.
The lighting setup was one light with soft box above to camera right 3' 1/3 power
one light camera right even with her head 4' 1/4 power
Fill light on the left 4' 1/4 power
Settings were
Canon 7Dmk2 and 70-200 F4 @ 168MM
1/200 F4 ISO 200
I think I could have brought the fill light camera left down a bit to provide a bit more shading to the left of the image.

Luna by Trevor Baldwin, on Flickr
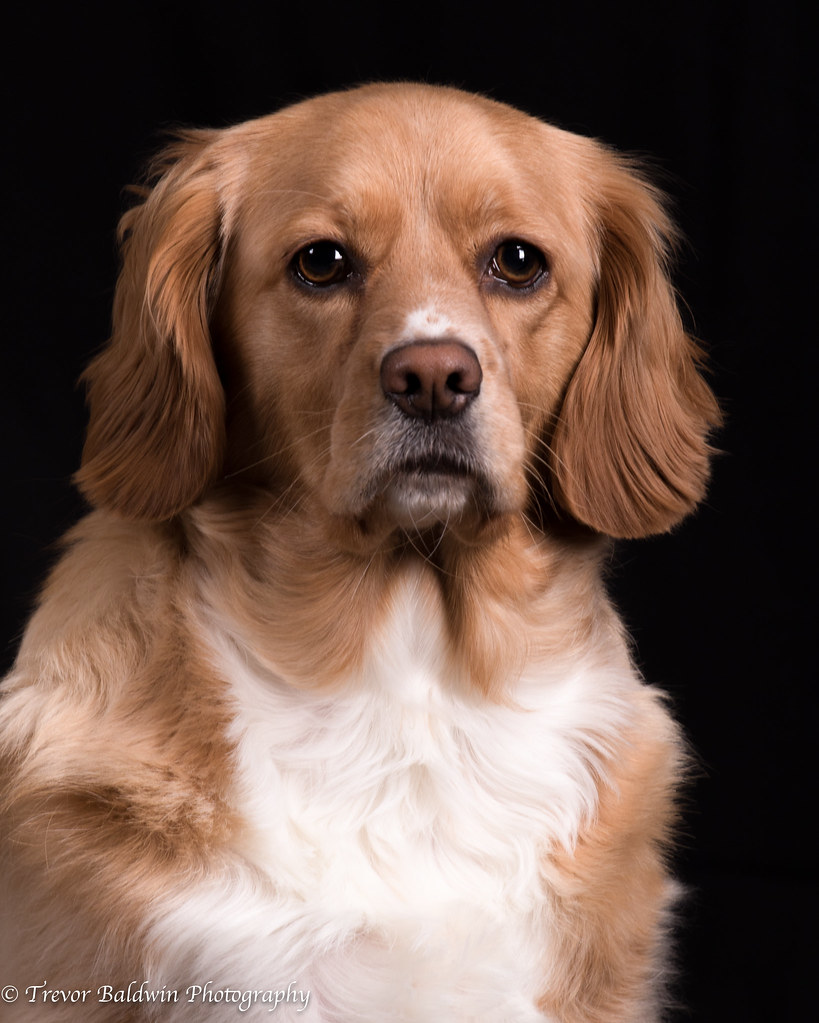
 
Nicely done! I think you've got that just about spot-on, 'though I did find brightening it by 1/3 stop really seemed to make it pop.
 
This is actually what the title says: a real, genuine dog portrait. Pretty good rendering of the dog! Good use of the frame's space. And framed right, as a tall, on a tall pose! Bonus points!

I agree with Tirediron: the first version is just a little bit too dark, not by much, but a weeeee bit 'flat' overall; the second version is more pleasing, brighter, snappier, pleasing. I like the slightly darker chest fur rendering in Shot #1...that's less-drawing to the eye than in #2; maybe burn down the chest fur in shot #2 with the burn tool and Minus 0.25 or so for a little bit at low intensity.

(Addendum: I meant Minus 0.25 EV, in about four, or five separate passes, as opposed to Minus 1.0 in one, single operation.)

But like, yeah...wow! Studio lighting...you are DOING IT!!!!
 
Last edited:
Thank you for all of the great suggestions.

I like the slightly darker chest fur rendering in Shot #1...that's less-drawing to the eye than in #2
Good point. I could also turn the light at her head level camera right down to 1/8 and the overhead camera right up to 1/4...or mess with them until I light her chest fur a bit less.
 
.....or mess with them until I light her chest fur a bit less.
Honestly? I wouldn't fuss with that too much. Burning that in LR or PS is so easy that it doesn't make sense [to me] to spend a half hour moving lights a bit here and a bit there, bumping power levels by 1/32 of a stop... You want to get the image as good as you can in camera, but you'll never get it perfec.t

Agreed...make a virtual copy in LR, then take the Adjustment Brush in Lightroom, and make a 45 to 60 diameter burn brush, set it to Minus 0.25 EV, and start making some circles with the brush...click DONE, and look at it...ought to be perfect. If it needs more, hit it again a lil' bit. POOF! Perfected lighting. 20,30 seconds time.

I've started using Lightroom's dodge and burn tools more than I EVER wanted to with two decades' worth and more with Photoshop...it's so easy, and this image is very solid to begin with.

In the old days, before easy image adjustments on parametric editors, like Lightroom, Arnie Frietag at Playboy said he often would use 10,11,12,13 light to get things right. On one shot, he used 17 lights, he said. That way of shooting, of doing ALL of the lighting adjustments in-camera, has passed us by mostly.

My only suggestion would be to start exploring ways to light the black backdrop you've got. Aiming one light back at it, from mid-back height, will create a lighter center, and a dark edge. Using different focal length LENSES will show more of the background (50mm from8 feet), or LESS of the background light-burst (85,100,135,200mm lens) from longer shooting distances.
 
On one shot, he used 17 lights, he said. That way of shooting, of doing ALL of the lighting adjustments in-camera, has passed us by mostly.
Dayyyy-ammmmmmmm! 17lights... :eek-73: I don't even own 17 lights. Of course I'm pretty sure I don't make what Arnie did either. I wonder how many Polaroids he burned through fine-tuning a 17 light set-up???
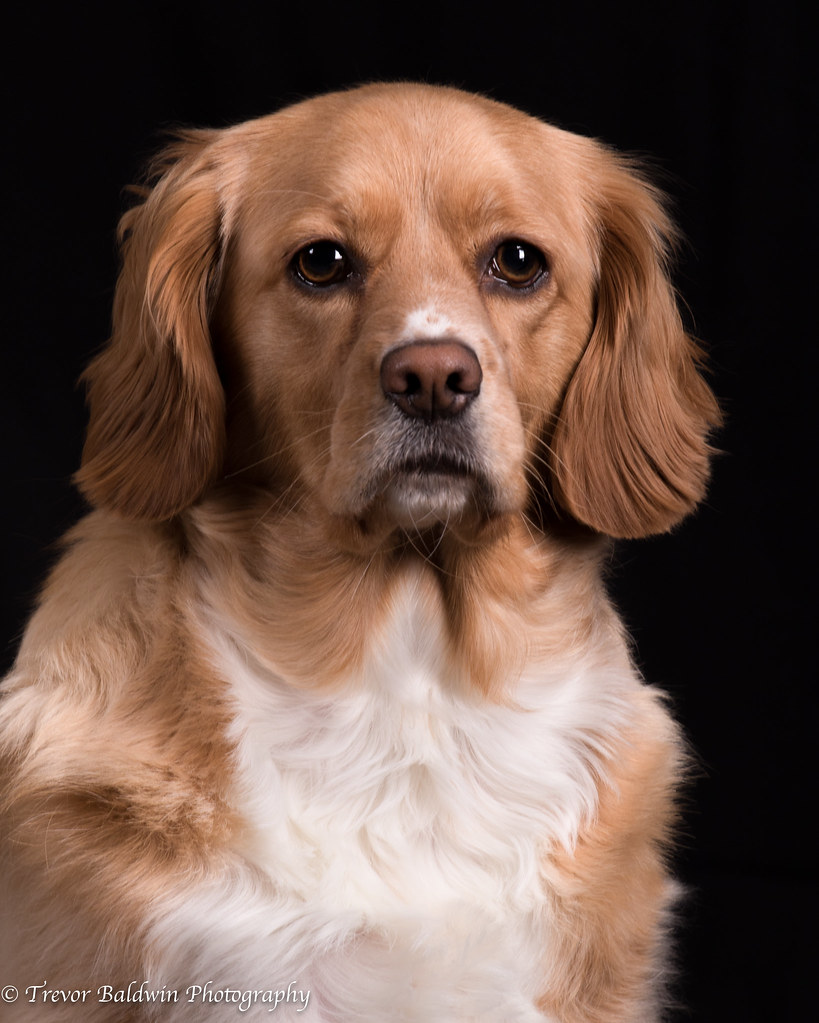
 
He used a LOT of small, hot lights, snooted, gridded, to get the kind of highlights and soft, specular light we can now literally "paint on" with the dodge tool. it is now very common to "paint on" a lightening, a soft, diffuse highlight on noses,cheeks,forehead,brow line, and so on.

But back to the zompiensiper dog portrait: Lightroom's automated masking identifies the white fur automatically. Basically, with a good raw file from a modern camera, and decent lighting, adjustment is easy.

What I **did find impressive** was zombiesniper using two lights...one for top lighting, and one for the lower part of the shot; that's a method many people seem to forget on "talls", especially with people, and in small studios, at close light-to-subject distances: the bottom of a tall frame will often be under-lighted with just a single light source, especially when that light is CLOSE to the subject, and the rate of Inverse Square fall-off is very rapid.
 

Attachments

  • chest burn in LR.jpg
    chest burn in LR.jpg
    118.2 KB · Views: 122
Yessssssssssssssss! Nailed it.
 
Thank you.

As for my 2 lights on one side. Thats where the modelling light helped out. With them on I could see shadows under her muzzle and the fall off on the chest so I used the second light as a right side fill.
 

Most reactions

New Topics

Back
Top