- Joined
- Sep 2, 2003
- Messages
- 36,798
- Reaction score
- 9,594
- Can others edit my Photos
- Photos NOT OK to edit
- Admin 🛠️
- #1
I made this IT from a cell phone shot as we were approaching the Louvre in Paris last summer (the guy in the foreground with the camera bag is my husband).

The background is a collage from cut-up pieces of background papers I've made with my gel plate. I glued them with gel medium to a 5x7" wooden panel as I arranged them, then painted gel medium over the top to protect the paper.

Here's the original cell phone shot:

Nothing wrong with this shot, really. Just typical. I converted it to B&W, printed it out (reversed) on my laser printer and cut out the sky completely. Coated the collage yet again with gel medium, then placed the image face down and let the paper dry. Peeled off the paper backing and the transfer was complete.
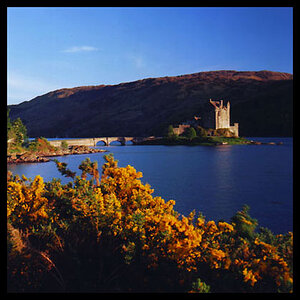
This one was made from an image I shot with my Holga, walking through Soho, London last summer. It's mounted on a square wooden panel - the base color/pattern is also from background paper I made on my gel plate. Same process.
This transfer fought with me a little bit as I removed the paper backing, and it ended up looking a mite grungy - but since that matches Soho, I'm letting it slide here. Funky little store.

Different process on this last one - also from a Holga shot, taken in Paris. Here I actually took a few WIP shots, since I was using acrylic paint for the background.

This is another 6x6 square wooden panel. I painted the background first so I could get the colors I wanted. There's the reversed laser print.

Looks pretty ugly by itself.

I let the acrylic paint dry over night, so I could paint over it with gel medium, then place the print into it while still wet. Let that dry overnight.

Then start the peel-off process. And done.

A messy process but such fun! Thanks for looking!
The background is a collage from cut-up pieces of background papers I've made with my gel plate. I glued them with gel medium to a 5x7" wooden panel as I arranged them, then painted gel medium over the top to protect the paper.
Here's the original cell phone shot:
Nothing wrong with this shot, really. Just typical. I converted it to B&W, printed it out (reversed) on my laser printer and cut out the sky completely. Coated the collage yet again with gel medium, then placed the image face down and let the paper dry. Peeled off the paper backing and the transfer was complete.
This one was made from an image I shot with my Holga, walking through Soho, London last summer. It's mounted on a square wooden panel - the base color/pattern is also from background paper I made on my gel plate. Same process.
This transfer fought with me a little bit as I removed the paper backing, and it ended up looking a mite grungy - but since that matches Soho, I'm letting it slide here.
Funky little store.Different process on this last one - also from a Holga shot, taken in Paris. Here I actually took a few WIP shots, since I was using acrylic paint for the background.
This is another 6x6 square wooden panel. I painted the background first so I could get the colors I wanted. There's the reversed laser print.
Looks pretty ugly by itself.
I let the acrylic paint dry over night, so I could paint over it with gel medium, then place the print into it while still wet. Let that dry overnight.
Then start the peel-off process. And done.
A messy process but such fun! Thanks for looking!


![[No title]](/data/xfmg/thumbnail/34/34691-2fa9779b0e77f698b193a633b9242553.jpg?1734165697)
![[No title]](/data/xfmg/thumbnail/34/34692-a218056da5698d6c9b7cf734f656562d.jpg?1734165698)