Astrophotography Critique

naiku

TPF Noob!
Joined
Mar 23, 2017
Messages
33
Reaction score
7
Can others edit my Photos
Photos OK to edit
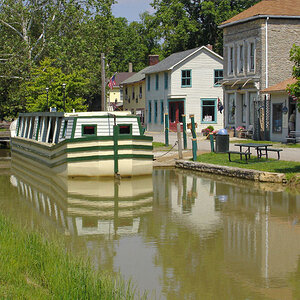
I am definitely what you would call a beginner, trying to have some fun with astrophotography since the sky gets pretty dark out here, Skyline Drive is 10 minutes away etc. Shooting with a Nikon D3200 and using a Tokina 11-16mm lens.

This is one of a set of images that I took, I did some editing in Lightroom:

wwiMDhZ.jpg


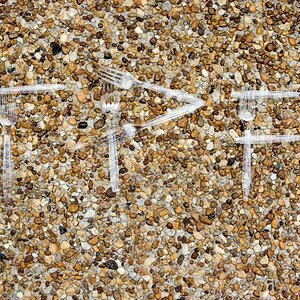
The second is a merged set from Photoshop with a Median filter applied, while I like the look of it, I don't like how I lost so much of the details:

yd6uDgM.jpg


Any tips? suggestions? I can upload an original version to show what they started out as.

Thanks.
 
I like the first one.
The mountains are a little bit noisy though. You could make an extra exposure for this area (using bulb) and mask it in in photoshop.
Regarding the median filter: I didn´t have much luck with it either. On some images it works, on others it doesn´t.
I´d love to see the raw file.
 
Thanks, I am looking forward to trying again at some point. My oldest son likes to head out with me (budding astronaut) so it is really enjoyable time out there together.

Here is a link to one of the originals:

DSC_0011.NEF
 
Cool - I love to play with milky way images. I spent more time on it than I planned :D
For my taste you introduced a little too much noise when working on it, but editing milky way images is always a question of personal preference. Here is my try:
DSC_0011_copyright_Naiku.jpg
 
The stars look good (nice & round ... some degradation near corners but that's common) but the image looks over-processed.

I did a combination of both Lightroom and Photoshop processing to try to clean up some noise and the light dome on the horizon.

In Photoshop, I duplicated the background layer to make a copy that I would de-noise using whatever favorite tool you like (Nik Dfine2 or even Photoshop's own built-in tools). But de-noising also softens an image so be careful not to take it too far.

There is often more noise in shadows and less in highlights. You can create a layer mask on your de-noised layer. Copy the original image (select that layer, do a select-all on the image (ctrl-a or cmd-a) then ... and here's the trick ... ALT-CLICK ON THE LAYER MASK. Don't just click it (which would select it) but if you alt-click it, that selects AND makes it displayed in the main window.

Now do a ctrl-I (or cmd-I on Mac) to past the image into the mask. Since a mask can only be black & white, you'll get a black & white image in your mask.

In a mask, anything "white" blocks you from seeing through the mask. Anything "black" can be thought of as a hole in the mask -- you can see through it. Anything "gray" is partially masked (blended)

The idea is that the bottom layer (the background layer) has the original image. The top layer (the copy of the background) has been de-noised... globally (without respect to where de-noising is or isn't needed).

When you create a black & white negative of the image and use it as a mask (which is what these steps did) most of the image (dark sky) will now be "white" which means that all the near-black background of space will be used from the de-noised layer. But all the stars and any bright detail areas with brighter nebulosity, etc. will be darker (because it's a negative) and that means it will use the original data (not de-noised).

The result is that the darker the area of the original image... the more aggressively it is de-noised. The brighter areas (which tend to show less noise) are not de-noised as aggressively.

This is a common astrophotography technique to reduce noise.

But be careful not to go overboard. I moderately de-noised in photoshop and used the mask.

I also created a curves adjustment layer to slightly darken the background and slightly brighten the highlights.

Then I saved the image and took it back to Lightroom.

In Lightroom I used two stacked gradient filters on the bottom to darken the bottom of the image. One gradient went about half-way up the image. The second was a bit more aggressive but only went up to the tops of the hills. This is to try to compensate for the light pollution near the horizon.

I also did some white balance correction (by eye - nothing formal) to reduce the orange cast. (I also applied more of that to the gradient filter to help tame the orange near the horizon).

I applied slightly more noise reduction in Lightroom (gently - trying to avoid over-doing this as it destroys detail.)

I also used a "brush on" adjustment to slightly raise highlights by making a broad brush with a strong feather to gently touch up the Milky Way. Usually I set slightly more adjustment than needed to the brush so I can see the change as I apply it to make sure I'm getting the areas I want... then I bring back the adjustment slider so that it's just a moderate adjustment before closing out the tool.

Here's the result of just a few minutes working on it.

DSC_0011-Edit.jpg
 
Thanks both, that's some great information TCampbell! Especially as I am learning Photoshop/Lightroom as well.

I definitely agree that there is a lot of personal preference in these type of images, but was also thinking mine may be a little heavy handed with the adjustments.
 
You guys know of any good Photoshop tutorials? I always have a hard time with gradient filters and can never figure out exactly what I am doing wrong with them. Figure some beginner tutorials maybe the way to go.
 

Most reactions

Back
Top