Backdrops

RumDaddy

TPF Noob!
Joined
Jun 9, 2009
Messages
210
Reaction score
1
Im gettng started with my backdrop kit, I figured b4 I waste the entire morning and part of the afternoon, and perhaps even into the night. :lol: I figured I ask for a few pointers b4 diving in.

Any suggestions on camera settings for a White Backdrop. OR power settings for the two softboxes.

Im using a canon 50D with a 28-135 mm F.3.5 lens

Here is the light kit I bought

Steve Kaeser Backgrounds & Accessories

FAN300-DIDACTIC.gif


FAN300_REARVIEW.jpg


x 30"S[FONT=arial, helvetica]oftboxes for the FAN300B (2343)[/FONT]
1...Pro [FONT=arial, helvetica]HD 160-A 160 w/s variable High Performance strobe (HD2310)[/FONT]
1...Pro 24"x 24"S[FONT=arial, helvetica]oftbox for HD 160-A strobe hairlight (2342)[/FONT]
1...[FONT=arial, helvetica]Four leaf barndoor with honeycomb diffuser and gel-set (7121)[/FONT]

3...

24170.jpg
 
Im gettng started with my backdrop kit, I figured b4 I waste the entire morning and part of the afternoon, and perhaps even into the night. :lol: I figured I ask for a few pointers b4 diving in.

Any suggestions on camera settings for a White Backdrop. OR power settings for the two softboxes.

Im using a canon 50D with a 28-135 mm F.3.5 lens

Here is the light kit I bought

Steve Kaeser Backgrounds & Accessories

Well there is no magic basic setting for the lights. The power level is based on several factors including, light power, subject (is it dark, light, reflective, size, etc..), the effect you want from the lights, and the distance the lights are from the subject. Moving the lights closer / farther is like changing the power level. So there is alot of variables to power levels. It's determined basically on a case by case basis. Now if you never move them, or change light modifiers, you will develope a basic setting for your studio configuration. An expample of this would be the department store studio. They don't move the lights and subjects always in same spot. So, they use constant power settings (doesn't mean its always right, but normally close enough for the customers).

Basically set them up and start practicing. A flash meter would help quicken things up. But trial and error method will not take to long to get dialed in. Just remember, the further away the more power you need. Of course there is math you can do. But I just either adjust power or move the lights. By the time I do the math, I could have been done. :lol: Even though I have a meter half the time I just adjust by eye. The meter definately helps with initial settings though. As I can't leave my stuff up all the time.
 
As mentioned, we can't give you the setting...there are too many variables. You will have to set it up and figure it out for yourself.

Take note that to get your background to photograph as white, you will probably have to light it separately from your subject. Light falls off with distance, so the light that is hitting your subject will be less bright by the time it hits the background...and for a white background, you may want/need more light on the background, not less.

So when you set up your lights, have one or two of them pointed at the backdrop and not on the subject.
 
As mentioned, we can't give you the setting...there are too many variables. You will have to set it up and figure it out for yourself.

And be thankful you are living in the digital age which should save you a lot of time.
 
How about camera settings?
It will have to be in Manual mode.

Set your shutter speed lower than your max sync speed. 1/160 or 1/125 should be safe. It has no bearing on the exposure when it comes to flash/strobe lighting.

Your aperture setting, along with the flash power setting (& ISO), will determine your exposure. So that's one that you will have to figure out for yourself.
 
Thanks Mike, Im about to head out into my garage/studio and get started thanks again.
 
Thanks Mike, Im about to head out into my garage/studio and get started thanks again.

I think before you head out to the garage, go spend 20-30 hours over on the Strobist website. Look for lighting 101 and 102.
 
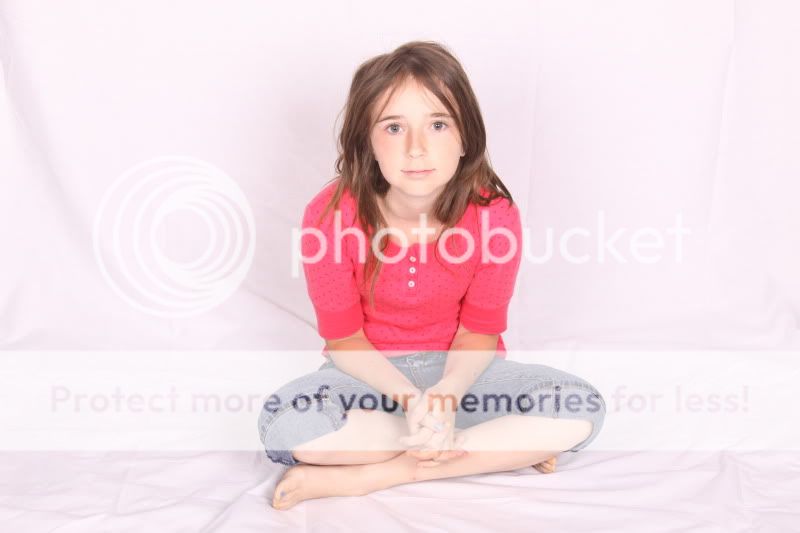
After a little trial and error I ended up with this one. I know its not perfect. My model Amber needed a break so I thought Id share.

IMG_1188.jpg
 
The next purchase should be a quality light meter like the L358. It will give you your settings in seconds.
 
A good start.

The light is even & flat, looks like you had two lights (maybe more?) and they were either side of her, both firing at the same power. The result is practically the same as using on-camera flash. It's not wrong, but it's not what we would typically think of a nice portrait lighting.
Try turning one light down, or using only one at first. The stronger light will be your 'main or key' light. This light is to give your subject shape and form. It should cause some shadows to be seen. The other light is your 'fill' light and it's job is to control just how dark those shadows are. If it's too strong, then the shadows disappear altogether...which is what you have here.

Also, there seems to be a pink hue to the whole shot. Maybe your WB is off.

As I mentioned before, you can make the background brighter/whiter by adding light to it, without adding that light to the subject. It will make things easier if the model is farther away from the backdrop.
 
I got a hairlight/boom thingy. But the flash wont trigger. Or basically wont work at all even when I hit it manually. I also have the barndoor light, how ever my subject just jumped ship and headed down the st to grandmas :er:

Light meter, I was told to get one yesturday as well.
 
All the pink is splash from her top. If you keep your model further from the background (several feet) that won't happen. That's to bright a color of clothing for a portrait.

If you are going to use two lights, like Mike said set your lights to a ratio. Better still for portait quality light, put your 2nd lower powered light on the lens axis behind and above you. In this configuration it is a fill light. If you put the second light to the side, it is no longer fill, just a second light.

The problem becomes competing shadows on opposite sides of the models face (or mask, as it's sometimes called) in a 2 light setup as opposed to a main and fill light setup.

A Sekonic L-308S will do all of what you need, and cost less than the 358. You'll just wind up moving around your 'studio' a bit more.

Have you seen the online Photoflex Lighting School?
 

Most reactions

New Topics

Back
Top