Calculating field of view

Mystery

TPF Noob!
Joined
Nov 28, 2012
Messages
42
Reaction score
3
Location
Las Vegas
Can others edit my Photos
Photos OK to edit
I am a beginner in photography, so pardon me if this is a basic question. I have just started to look for some books and I assume that when I get a few, this will be something I will learn. In the meantime, though, I have found the forum helpful and hope someone can help me out a little with this. I am shooting product photography of items ranging from just a few inches up to items that are a couple feet tall and wide. I am currently shooting on a Nikon D40 with the 18-55mm kit lens. I plan to upgrade my camera soon, possibly to a D7000. For now, I'd like to try and get some better images with the camera I have by adding a new lens. I was looking at something like the 60mm f/2.8 AF-D for the small stuff, but I think I will have issues with that on the larger items. What I don't have a handle on yet, is calculating what field of view I will have and trying to figure out how close/far I must be to the subject with a particular lens. I use my 18-55 pretty much opened all the way to 18 for all of my shots and I just barely get some of my products in the frame at the distance I am shooting. I could certainly move further away from the subject, but then I lose quality of the image. With a 60mm lens, I will get great macro shots, but I will get an evan smaller field of angle for the larger items. So I figure this is not ideal for what I do. So, the first part of my question is, what lens should I be using for the larger products so I can get a close shot of about 2ftx2ft in the field of view at a close distance? And the second question is, is there an option for a lens that will do both the close up work of the small items and the larger ones. Or is that pretty much my kit lens that I am already using? Finally, how will the macro lens work on items in between that are about 1ftx1ft? I'm just a little confused!
 
The problem with your approach is that the closer you are to the objects, the more you get geometric distortion. If would be better to be further away, and use a longer lens to make the objects the same size in the image. There is no reason why you'd lose quality of image by moving further away, unless you're planning to crop severely and are using a low megapixel camera. If I am not understanding your question, perhaps you could post an image of what you're doing, and then we can diagnose what the issues really are.
 
The problem with your approach is that the closer you are to the objects, the more you get geometric distortion. If would be better to be further away, and use a longer lens to make the objects the same size in the image. There is no reason why you'd lose quality of image by moving further away, unless you're planning to crop severely and are using a low megapixel camera. If I am not understanding your question, perhaps you could post an image of what you're doing, and then we can diagnose what the issues really are.

I meant that I would lose quality from cropping. I guess if I zoom in to fill the frame instead of cropping, I will be ok. You are right that I have been making a rookie mistake of moving in close rather than letting the camera do the work for me. I will readjust my setup and move back.

With what I'm doing, will I really be able to tell difference in quality by getting a better lens? Or should I just stick with my 18-55? I've never used a high quality lens, so I don't know if I will really be able to tell the difference. I am doing a lot of touch up on the images, and I would love to have a larger image than what I am getting now. So, maybe what I really need is the higher megapixel camera like the D7000 and forget the glass for awhile. I have lots of other gear I could spend the money on if I don't buy a lens.
 
I don't see that calculating field of view is a much of an issue, if you're using a prime then you just move forward/back until the subject's framed how you want. You could get yourself a decent 50mm prime to experiment with (The Nikon 50 1.8D for example), they're cheap, have very little distortion and good IQ. Only thing with that lense is that it has no AF motor so it'd be manual focus only on your D40.
 
First off, if you doing product photography, lighting is a major issue. Check out some of the product photography threads on this web site and you'll find a wealth of information on lighting for best appearance, reduce/eliminate shadows, etc.

Next, is to know your equipment and what it can do as well as its limitations. Taking pictures to put something up on ebay can be done with a point and shoot camera and the item will likely sell. Taking pictures of high-end home furnishings, on the other hand, require a great deal of time, expertise, and equipment to get the best images. Yes, it all takes time to learn.

As far as your your product photography, shooting from a few inches away, you will need to know the minimum focusing distance capabilities of your lens(es). You also need to learn about depth of field and how to control it, achieve it, and change it when needed.

As you already seem to realize, your kit lens isn't the sharpest in Nikons' lens lineup, and shooting wide open is likely the least sharp aperture that nearly all lenses. So, in your learning journey, you should familiarize yourself with what kind of lens(es) you'll need and then go find one to fill those needs. I felt like a traitor just by looking at Nikons' web site, but here's a downloadable PDF that shows their lens lineup fairly well. You'll have to dig deeper into their web site to find field of view information on each specific lens. http://imaging.nikon.com/lineup/lens/pdf/nikkor_lenses.pdf

Good luck, and happy shooting!
 
The thing we don't know, and which will heavily influence the answer we give you, is how the final image will be viewed. If you're talking web display only at (say) 3x4 inches of screen resolution, you're looking at an image of about 300x400 pixels (120KB). Any detail you gain with a better lens will be lost in the resizing for the web. If, on the other hand, you're printing catalogue images at 200 dpi, and printing them at 8x10 inches, you're dealing with image size of 1600 x 2000 pixels, still well within the native resolution of most cameras, and even if you crop, you won't be losing much detail. As bratkinson pointed out in his first sentence, lighting is the major issue, as it is the shadows that reveal texture, show curvature and mimic depth. It takes some good knowledge with light management to make that work for you. So my take on it (not seeing any images of your work), is that you will be getting more results by focusing on lighting. The second improvement will be to do the post-processing work involving sharpening (all digital images have to be sharpened to an extent), contrast and level adjustment, white-balance adjustment, etc. Note that post-processing on RAW files is much preferable to trying to edit JPG images.
 
I do product photography (which is about as vague as saying 'I can cook') and I generally use an 85 mm lens on full frame, unless I am shooting scale models and toys from the scale perspective or have to use a wider lens because of space constraints in the studio. The same goes when I use larger format - I use a 90 mm to 100 mm equivalent lens. Often I would prefer a 120 mm equivalent.

It is easy to work out fields of view in terms of linear dimensions. It is just simple proportions. Let's say that the D40 has a 24 mm wide sensor. If you use a 60 mm lens the width:distance is about 24:60 or 2:5 or 4:10. If the camera is 10 ft from the subject, the field of view is 4 ft, and so on.

if you want, you can use a multi-purpose smartphone or iPad app. I like DoFViewer.

PS if you are shooting for a catalog then you should probably aim for enough camera resolution to produce 300 ppi over the area that will be printed, even though the image will not be printed at that resolution.
 
Last edited:
The thing we don't know, and which will heavily influence the answer we give you, is how the final image will be viewed. If you're talking web display only at (say) 3x4 inches of screen resolution, you're looking at an image of about 300x400 pixels (120KB). Any detail you gain with a better lens will be lost in the resizing for the web. If, on the other hand, you're printing catalogue images at 200 dpi, and printing them at 8x10 inches, you're dealing with image size of 1600 x 2000 pixels, still well within the native resolution of most cameras, and even if you crop, you won't be losing much detail. As bratkinson pointed out in his first sentence, lighting is the major issue, as it is the shadows that reveal texture, show curvature and mimic depth. It takes some good knowledge with light management to make that work for you. So my take on it (not seeing any images of your work), is that you will be getting more results by focusing on lighting. The second improvement will be to do the post-processing work involving sharpening (all digital images have to be sharpened to an extent), contrast and level adjustment, white-balance adjustment, etc. Note that post-processing on RAW files is much preferable to trying to edit JPG images.

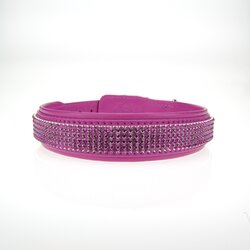
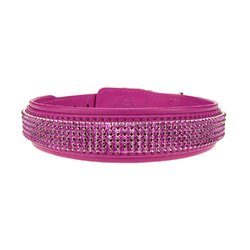
I'm shooting for web and print. Our print is mostly for magazines and catalogs, so nothing like big posters or anything. While that could very well be something we need in the future, we just don't need it now. Here is an example of one of my latest images, raw and post.

$0805.jpg$0805a.jpg

I am using the setup shown in this thread (http://www.thephotoforum.com/forum/...ackground-product-photography-problems-2.html), but I already returned the cowboy studio lights because they were junk. I am now looking for flashes after learning how hot the continuous lighting gets for photography! I have some manual flashes a friends was kind enough to let me borrow, I will be setting them up this weekend to start learning how flashes work. I don't have any modifiers after returning the softboxes, but said friend has plenty he will let me borrow once I get the hang of the flashes. In the image here, you can see the distortion on the sides from being too close. I will move back from now on and hope to see that go away (thanks pgriz!) I find it difficult to light the crystals so they sparkle, so I used a combination of lightening and sharpening in post to get them to sparkle in the finished image. I primarily do design and manufacturing work. For example, I designed and made the dog collar in the photo. So, I am more of an illustrator user than photoshop. I've always been very amateur with photoshop. I feel like I'm getting the hang of it now, but I have a lot to learn. I hope as I learn more about photography, I can just get better images off the camera and have less post to do.


I do product photography (which is about as vague as saying 'I can cook') and I generally use an 85 mm lens on full frame, unless I am shooting scale models and toys from the scale perspective or have to use a wider lens because of space constraints in the studio. The same goes when I use larger format - I use a 90 mm to 100 mm equivalent lens. Often I would prefer a 120 mm equivalent.

It is easy to work out fields of view in terms of linear dimensions. It is just simple proportions. Let's say that the D40 has a 24 mm wide sensor. If you use a 60 mm lens the width:distance is about 24:60 or 2:5 or 4:10. If the camera is 10 ft from the subject, the field of view is 4 ft, and so on.

if you want, you can use a multi-purpose smartphone or iPad app. I like DoFViewer.

PS if you are shooting for a catalog then you should probably aim for enough camera resolution to produce 300 ppi over the area that will be printed, even though the image will not be printed at that resolution.

Thanks, that's exactly what I was looking for! Makes sense now.

As for the image size, I am starting with the web stuff so I can avoid anything ugly in print. But I have a question about resolution because it confuses the crap out of me. I found out that I had the resampling checkbox on in photoshop and that is bad when resizing images. I saved all my web images from 240ppi to 300ppi at 1500x1500 for my master images, then batched those to 72ppi at 1500x1500 for my web images. Some images were scaled down, some were scaled up to get them to 1500 pixels square. Did I do that wrong and make them worse by resampling? The relationship between resolution for digital and print has always confused me, I am getting a handle on it though. I just am not sure if I am doing things right!
 
I don't know if you mentioned it, but I am hoping you are shooting everything in RAW, as that gives you editing headroom. Getting shiny things to sparkle involves careful placement of lights. One of the regular posters on TPF, Bitter Jeweller, makes handmade, custom jewellery and has in the past shared his techniques of shooting his pieces with us - there is a lot of management of shadows and highlights. If the items you are shooting are all quite small, then perhaps an 18" lightbox would make sense to build or buy (see Do It Yourself Photography Light Box for Under $40, or Photek Digital Lighthouse DLH-18/27 B&H Photo Video, or others if you google "Table-top Light Box"). I have one and it is quite versatile, but you need to experiment to see which lighting approach gives you the best results.

As for resampling, I would avoid resampling until you are ready to save your "final" jpg in whatever size you need. This means that your master "RAW" file stays at whatever native resolution your camera is capable of. Your edits to it are "soft edits" using Lightroom or similar software that adds the editing commands carried out as additional bits of information stored with the image and do NOT change the original image. From this master, you will then resize to the size you need and save it in a loss-less format (not jpg). You will need to apply a final sharpening pass after resizing. Then you can produce a "final" jpg from this resized (and resharpened) file. Others may use a different workflow, but what you want to do is do your editing in a way that does not mess up your original image. This also means that you will use the same master to produce various-sized intermediate files which are intended for different purposes. You may also have to change your color space to match whatever your final display medium will be, so for web imaging, that would be RBG, whereas for printers it may be a different color space (and a different print profile may be associated with each printing device).

I don't recall seeing you mention using a tripod, but that would be one of the more important things I can suggest, as it will allow you to position your camera precisely, to ensure that your focus falls on the right place, and that your depth-of-field is correct for your purposes. For closeup stuff, I use live-view for focusing, set the aperture based on the DOF I need for the item, set the flash power manually using a flash meter, and depending on the situation, shoot tethered to a PC (because it is much easier to see the focus on a big screen compared to the relatively tiny screen of the camera).
 
This site may be helpful for you: http://www.tawbaware.com/maxlyons/calc.htm

Scroll down to the "dimensional field of view calculator" (there's also an "angular field of view calculator" which is probably not what you want.)

Fill in the values. The "focal length multiplier" box is the crop factor of your camera sensor relative to a full-frame (35mm negative) size. For a Nikon DX format camera, it's 1.52 (1.5 is close enough). If you had a full-frame (Nikon FX) format camera then you'd just type in "1".

Then enter the focal length of the lens and the distance you plan to place the camera from the subject and it will tell you, dimensionally, how tall and wide the frame will be at that distance.

For example:

If I need to photograph something which is 3' tall, and I punch in the value (as initial guesses), I could input the following:

Focal length: 60mm
Focal length multiplier: 1.5 (you could punch in 1.52 if you wanted it to be more accurate)
Distance to subject: 5'

Then press "compute"

It tells me that my Field of View dimensions will be 2' wide by 1' 4" tall.

That's not enough for my 3' tall subject. But... it does tell me that if I go back 50% farther, the width should be 3' wide. Of course at 7.5' I'd have absolutely no space around the subject, so I'd probably be better off going back to 10' so that I have a 4' width to photograph a 3' subject and give myself a little breathing room.

Good luck!
 
It is easy to work out fields of view in terms of linear dimensions. It is just simple proportions. Let's say that the D40 has a 24 mm wide sensor. If you use a 60 mm lens the width:distance is about 24:60 or 2:5 or 4:10. If the camera is 10 ft from the subject, the field of view is 4 ft, and so on.

if you want, you can use a multi-purpose smartphone or iPad app. I like DoFViewer.
Helen, you are a true TREASURE!!! I love the wealth of information you have and share!! This latest bit of knowledge is fantastic!

It got me thinking that it would be a useful tool for me to put together a quick spreadsheet that I could plug numbers in for calculating how much (studio) space in terms of distance I would need for various subject heights with various lenses.

Working it out with your information was easy. To check my work, I went to an online FOV calculator (THIS ONE)and plugged in some of the numbers. They were VERY close, but not dead-nuts, so I calculated the additional X factor in percent that would allow my numbers to equal the numbers in the online calculator with consistency, and used those additional X factors in my equations. This is what I came up with:

Bucks_FOV_Calc.PNG


With it, I can change the needed subject height or width, lens focal length, or even sensor size, and see what distance to subject I need.

So, for example, if I want 7 ft of height to deal with someone up to 6 ft tall and want to retain half a foot of space above and below them, I plug in 7 ft and see that if I use my 85mm lens on my 5DMKII, I'll need about 25 ft of distance from camera to subject (if shooting landscape oriented). If I want to accommodate a 10 ft width with the same camera and lens, I'll need about 24 ft.

Since I can Dropbox this spreadsheet and open it on my tablet or smart phone, I can take it with me anywhere and use it, which will be handy. :)

THANK YOU for the inspiration and base calculation!!!
 
Last edited:
I'll have to do this in parts, in a rush. Apologies in advance.

My workflow for print and web.

Requirements: Web images usually at 500x500 with some larger banner images up to 800 wide. Nothing as big as 1500! That sounds odd for web, unless you are using some zoom tool. sRGB.
Blog & magazine images, both on-spec and by request: full original resolution images available on the web to those who wish to use them. sRGB.
Print images: Full resolution for print (Adobe RGB) and quarter resolution for page design, both with same nominal physical dimensions, different nominal ppi (300 and 75 respectively). It is important for page design that the 'inch' dimensions are the same.
Aspect ratio: image designed for the aspect ratio of the primary use (eg whatever shape it will be on the page) with allowance made for other potential aspect ratios if possible.

Workflow:
Use tilt-shift lens on full frame, try to avoid anything smaller than f/11 or maybe f/16.
Take image in raw with tethered camera, often using Live View for focus, composition and finessed lighting.
Do rough composite in Photoshop if appropriate, for client approval - to show it all works perfectly.
Print a cropped image to final size and paste into page mockup.
In Lightroom, with selected images:
Batch adjustment of white balance.
Individual adjustment for colour fringing and lens defects if necessary (squaring up etc comes later) and slight sharpening.
Open in Photoshop, via ACR
Set output from ACR to PS as Adobe RGB at 300 ppi.
Check for out of gamut, adjust, along with exposure, fill, etc sliders
Import as Smart Object or as Image into PS.
Do all the PS work, except output sharpening.
(so far there has been no resampling at all)
Save master .psd file
Save flattened .tiff file for ftp to printer.
Resample, only changing ppi to 75.
Save sRGB low res file for page preparation in InDesign.
Return to master file.
Crop and resample for web and adjust as necessary.
Output sharpen for web at 100%.
Save for web in sRGB.
Return to master file.
Crop loosely for general blog / magazine use (ie just remove unwanted bits, like missing parts of the set) but do not resample.
Save in sRGB for blog/magazine use, unless otherwise requested.

Note: The printers will do the conversion from Adobe RGB to CMYK. They know their printing machines, and they know how to do the best conversions.

There's more, but I have run out of time.
 
This site may be helpful for you: http://www.tawbaware.com/maxlyons/calc.htm

Scroll down to the "dimensional field of view calculator" (there's also an "angular field of view calculator" which is probably not what you want.)

Fill in the values. The "focal length multiplier" box is the crop factor of your camera sensor relative to a full-frame (35mm negative) size. For a Nikon DX format camera, it's 1.52 (1.5 is close enough). If you had a full-frame (Nikon FX) format camera then you'd just type in "1".

Then enter the focal length of the lens and the distance you plan to place the camera from the subject and it will tell you, dimensionally, how tall and wide the frame will be at that distance.

For example:

If I need to photograph something which is 3' tall, and I punch in the value (as initial guesses), I could input the following:

Focal length: 60mm
Focal length multiplier: 1.5 (you could punch in 1.52 if you wanted it to be more accurate)
Distance to subject: 5'

Then press "compute"

It tells me that my Field of View dimensions will be 2' wide by 1' 4" tall.

That's not enough for my 3' tall subject. But... it does tell me that if I go back 50% farther, the width should be 3' wide. Of course at 7.5' I'd have absolutely no space around the subject, so I'd probably be better off going back to 10' so that I have a 4' width to photograph a 3' subject and give myself a little breathing room.

Good luck!

Excellent, I was hoping for something like that but I also wanted the info provided by Helen so I could figure out how to do it myself. If I use a calculator, I don't learn. So, now that I have the basics, I can figure it out and then "cheat" with the calculator!

It is easy to work out fields of view in terms of linear dimensions. It is just simple proportions. Let's say that the D40 has a 24 mm wide sensor. If you use a 60 mm lens the width:distance is about 24:60 or 2:5 or 4:10. If the camera is 10 ft from the subject, the field of view is 4 ft, and so on.

if you want, you can use a multi-purpose smartphone or iPad app. I like DoFViewer.
Helen, you are a true TREASURE!!! I love the wealth of information you have and share!! This latest bit of knowledge is fantastic!

It got me thinking that it would be a useful tool for me to put together a quick spreadsheet that I could plug numbers in for calculating how much (studio) space in terms of distance I would need for various subject heights with various lenses.

Working it out with your information was easy. To check my work, I went to an online FOV calculator (THIS ONE)and plugged in some of the numbers. They were VERY close, but not dead-nuts, so I calculated the additional X factor in percent that would allow my numbers to equal the numbers in the online calculator with consistency, and used those additional X factors in my equations. This is what I came up with:

Bucks_FOV_Calc.PNG


With it, I can change the needed subject height or width, lens focal length, or even sensor size, and see what distance to subject I need.

So, for example, if I want 7 ft of height to deal with someone up to 6 ft tall and want to retain half a foot of space above and below them, I plug in 7 ft and see that if I use my 85mm lens on my 5DMKII, I'll need about 25 ft of distance from camera to subject. If I want to accommodate a 10 ft width with the same camera and lens, I'll need about 24 ft.

Since I can Dropbox this spreadsheet and open it on my tablet or smart phone, I can take it with me anywhere and use it, which will be handy. :)

THANK YOU for the inspiration and base calculation!!!

Buckster, I love the spreadsheet idea! I just might have to make that up for myself!

I don't know if you mentioned it, but I am hoping you are shooting everything in RAW, as that gives you editing headroom. Getting shiny things to sparkle involves careful placement of lights. One of the regular posters on TPF, Bitter Jeweller, makes handmade, custom jewellery and has in the past shared his techniques of shooting his pieces with us - there is a lot of management of shadows and highlights. If the items you are shooting are all quite small, then perhaps an 18" lightbox would make sense to build or buy (see Do It Yourself Photography Light Box for Under $40, or Photek Digital Lighthouse DLH-18/27 B&H Photo Video, or others if you google "Table-top Light Box"). I have one and it is quite versatile, but you need to experiment to see which lighting approach gives you the best results.

As for resampling, I would avoid resampling until you are ready to save your "final" jpg in whatever size you need. This means that your master "RAW" file stays at whatever native resolution your camera is capable of. Your edits to it are "soft edits" using Lightroom or similar software that adds the editing commands carried out as additional bits of information stored with the image and do NOT change the original image. From this master, you will then resize to the size you need and save it in a loss-less format (not jpg). You will need to apply a final sharpening pass after resizing. Then you can produce a "final" jpg from this resized (and resharpened) file. Others may use a different workflow, but what you want to do is do your editing in a way that does not mess up your original image. This also means that you will use the same master to produce various-sized intermediate files which are intended for different purposes. You may also have to change your color space to match whatever your final display medium will be, so for web imaging, that would be RBG, whereas for printers it may be a different color space (and a different print profile may be associated with each printing device).

I don't recall seeing you mention using a tripod, but that would be one of the more important things I can suggest, as it will allow you to position your camera precisely, to ensure that your focus falls on the right place, and that your depth-of-field is correct for your purposes. For closeup stuff, I use live-view for focusing, set the aperture based on the DOF I need for the item, set the flash power manually using a flash meter, and depending on the situation, shoot tethered to a PC (because it is much easier to see the focus on a big screen compared to the relatively tiny screen of the camera).

I was going to get a tent, but I opted for the background that I built for a few reasons: I have to shoot the products from many different angles, some from directly above, many of the products have lots of staging to do, I have a huge variety of sizes. I know most of these shots could be done in a tent, but I think I'm actually getting pretty good results with the background I built considering my lack of experience.

Thanks so much for the tips on how to preserve quality with resizing and resampling. I didn't know to sharpen after resizing or several other orders of things you mentioned. I am shooting RAW, I mentioned it in my last post, but I said raw image, not RAW image. I will do better to distinguish that in the future. And I am certainly using a tripod but I forgot to mention it. Thanks to you and everyone else for all the tips here, it's been very helpful.
 
I'll have to do this in parts, in a rush. Apologies in advance.

My workflow for print and web.

Requirements: Web images usually at 500x500 with some larger banner images up to 800 wide. Nothing as big as 1500! That sounds odd for web, unless you are using some zoom tool. sRGB.
Blog & magazine images, both on-spec and by request: full original resolution images available on the web to those who wish to use them. sRGB.
Print images: Full resolution for print (Adobe RGB) and quarter resolution for page design, both with same nominal physical dimensions, different nominal ppi (300 and 75 respectively). It is important for page design that the 'inch' dimensions are the same.
Aspect ratio: image designed for the aspect ratio of the primary use (eg whatever shape it will be on the page) with allowance made for other potential aspect ratios if possible.

Workflow:
Use tilt-shift lens on full frame, try to avoid anything smaller than f/11 or maybe f/16.
Take image in raw with tethered camera, often using Live View for focus, composition and finessed lighting.
Do rough composite in Photoshop if appropriate, for client approval - to show it all works perfectly.
Print a cropped image to final size and paste into page mockup.
In Lightroom, with selected images:
Batch adjustment of white balance.
Individual adjustment for colour fringing and lens defects if necessary (squaring up etc comes later) and slight sharpening.
Open in Photoshop, via ACR
Set output from ACR to PS as Adobe RGB at 300 ppi.
Check for out of gamut, adjust, along with exposure, fill, etc sliders
Import as Smart Object or as Image into PS.
Do all the PS work, except output sharpening.
(so far there has been no resampling at all)
Save master .psd file
Save flattened .tiff file for ftp to printer.
Resample, only changing ppi to 75.
Save sRGB low res file for page preparation in InDesign.
Return to master file.
Crop and resample for web and adjust as necessary.
Output sharpen for web at 100%.
Save for web in sRGB.
Return to master file.
Crop loosely for general blog / magazine use (ie just remove unwanted bits, like missing parts of the set) but do not resample.
Save in sRGB for blog/magazine use, unless otherwise requested.

Note: The printers will do the conversion from Adobe RGB to CMYK. They know their printing machines, and they know how to do the best conversions.

There's more, but I have run out of time.

I am similarly creating my 300ppi master, but my workflow is a little different due to software and hardware differences. I am shooting in Capture One, and going straight to PS. and I don't have a T/S lens. :-( I just got Capture One and haven't gotten familiar with RAW editing in it yet, so I am doing most everything in PS for now. I'll study your post a bit more, it's helpful to see it laid out like that. Thanks for taking time to do that.
 

Most reactions

Back
Top