windrivermaiden
TPF Noob!
- Joined
- Nov 2, 2006
- Messages
- 230
- Reaction score
- 2
- Location
- So Cal
- Can others edit my Photos
- Photos NOT OK to edit
I have put a little tutorial on my posts with the individual prints from these types of processes but I'll put in a little overview here for simplicities sake so...
Simplist first.... The INK JET LIFT.
you will need: image, watercolor paper, piece of glass a little larger than your paper, inkjet transparency sheets, a squeegie or rubber spatula.
INK Gel LIFT.
you will need: image, watercolor paper, piece of glass a little larger than your paper, inkjet transparency sheets, a squeegie or rubber spatula (for squeegieing off the paper).
Very nearly the same steps as the ink lift only this time, print on the GEL side of the transfer paper
The sheet of paper should be slightly wetter than for an ink lift.
Then:
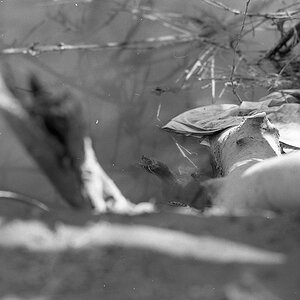
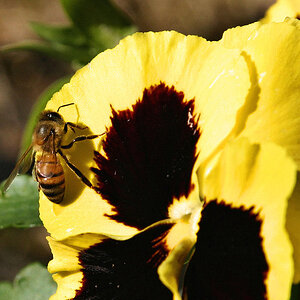
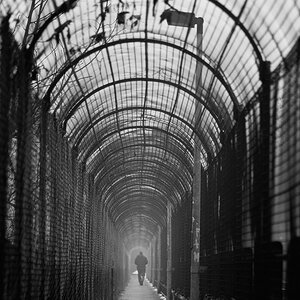
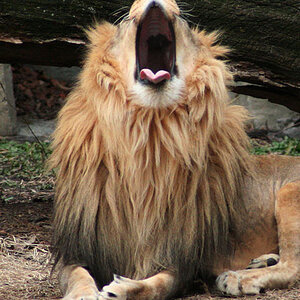
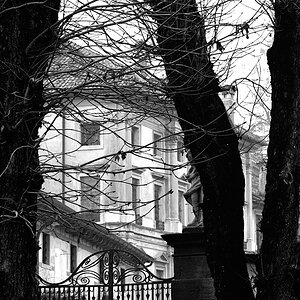
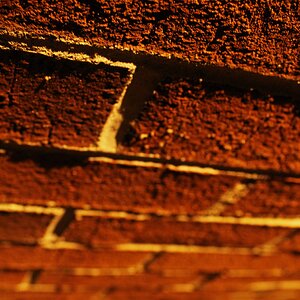
Some things I have learned...Oversharpening helps to make the image more crisp in the final print. Oversaturating and darkening the image on the gel lifts makes the image more vivid in the final print. the last few I've done...but haven't scanned and posted, I've oversharpened by about 150% at 2-5 px, no threshold, Oversaturated by 25-40% and darkened about 25 %.
I thought I had made a thread or added to one of my image threads the process of gumprinting I use...I cant seem to find it now and i'm running late to shoot a cute little baby.:hugs: awe!
so there you have it all in one place the process for ink lifts that I use....
Have a beautiful day. looks to be toasty here in So Cal.
Simplist first.... The INK JET LIFT.
you will need: image, watercolor paper, piece of glass a little larger than your paper, inkjet transparency sheets, a squeegie or rubber spatula.
- Choose your desired image and made a digital file either by digital capture of scanning from film.
- In a large flat tray that will hold your paper with out crowding, soak your 100% cotton watercolor paper or printmaking paper (good types Fabriano #90, 140, Arches, Stonehenge stuff like that...bright white to neutral color, smooth texture, fairly light weight 100% cotton is what I advise because it will not pull a part as easily when you handle it soaking wet.)
- Over sharpen and print on the REVERSE side of inkjet overhead transparency film (not OHP)or single sheet acetate. The kind used for wet media art works well because the ink doesn't bead up as much. ( you may or may not want to invert the image for printing...if you have text in your image if you dont invert it...the text will be backwards in your final print)
- Chose the "text" or "text with image" ink volume setting and the "inkjet" or "matte heavy weight" paper speed setting on your printer so the ink is applied slowly to the substraight...that keeps the ink from beading up and running together...or as much as it can be avoided.
- While your image is printing, carefully take your wet paper out of the soaking bath and place it onto the glass smoothing out all the bubbles so that it is perfectly adhered to the glass, The paper will be very tender and the lighter the weight and the less cotton fiber content, the more fragile it will be. This is where the learning curve gets tricky....the object is to squeegie off enough moisture from the paper so there is enough moisture to draw the ink off the acetate and give a good image, but not so much that the image bleeds all over the place. my rule of thumb is a tiny sheen of moisture on the paper...
- Grab the fresh transparency carefully off the printer tray, grasp it by opposite diagnal corneres and "kiss" it to the damp paper and pull it off. it only takes a second for the transfer.
INK Gel LIFT.
you will need: image, watercolor paper, piece of glass a little larger than your paper, inkjet transparency sheets, a squeegie or rubber spatula (for squeegieing off the paper).
Very nearly the same steps as the ink lift only this time, print on the GEL side of the transfer paper
The sheet of paper should be slightly wetter than for an ink lift.
Then:
- after applying the acetate to the wet paper, printed GEL side down, smooth out all the bubbles and walk away.LEAVE IT ALONE FOR 10-15 MINUTES
- start rubbing the back of the acetate with a smooth hard motion. I have used a brayer, the back of a large spoon, popcicle stick, teflon fid, what ever you have on hand, experiment. you can pull up a corner to peek at your progress but, be very careful the paper is tender and the transparency can shift. Rub till you think you have the whole image pressed into the surface of the damp paper.
- pull off the acetate and hang to dry.
Some things I have learned...Oversharpening helps to make the image more crisp in the final print. Oversaturating and darkening the image on the gel lifts makes the image more vivid in the final print. the last few I've done...but haven't scanned and posted, I've oversharpened by about 150% at 2-5 px, no threshold, Oversaturated by 25-40% and darkened about 25 %.
I thought I had made a thread or added to one of my image threads the process of gumprinting I use...I cant seem to find it now and i'm running late to shoot a cute little baby.:hugs: awe!
so there you have it all in one place the process for ink lifts that I use....
Have a beautiful day. looks to be toasty here in So Cal.