Exterior Architectural Photos - Sky Washing Out or Photo Too Dark

MMeticulous

TPF Noob!
Joined
Aug 26, 2009
Messages
29
Reaction score
0
Location
Nashville, TN
Can others edit my Photos
Photos NOT OK to edit
Hello Everyone!

I just bought a new Canon 50D with a high-end 17-55mm lens, and am using a B+W MRC UV Filter and Canon lens hood.

I need to take a bunch of exterior architectural photos for a website I'm building, I don't know much about the gear I just bought, and my photos are turning out terrible!

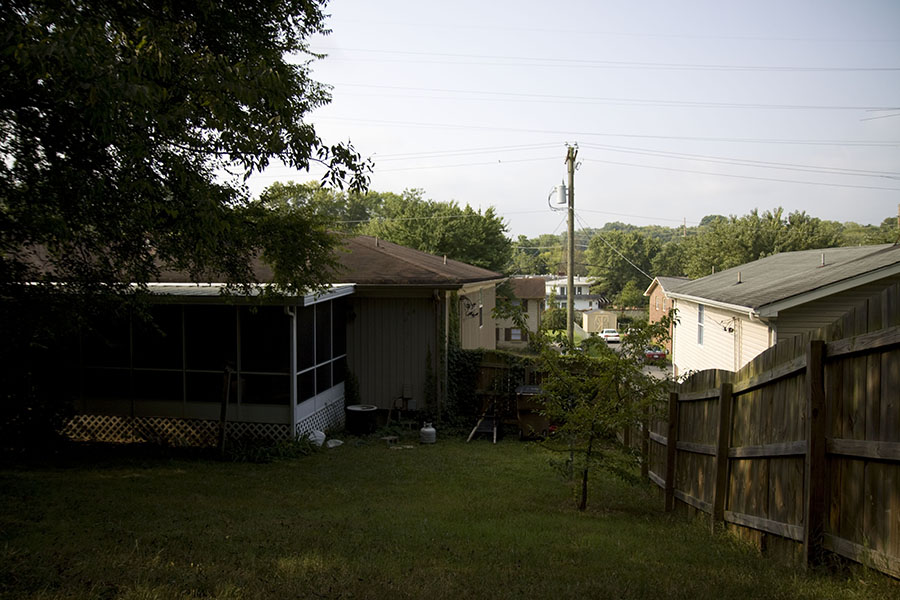
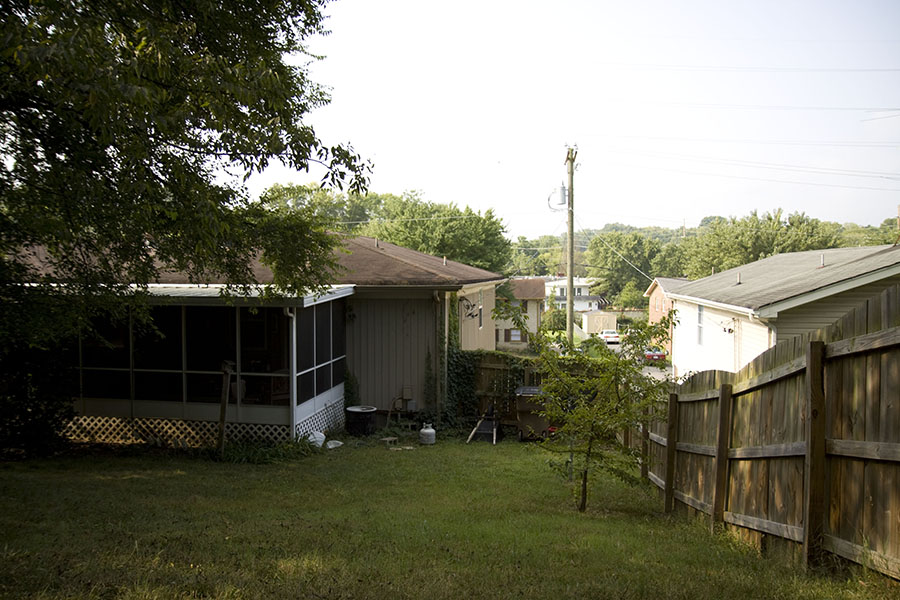
I've tried using all sorts of different settings, but without much success. The primary problem I'm having is that either the sky washes-out and has no color, or else I'm stopping it down so much that the sky looks good, but the rest of the photo is WAY too dark. What I'm trying to capture, is blue skies with bright clear buildings. I can see it with my eyes, but so far I can't capture it with my lens. I'm being careful not to shoot into the sun, but I'm still not having any luck. Can someone give me a few pointers about what I'm doing wrong?

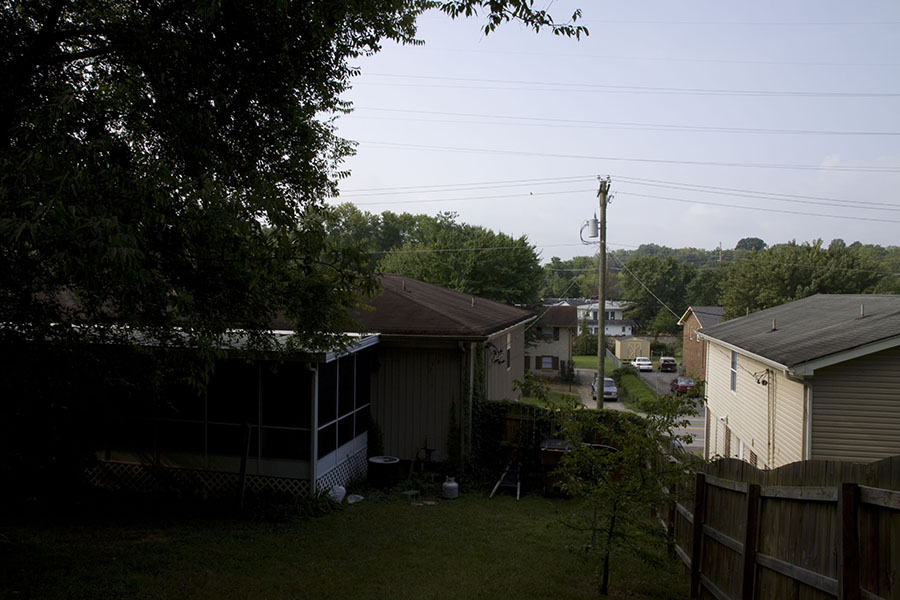
Here are 3 rounds of bracked shots I took, to show you what I'm struggling with (please disregard the fact that this is an ugly backyard shot - it was just for testing purposes):

IMG_1-1.JPG

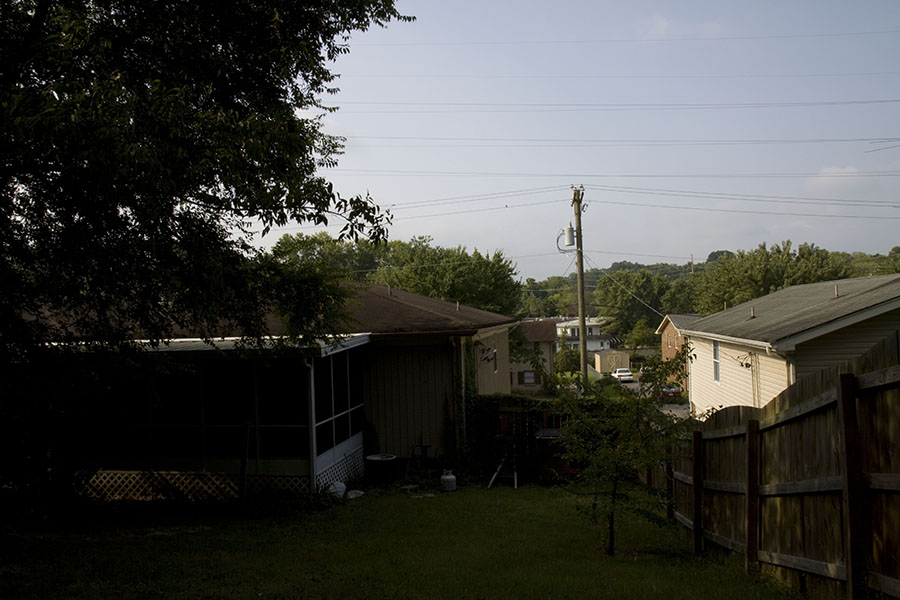
Round 1: Exposure 1/80 s at f/16.0 [Exposure Bias Value -2.33] ISO 100 (sky looks ok - building too dark)

IMG_1-2.JPG

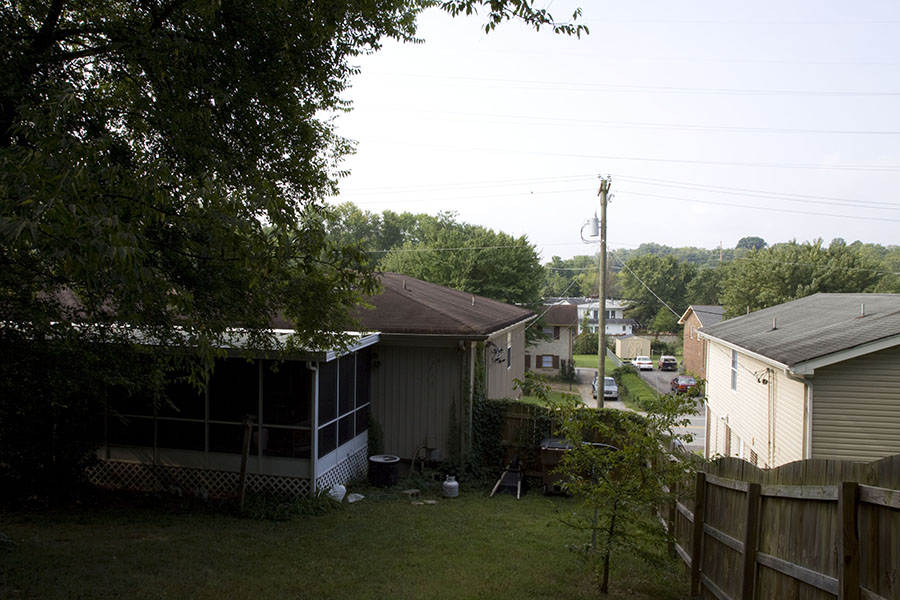
Round 1: Exposure 1/40 s at f/16.0 [Exposure Bias Value -1.33] ISO 100 (nothing looks good)

IMG_1-3.JPG

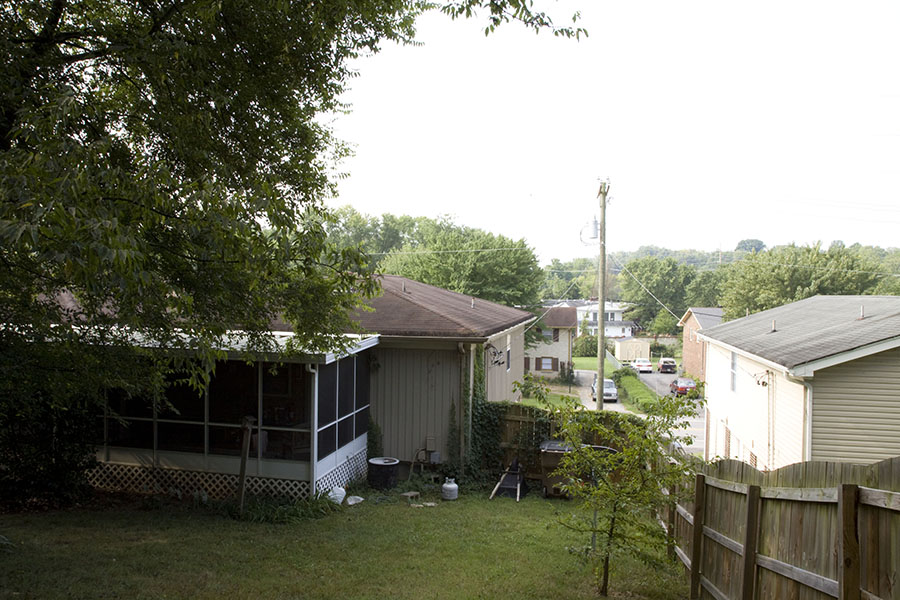
Round 1: Exposure 1/20 s at f/16.0 [Exposure Bias Value -0.33] ISO 100 (building looks ok, sky washed-out)


IMG_2-1.JPG

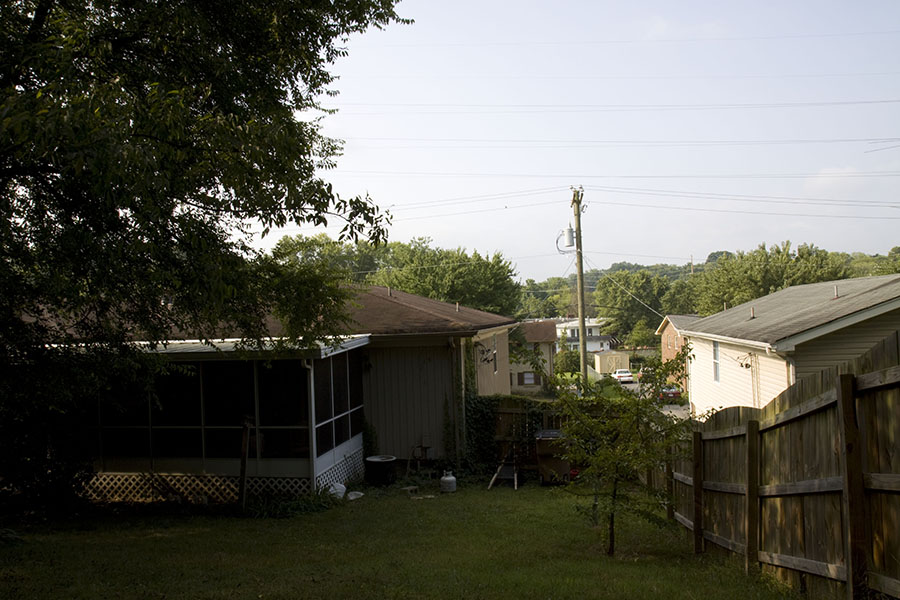
Round 2: Exposure 1/50 s at f/16.0 [Exposure Bias Value -2.33] ISO 100 (sky looks ok - building too dark)

IMG_2-2.JPG

Round 2: Exposure 1/30 s at f/16.0 [Exposure Bias Value -1.33] ISO 125 (nothing looks good)

IMG_2-3.JPG

Round 2: Exposure 1/30 s at f/16.0 [Exposure Bias Value -0.33] ISO 250 (building looks ok, sky washed-out)


IMG_3-1.JPG

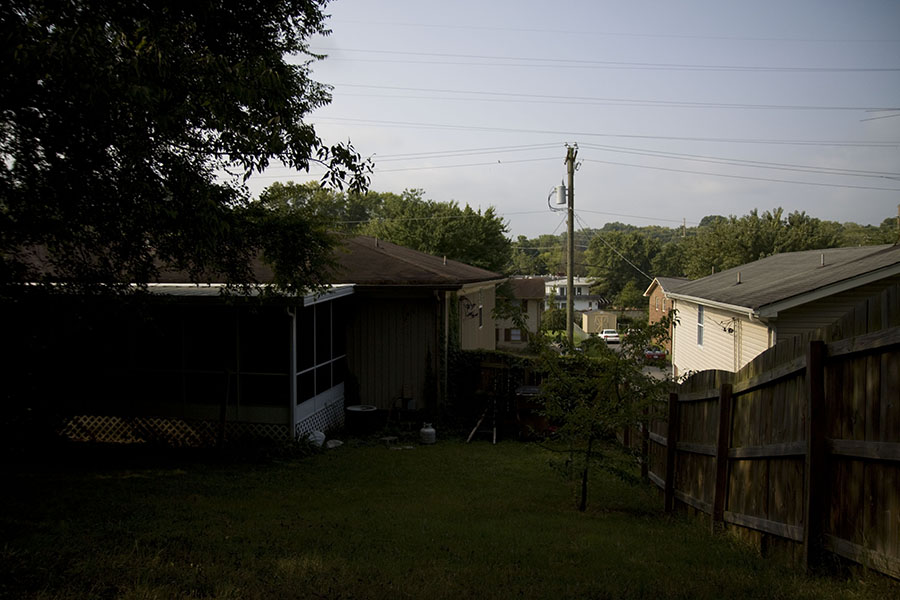
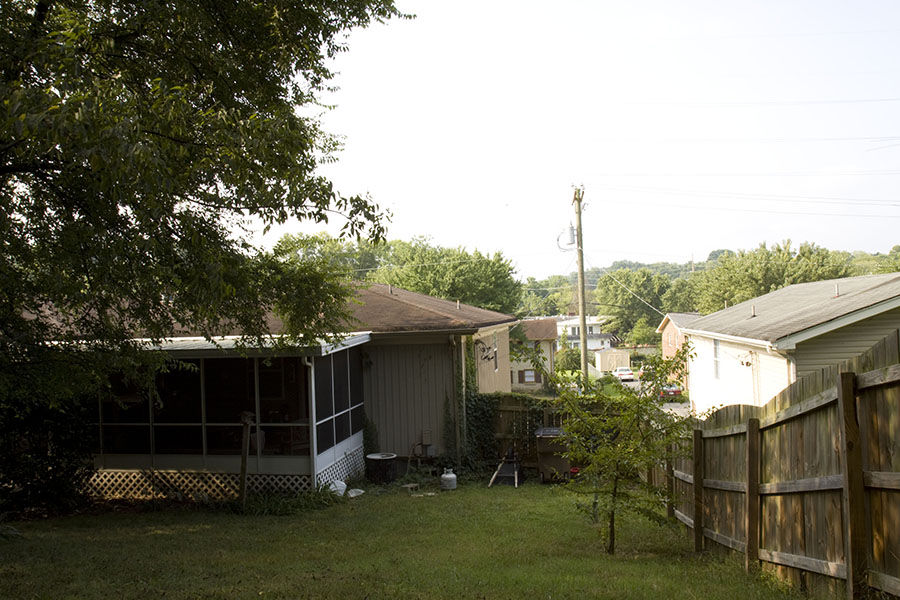
Round 3: Exposure 1/2000 s at f/2.8 [Exposure Bias Value -2.33] ISO 100 (sky looks ok - building too dark)

IMG_3-2.JPG

Round 3: Exposure 1/1000 s at f/2.8 [Exposure Bias Value -1.33] ISO 100 (nothing looks good)

IMG_3-3.JPG

Round 3: Exposure 1/500 s at f/2.8 [Exposure Bias Value -0.33] ISO 100 (building looks ok, sky washed-out)

Any idea how I can get better photos?

Thanks for the help!
:mrgreen: Jeff
 
Last edited:
look inot HDR and photomatix.... HDR is the tehcnique, Photomatix is the program :D

basically your going to combine 3+ pictures to acheive what u want.
 
look inot HDR and photomatix.... HDR is the tehcnique, Photomatix is the program :D

basically your going to combine 3+ pictures to acheive what u want.

Do that ^^^^^

Also look at Graduated Netral Density filters (ND Grads)
 
The issue you are having is that your camera cannot properly meter both sections as there is a large range of difference between the shaded area and the bright sky. This is very common with photography.

Its all about 18% grey, which is the mid point between the lights and the darks. When you meter, the camera looks at the scene and tries to bring things to an 18% grey level.

Lets say you are using spot metering (metering only a small part of the scene) and you put your meter on the sky. The camera sees this as really bright, but as this is what you want to meter, it will bring down the exposure to an 18% grey level. But it brings down the exposure for everything. So things that are dark will be even darker.

Same thing if you put the meter in the shaded area. The camera meter will have to add exposure / light to bring that dark area lighter, up to 18% grey. By doing this, things that are bright in the scene will be even brighter.

Your pictures show that you really have the two extremes and your camera can't cope. And its not your 50D, this is an issue with all cameras.

So your best bet is to take 3 pictures (look into bracket settings in your menu) while on a tripod. Aim the meter at something that is green, thats your mid point exposure. Then take one picture over exposed (making the fenced shaded area nice) and one under exposued (making the sky nice). Then you need, as suggested, some HDR software to merge the two.

A ghetto way of doing this is taking one image in RAW and save a copy as under exposed and one as over exposed. You can then use layers in photoshop and mask out the areas you don't want to make it what you want.
 
I don't know much about the gear I just bought, and my photos are turning out terrible!
Thank goodness. I guess that means all the studying, working and practice I've been doing all this time, wasn't in vain. ;)

As mentioned, the scene you have here contains a wide range of tones...from very bright to very dark. Our eyes move around and adjust very quickly, so we can easily view everything in the scene but a camera doesn't work that way.
Photographic medium (whether film or digital) has what is called a 'dynamic range'....which is the range of tones that it can capture with a single exposure. In a case like this, the scene exceeds the dynamic range of the camera. In the old days, the photographer had to make a choice and set the exposure for what was most important in the scene...and lets the rest fall where it may.
One option is to use a split or graduated filter, which can be used to darken the bright sky part of the scene, hopefully bringing things within the dynamic range.

Since this is a limitation of what you can get in a single exposure, another solution is to take multiple exposures at different settings. You can then use software to combine the best parts of each image, giving you a final image the show both highlight and shadow detail.
 
The UV filter is doing nothing for your images. It only has a positive effect on film cameras. Using the hood is good. It helps control lens flare and helps the contrast a bit.

You might want to read about Dynamic Range.
 
if all you want is a darker sky, get a circular polarizer filter. it will darken the sky and help control glare.

Look at the difference:
577687037_0602575d76.jpg
 
I do not know what time of day these were taken but it looks like harsh light and bad shadows. Try to shoot with everything in the sun or get up early and shoot before the harsh light.

If you are shooting during the day, it would also help to use a circular polarizer (filter). It will bring out colors in the sky.

Craig
 
Thanks for the feedback everyone!

Major bummer, I really thought that with the "right" gear I'd get a clean shot without having to use a software solution or go to great pains.

In light of what you've told me, I have a few questions:

  1. Is photomatix the definitive HDR solution?
  2. How much time does it take to render & finish a single image with photomatix?
  3. Is it possible that using a circular polarizer filter would enable me to consistently get the shot in a single exposure? Or does everyone who regularly shoots exterior architectural shots use the HDR method for quality & reliability?
  4. I use the UV filter just to protect my lens (nothing more), since I spent a grand on the lens, and I don't know what I'm doing, I'd really like to protect it from scratches. When I use a circular polarizer filter, can I stack it on top of my UV filter without hurting my shot? I would rather NEVER remove the UV filter if I can help it, especially in the field. Will this compromise the quality of my shots?
  5. If I end up using HDR, is it better if I shoot my bracketed groups while using the circular polarizer filter, or without it? Will my range be better without the filter?
  6. I've had problems using circular polarizer filters in the past, because my eye can't tell the difference as I try to adjust the filter (turning it), is there a trick to doing this successfully?
  7. Someone mentioned looking into Graduated Netral Density filters (ND Grads), is that the same as the circular polarizer filter, or what is the difference and is it better for this application?
  8. I'm assuming with HDR, my main objective in getting a "good" shot will be ensuring it is in focus. Other than that, what am I looking for on site while I'm shooting?
  9. I know that I've seen some excellent outdoor pictures in the past, that were shot with a single exposure, with blue skies and balanced light throughout the shot, where does the sun need to be in order for this to work out? I know that you can't shoot directly into the sun, but does it need to be directly at your back in order to not wash-out the sky, or ???
  10. Is a "point & click" better at this, than an SLR, for some reason?
  11. What exposure recommendations do people have for this type of shot? What should my f stop and ISO be set at? What camera mode would you recommend using? AV priority? An automatic setting like landscape?
  12. How far apart would you bracket the three shots?
Thanks for all the help! Sorry to be such a total freaking noob here! I thought that if I spent a few grand, I would get good shots, plain and simple. That doesn't appear to be the case, and I need to get some shots quick before the leaves fall off the trees!

:mrgreen: Jeff
 
1=Its one program, you don't need HDR for what your trying to do.
2=Don't know
3=It will darken your sky but you need to know about correctly exposing anyway
4=You can stack if you want
5=No filter needed, you expose for the highlights, the midtones, then the shadows.
6=Look through the viewfinder at something reflecting light your way, as you turn the filter when you get it right the bright reflection will be toned down.
7=different type filter, dark at one end graduating to clear at the other, for darkening skys.
8=getting at least three good shots, on a tripod without moving the camera, all which changes is your exposure value.
9=No, it doesn't matter where the sun is, but afternoon sun is a no no, the light is too hard, as another said, try early morning or late evening for better, more even light.
10=No, just a point n shoot is easier to work as no settings and it will try to deliver a reasonable shot every time, but hard light will eff it up too, you need to understand what your doing with an slr, but I've no time for a photography course here.
11=As above, try the sunny sixteen rule and then bracket up n down from there.
12=1 stop as metered, 1 stop underexposed, one overexposed, if that doesn't cut it go up/down from there in third increments. H
 
#3 No. The circular polarizer only helps to make a blue sky darker compared to your foreground. It won't help at all with an overcast sky. Furthermore, the circular polarizer doesn't darken all the blue sky to the same degree. It has maximum effect at 90 degrees from the sun. This means that when the sun is straight up, the polarizer has the greatest effect all around the horizon. In the winter when the sun is low (or the morning or evening), the polarizer has less effect because you probably aren't shooting at 90 degrees to the sun.

The second half of your question is it depends. Sometimes HDR or compositing is not necessary, but sometimes it is. You can decide for yourself.

#4 you can stack filters, but depending on their quality, you risk increasing the chance for internal reflections, light loss, glaring, etc. Also with wide angle lenses you risk vignetting your image because of the staked filters. It would probably be best to remove the IR filter when you use the polarizer.

#5 without trying to sound smart, the polarizer helps when it helps. If it helps it would be better to bracket with it, or possibly not have to bracket at all.

#6 if you're shooting something that the polarizer doesn't help, you probably won't notice any difference. My trick is to turn the polarizer quickly while looking at the blue sky right above my scene. It will darken at the point of greatest effect. Or it will eliminate reflections when using with water, glass, etc. If you can't see any difference, it's probably not helping in that situation.

#7 no, not the same. A ND filter darkens the entire scene the same. A graduated ND filter darkens a specific part, usually half and half. As soon as you see one you'll understand. A polarizer removes proportionally more light from certain things, mostly the clear sky at 90 degrees.

#9 see #3

#10 no. Actually most PnS have less dynamic range so it's worse.

#11 Try not to memorize shot settings. Use your meter and think about all your settings as they work together. Every setting is a balancing act. I could tell from all your pics posted above that you expected something different to happen when you opened your aperture, but speeded up your shutter. There is no magic combination that works better. You can guide your camera to keep certain things in check, like low ISO for low noise, aperture setting based on how much depth of field you need and/or how much light is required to get the correct exposure. Shutter speed to be fast enough not to blur your entire image or possibly fast enough to freeze a moving target, etc. You can start by using the auto features like landscape, but as you get better you may find you want more control. I use aperture priority about 75% of the time. The other 25% is full manual, then TV. I almost never use full auto.

#12 I think 1 stop for each shot, but I'm not very experienced with HDR.

You have lots of reading and practice to do. You need to understand exposure as a first priority - how to balance each setting and what they do.

EDIT: I don't want to sound like I'm contradicting Flash Harry, so I'll explain. The polarizer works best with skies at 90 degrees from the sun, but that's also the harshest lighting to take a shot. If you waited until the sun was behind a large cloud while it's overhead, you'll have the best of both worlds. I also don't want to make it sound like you HAVE to be 90 degrees from the sun for the polarizer to work, that's just the best. Near 0 degrees (towards the sun) and near 180 degrees (opposite the sun) it has zero effect.
 
Last edited:
...I really thought that with the "right" gear I'd get a clean shot without having to use a software solution or go to great pains...

A little PP is almost always benificial. With challenging scenes like this example it always is.

Actually, I played with the first image and could get a rather good, balanced image by simply using Photoshop's "Highlight/Shadow" adjustment. I'm sure even better results could be had if the image was shot RAW and a decent RAW converter was used for similar adjustment. I've found this to be true for my own work.

In light of what you've told me, I have a few questions:

3. Is it possible that using a circular polarizer filter would enable me to consistently get the shot in a single exposure?
sometimes but not always. It depends a lot on the angle between the blue sky in the picture and the sun.
4. I use the UV filter just to protect my lens (nothing more)...
DON"T. Use only a CPL when needed. Avoid the UV altogether.
5. If I end up using HDR, is it better if I shoot my bracketed groups while using the circular polarizer filter, or without it? Will my range be better without the filter?
Even when doing HDR, the CPL is valuable.
6. I've had problems using circular polarizer filters in the past, because my eye can't tell the difference as I try to adjust the filter (turning it), is there a trick to doing this successfully?
Pay attention to subtle changes. Its possible that you don't see well enough through the VF (poor match to your eye or poor VF) to see small changes. Try holding the filter to your eye and making the adjustment. When you find the best effect, note the position of the indicator dot on the rim of the filter (if your's lacks a mark make only anywhere on the rim) and match the postion after remounting it on the lens.
7.Someone mentioned looking into Graduated Netral Density filters (ND Grads), is that the same as the circular polarizer filter, or what is the difference and is it better for this application?
They are different. They are just neutral grey and don't filter based on polarization angle. They wouldn't work well in your example as they need a straight line all the way across the image between the light and dark portions.
 
#11 Try not to memorize shot settings. Use your meter and think about all your settings as they work together. Every setting is a balancing act. I could tell from all your pics posted above that you expected something different to happen when you opened your aperture, but speeded up your shutter. There is no magic combination that works better. You can guide your camera to keep certain things in check, like low ISO for low noise, aperture setting based on how much depth of field you need and/or how much light is required to get the correct exposure. Shutter speed to be fast enough not to blur your entire image or possibly fast enough to freeze a moving target, etc. You can start by using the auto features like landscape, but as you get better you may find you want more control. I use aperture priority about 75% of the time. The other 25% is full manual, then TV. I almost never use full auto.

Thanks for the detailed feedback. You brought up one issue, I don't have a light meter and don't know how to use one. Do I need to purchase one, or is this functionality built into the 50D? Is an independant light meter better? What kind would you recommend purchasing?

Thanks again!
:D Jeff
 
Thanks again for the detailed feedback everyone!

I still haven't heard an answer to my question #2 above:

2. How much time does it take to render & finish a single image with photomatix?
Does anyone have experience with photomatix, and can give me an idea of the time investment required per image? Also, are there other software solutions I should consider for HDR, or is photomatix THE HDR solution?

Thanks!
:D Jeff
 

Most reactions

Back
Top