First photo's with the camera recommended by the community here (Nikon D3200)

seanpatrick

TPF Noob!
Joined
Apr 3, 2014
Messages
28
Reaction score
6
Location
toronto, Ontario
Can others edit my Photos
Photos OK to edit
Hey all! - So I was able to pop out today and test out my new camera that I decided on with the help of the members here (given my budget) and must say I'm quite pleased. Some pictures turned out Meh, some decent, and one turned out amazing. I wasn't using the point and shoot feature, but rather the built in "guide" and was trying different settings ( blur background, sharper background, dark and sunlight settings ) .. but should have payed more attention as I don't know why the bad ones turned out bad or the decent ones turned out decent. It was late afternoon / early evening so there wasn't a lot of light out, though I've heard this is one of the best times to shoot. In any case, I'lll start with a few examples of the ones that didn't turn out. I think it has something to do with the "f" setting? They're way to dark (obviously)

$DSC_0021.JPG$DSC_0026.JPG$DSC_0027.JPG

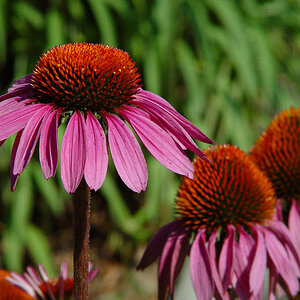
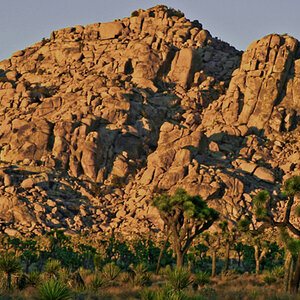
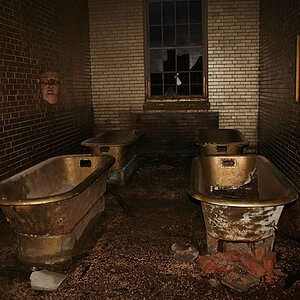
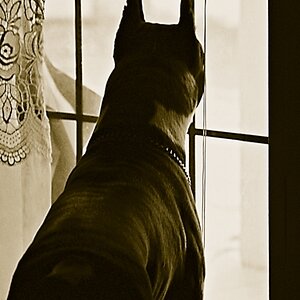
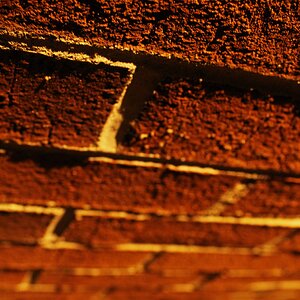
Here's a few that turned out pretty well:

View attachment 70444View attachment 70445View attachment 70446View attachment 70449View attachment 70450

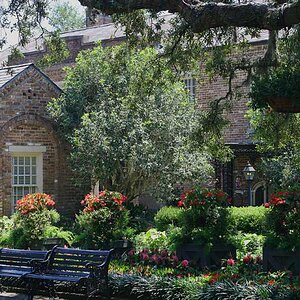
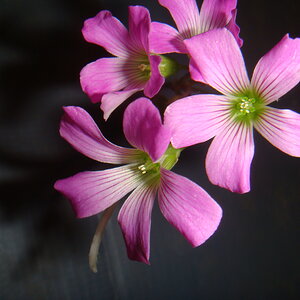
And this is my absolute favorite - I LOVE it:

View attachment 70451
 
The last one is ok, small piece of advice: Dont cut the top of the head off, and it looks like there was a bit to much camera shake on it (little bit blurry) but your on your way!

The ones up the top are just dark because the shutter speed is either to fast or your aperture is way to high for the conditions or both
 
hey, cool shots! one thing that could help you out immediately is the "exposure compensation" setting on your camera. this way, if you take a picture and you realize it's too dark you can crank up the exposure compensation and take another one that will look much better.

i made a little pic for you below.. that shows the exposure compensation button

happy shooting!
 

Attachments

  • $exposure comp.jpg
    $exposure comp.jpg
    72.5 KB · Views: 105
Great start! No doubt you'll have all kinds of fun learning your camera. The ones that are dark look that way because the camera was trying to expose for the sky and not the trees. If you read about the camera a bit you'll get to the section on metering and the different modes you have available to tell your camera how to meter a scene. Keep clicking, you're doing great!
 
The last one is ok, small piece of advice: Dont cut the top of the head off, and it looks like there was a bit to much camera shake on it (little bit blurry) but your on your way!

The ones up the top are just dark because the shutter speed is either to fast or your aperture is way to high for the conditions or both

Got it, no more chopping off heads :) I'll make sure to more carefully inspect the results of my shots on the fly while adjusting the shutter speed (f setting correct?) to see what works and what doesn't.

hey, cool shots! one thing that could help you out immediately is the "exposure compensation" setting on your camera. this way, if you take a picture and you realize it's too dark you can crank up the exposure compensation and take another one that will look much better.

i made a little pic for you below.. that shows the exposure compensation button

happy shooting!

Great! thanks for the pic and the wiki. Hopefully I can figure out how to get the photo right the first time, but will definitely try out the compensation if I can't. The compensation adds or subtracts light artificially I assume - and the results look great, however I'm also assuming getting it right with natural light is best. Lots of assuming going on on my part - lol - I'll continue reading up. I read the manual front to back before my session yesterday, but was so excited to get out and shoot I didn't take my time with the settings. To be honest I forgot about 80 percent of what I'd read, there's just SO much info. But replies like yours helps reinforce my learning, thanks!

Great start! No doubt you'll have all kinds of fun learning your camera. The ones that are dark look that way because the camera was trying to expose for the sky and not the trees. If you read about the camera a bit you'll get to the section on metering and the different modes you have available to tell your camera how to meter a scene. Keep clicking, you're doing great!

Thanks for the encouragement BrickHouse. Yes there's a lot of reading going on at the moment - the trick is trying to remember what I've read when I get to shooting. I'll keep practicing in any case. I've got 4 months before I leave for Ireland on a bicycle journey, so have some time to figure the basics out before then. I'm intent on not using AUTO, although I'm sure it works great 90 percent of the time it kind of feels like cheating :)
 
F is apeture, S is shutter speed ;)

Sent from my Nexus 5 using Tapatalk
 
The one website I recommend to any photography newcomer is www.cambridgeincolour.com

It's an awesome feeling going through the learning curve. And to be able to look back and analyse your very first pictures!

Best of luck!


Sent from my iPhone using Tapatalk
 
Here's a few more rookie attempts.. I went back and tried to re-shoot that one statue of the little girl without cutting off the top of her head, but couldn't recapture the feeling of the first photo. I'll make sure to look at what iso and f settings I had the first time and try it again. Anyhoo - I have noticed that if I shoot with ISO 400 I get a neat effect with the sun, having an aura and rays shooting out of it - what's that all about? I obviously blew the composition of the photo with the flowers in it - but decided to throw it in there anyways as the colors came out super vibrant.

$DSC_0072.JPG$DSC_0054.JPG$DSC_0094.JPG$DSC_0065.JPG$DSC_0075.JPG$DSC_0093.JPG$DSC_0048.JPG
 
Last edited:
The ISO changes the sensitivity of the sensor but the higher the ISO the more noise you will get which is more notiable the larger the image.

JohnLindsey-Photography
 

Most reactions

Back
Top