First Time Stars Shot C&C

PixelRabbit

A naughty little bunny...
Joined
Nov 28, 2011
Messages
6,593
Reaction score
3,719
Location
Ontario
Can others edit my Photos
Photos NOT OK to edit
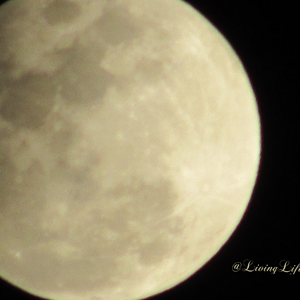
Hey all, well last night I was up late so I decided to finally try shooting the stars.
This is one of the best shots I got.
I was going more for playing with the technical side of it than the amazing shot so I lined up the greenhouse and old windmill tower and had at it.
Would love C&C on the more technical aspects of this shot to take with me when I go out to shoot them again with a plan. (which will be very soon, this was fun despite the nighttime creatures sneaking up on me!)


Shot Settings:
30 sec. exposure
F4
ISO1600

 
My personal non artistic amateur forgettable opinion....... with the structures in the photo, either light 'em or ditch 'em.

TO me they are just a black blob of a distraction since the outline doesn't let me know what it is. There are some trees maybe, and some sort of weird spire of a structure, and a black rectangle...... Honestly it's distracting to me. If you choose to light them, you could try light painting or the like.

And the powerlines should go. Those should be easy enough to clone out.
 
Thanks Stradawhovious, I 100% agree that the stuff on the ground got lost, I tried to light paint them but I wasn't nearly "fast" enough to do it alone.
I passed on going to other locations on the property, again, because I was home alone and the coyotes were really active so I stayed close to the house and worked on exposing the sky the best I could for this first time around.
 
looking from an inclined angle i see a brown sky with the brilliant stars ...but when i look at 90 degree it is dark...so i like it inclined ;)
 
Thanks Frequency, your comment made me go back and play with brightness a bit and much to my surprise there was a TON in the shots that was hidden!
The ones in the OP are proving a little trickier but can certainly be brighter with some TLC.


Judi, if you load the Stellarium free planitarium software (Stellarium), and navigate over to the part of the sky in your first shot, you will see the Pleiades (as Bynx mentioned), the constellation Persus (occupying the middle left, Casseopia (upper left), Triangulum (middle right), Andromeda, with the three stars pointing to the Andromeda galaxy (just visible in your shot), and lots of other details.

The trick to showing the sky is to play with your curves or levels, and move the sliders so that the mass of black on the left side of the histogram is stretched out somewhat. Yes, there'll be noise, but you also have lots of detail lurking in the darkness.

As for catching the foreground in some kind of visible manner - it really depends on the amount of ambient light there is. It doesn't take much, but it's tricky and when there's enough, it may also end up killing the darkness of the sky. If you wan to do this, you may want to consider two shots - one at the end of dusk (enough light to show the foreground), and one later just for the sky. Obviously, for this to work, you need to keep the same position, camera angle, focal length, etc. Later, you can merge the two.
 
Last edited:
pgriz said:
Judi, if you load the Stellarium free planitarium software (Stellarium), and navigate over to the part of the sky in your first shot, you will see the Pleiades (as Bynx mentioned), the constellation Persus (occupying the middle left, Casseopia (upper left), Triangulum (middle right), Andromeda, with the three stars pointing to the Andromeda galaxy (just visible in your shot), and lots of other details.

The trick to showing the sky is to play with your curves or levels, and move the sliders so that the mass of black on the left side of the histogram is stretched out somewhat. Yes, there'll be noise, but you also have lots of detail lurking in the darkness.

As for catching the foreground in some kind of visible manner - it really depends on the amount of ambient light there is. It doesn't take much, but it's tricky and when there's enough, it may also end up killing the darkness of the sky. If you wan to do this, you may want to consider two shots - one at the end of dusk (enough light to show the foreground), and one later just for the sky. Obviously, for this to work, you need to keep the same position, camera angle, focal length, etc. Later, you can merge the two.

Thanks Bynx, Nandakumar and Pgriz.

Pgriz, thanks for the link and suggestions! That link will prove very useful for planning. Hubby is home today for the weekend and I pre warned him that he was being recruited to help, I have a few shots in mind :)
Playing with levels etc on the first set has me very excited to play with this idea more.
 
A few other thoughts:

1) Use the "Long Exposure Noise Reduction" option in your custom menu. This creates a "dark" picture, which the camera automatically deletes from the "real" image. This takes care of hot-spots, and some pixel-to-pixel variations. The minus to this, is that every exposure of 1 second or more, the camera takes an identical dark frame, so a 30 second exposure is followed by a 30 second dark frame exposure before the camera gives control back to you. It's a pain sometimes to wait, but the end results are worth it.
2) The formula for how long you can expose before earth movement causes the stars to trail is about 400/focal lenth in mm. So on average, a 18mm lens on your crop Canon will allow you to expose for 22 seconds before star trails start to become visible (3-pixels). For a 50mm lens setting, that would be about 8 seconds. The Earth rotates at 15 arc-seconds per second of time, so it's basic math to work out how much time is needed before the star trails start to show.
3) Stacking images is a well known technique to reduce noise and boost the signal/noise ratio. There are commercial, shareware, and freeware softwares that will allow you to do this.

A few links with good information: 10 Useful Tips for Photographing Beautiful Star Trails, Stars - Photography Reviews, How-To, and Galleries of Digital Grin
 
pgriz said:
A few other thoughts:

1) Use the "Long Exposure Noise Reduction" option in your custom menu. This creates a "dark" picture, which the camera automatically deletes from the "real" image. This takes care of hot-spots, and some pixel-to-pixel variations. The minus to this, is that every exposure of 1 second or more, the camera takes an identical dark frame, so a 30 second exposure is followed by a 30 second dark frame exposure before the camera gives control back to you. It's a pain sometimes to wait, but the end results are worth it.
2) The formula for how long you can expose before earth movement causes the stars to trail is about 400/focal lenth in mm. So on average, a 18mm lens on your crop Canon will allow you to expose for 22 seconds before star trails start to become visible (3-pixels). For a 50mm lens setting, that would be about 8 seconds. The Earth rotates at 15 arc-seconds per second of time, so it's basic math to work out how much time is needed before the star trails start to show.
3) Stacking images is a well known technique to reduce noise and boost the signal/noise ratio. There are commercial, shareware, and freeware softwares that will allow you to do this.

A few links with good information: 10 Useful Tips for Photographing Beautiful Star Trails, Stars - Photography Reviews, How-To, and Galleries of Digital Grin

Pgriz, you are the best :) <3
I do research, promise! (or at least I try)
The best I end up with is a general understanding and have to experiment hands on to make it click , isolating the important bits that I'm missing helps me a TON.

I have made notes in my book and hopefully I will have something to show by the time Hubby leaves for the city again on Monday!
 

Most reactions

Back
Top