vigilante
TPF Noob!
- Joined
- Feb 5, 2015
- Messages
- 55
- Reaction score
- 1
- Can others edit my Photos
- Photos OK to edit
I am not a pro photographer by any stretch but I do what I can. I work for a company with an online store and I also have to take many product shots.
Our equipment is pretty cheap stuff:
Nikon D5100 with Nikkor 18-55 standard lens. About a $1000 setup.
I've got a white box for our photo booth and 3 standard lamps plus standard room lighting and a window that all light up the box. All the lights are white, no incandescent.
The shots I'm having the most trouble with are metallic objects like steel, iron, painted metals etc. Think like knives or firearms. Mostly these are manufactured steel products with various colored finishes.
I have played with every setting I can to try and get good high key photos so I can blow out the backgrounds etc.
Problems I keep having though:
- Colors never seem right. A dark grey or a black just look like silver, too light. I can put a grey and black product next to each other and they often don't look any different.
- Too grainy. I would like the metal on these objects to seem smooth but instead I have a kind of grainy, almost TOO detailed look, with high ISO-like artifacts and prominent "pores" from the metal.
- Odd blobs of color splotches. For example if an object is 7 inches long and I'm shooting it from the side, the middle 4 or 5 inches looks ok, but on the two outsides, there might be splotches of purple or green tints with grainy artifacts. I'm guessing the narrow range of the flash is lighting up the middles and leaving problems on the outsides.
- I try to compensate with more light by using flash but this exacerbates some of the discoloration issues and makes shadows and things more pronounced.
- Raising flash compensation and exposure compensation just end up washing out products, even making artifacts, pores, and tiny imperfections more visible.
I seem to be able to shoot other sorts of things just fine, like hats or boxes or other swag, but have a heck of a time with dark objects or metal!
As I mentioned, I'm using the light box because I want to blow out the backgrounds and cut my products out.
I have to hold the camera, so my shutter speed, I've found, needs to be at 80. I can try 60 but can get a little camera shake so I like to stay at 80-100 at least. ISO is a killer with artifacts on metal so I really don't want much more than 400 maybe 800 at most.
That leaves aperture. Well sometimes I want a little depth of field like maybe at 7 or 8, rarely down to 4.8 which is max. Sometimes I want zero DoF, because I'm trying to get fully sharp object image, but jumping to 14+ is just too dark again.
I'm at a loss, I really am trying to learn but I can't seem to find settings that work for high key shots on metal objects which may be dark in color. The D5100 has a "high key" effect which works ok but is stuck on 4.8 aperture which I rarely want anyway.
So what is my problem? Do I just need even more ambient light? A better flash setup? Do I need to take the shots from farther away to try and smooth out the metal pores?
Everything I do just makes it worse. If I use flash compensation brighter, that's no good. If I use exposure compensation and go up on that, also blows out the colors and richness of the objects. If I have higher aperture then my ISO has to go to 1000+ and the metal looks bad at that point. I can lower shutter speed but it's hard not to get a pinch of blur when I do that.
Any ideas are welcome. Some tutorials on shooting steel or metal products, high key, blowing out backgrounds, accurate colors, reducing artifacts and visible imperfections etc etc.
I've got an entire small catalog I will be shooting soon and I haven't found a method and settings that work for these painted metal objects!
")

 Shimano SH-M162
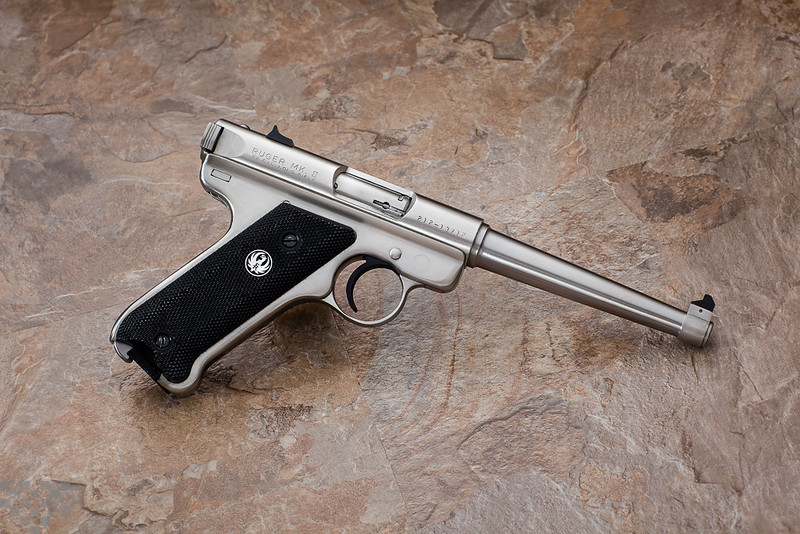 Ruger: MK II
 Tiffany


![[No title]](/data/xfmg/thumbnail/37/37119-95714aab9befe33ecb7b951366bedc94.jpg?1734169832)
![[No title]](/data/xfmg/thumbnail/35/35952-55c8d42ec1c6ff0e13b45356cbf9c068.jpg?1734167758)
![[No title]](/data/xfmg/thumbnail/42/42067-88a229e814afcfc8848b3e293d8113d9.jpg?1734176466)


![[No title]](/data/xfmg/thumbnail/35/35953-1a8b92df0115ff7026f31b78855ac815.jpg?1734167764)