Help with lighting

arian29

TPF Noob!
Joined
Aug 15, 2010
Messages
31
Reaction score
0
Can others edit my Photos
Photos NOT OK to edit
I am trying my hands in product photography.. As an amateur, currently i am using a DIY light tent/box. I need help with two issues.

1>The lighting is not equal across.
Below image there are two dark patches and a light patch at the center.

$1.jpg


2> Background is not smooth. Am using simple A4 paper.

In the below picture (zoomed to 100%) one can see that its rough. Will over exposing or using stronger flash blow it out of should i use something else ?
$2.jpg

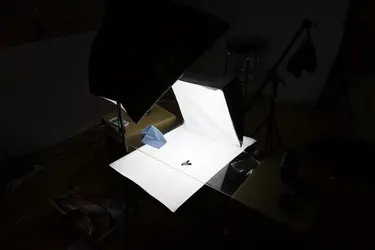
My Current setup:
$Untitled.jpg

Help appreciated :)
 
The easy solution here is not actually to change your lighting, but your product placement; raise the product up 6-8" above the paper and light it. You can then blow out the paper in post, darken it, etc, as you want. Ideally, raise the tea-bag, light it iwth one light, and then use the two desk lamps to light the paper below.
 
To follow along with tirediron's suggestion of raising the product off the floor, you can use something like an upturned wine glass.........

D4%20Front%20A-XL.jpg


.... and then edit it out in post.

D4%20Front%20edit-XL.jpg
 
Thanks for the tip.. seems its working..
$new1.jpg

Anything can be done about the second issue.. its still there.. :)
I don't wanna photoshop and smoothen the background cos at 100% crop the product edges go bad..
 
As an Amazon Associate we earn from qualifying purchases.
Try lifting your object off the background, I use a pain of glass. Then use one light to light the object at about half power (if you can adjust your lights). Use your other light to 'blow out' the white background.
Here is an example of one of mine where I used one light above the product, one behind it, and one lighting the background at a higher power.
$822_5306_0170.jpg
 
eT.David you are just awesome with your suggestion..!
I liked your idea, very inspiring and very effective too!

Hey Austin, happy you found it effective. Give it a try and put up some shots so we can all see how it performs.
 
Thanks eTech_David , however that technique wont work for the teabag. It will work only for object placed flat (standing). So if i want depth or perspectice in my pic i cant do that and there is the problem. I tried a few thinks. Used 2 lamps from the front and the flash with diffuser. This blew out the background .. as well as the object :confused:. so i reduced the lighting and tried focusing the lights up and down and this is what i got. this is very close to what i want :).

$_PGT1978.jpg
Another shot.. :
$990.jpg

Seems it is better to use a single light source so you can control the shadows easily.

However if i zoom in i can see the pape patten.. how do i remove that.. i can use a glossy paper but i guess there are better options.. :)
$22.jpg
 
Last edited:
I'm not sure I understand the problem. Do you want the shadow under your objects? By getting you object lifted up above the background you have the ability to light the background separate from the object. This does two things, allows you to over expose the background removing the details and second it allows the depth of field to remove the texture. If your background is large enough you will be able to photograph from any angle which would help you overcome the perspective hesitation you have. The following images are resized only.
$IMG_0250.jpg
$IMG_0250 copy2.jpg
$IMG_0250 copy.jpg

If you would like I can snag a shot of my setup (which is way smaller than I would like it to be).
 
If you would like I can snag a shot of my setup (which is way smaller than I would like it to be).

Sure.. that would be great..:hail:

the problem is not the shadow but the paper pattern.. the texture..
 
Alright, a few things first:
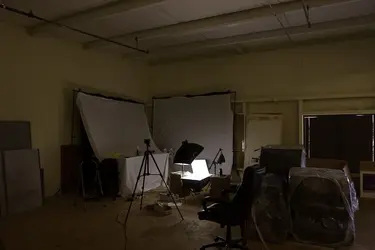
This is obviously an insanely cheap setup. I am using what is available to me because who wants to spend money unless they absolutely have to? These have not been edited, only resized for the forum. I went quick so that's why everything is sloppy.

Location is absolutely vital. You don't want a close space, your walls and ceiling will be nothing but problems regardless of their color. You can see that I am a large open storage space. I would prefer a black ceiling but so far it's okay because it is so high up there.

$IMG_0285.jpg
My glass is over by background. Which is actually small softbox. I would prefer a huge soft box because I could get a wider variety of angles before shooting off the background, but life is what life is.


$IMG_0279.jpg
Here is a shot of what I put on the glass. I typically want this closer to the upper softbox. But I wanted you to just see something.
$IMG_0280.jpg
This what how it was positioned so that I could shoot back into it to give perspective.
$IMG_0282.jpg

Questions?
 
Thanks @ eTech_David .. Nice setup.. but a complex one.. am still a newbie at this. In your setup you have to control reflections in the glass? Nice idea though. However i was able to isolate the background completely by using separate lighting for background and separate for the product. But this works for standing objects only.. once that lay flat , i guess yours is the best way though it would need more practice.
A new shot :)
$DCf33.jpg
 
Last edited:

Most reactions

Back
Top