What's new

How do they do this

jvillaire

TPF Noob!
Joined
Feb 24, 2010
Messages
16
Reaction score
0
Location
saginaw, MI
Can others edit my Photos
Photos OK to edit
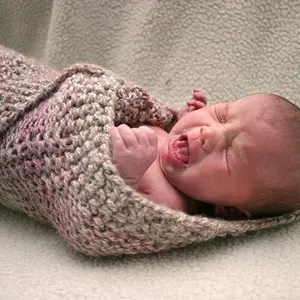
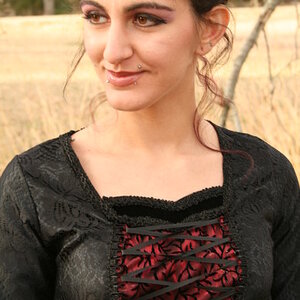
I am still learning how to use photoshop to edit my photos and I am going through a lab company called H&H Color Lab. On their site they offer retouching services and I noticed all of their photos just pop with color and I was wondering if anyone knew how to do it here is a example. Hope you can help!

SERVICES_Retouching_main.jpg
 
The colors are saturated. More contrast also. And it appears there is a "Glow" added to the skin as well. The reds in the blanket are saturated/vibrant, and the reds in her skin as well ( hence the sort of reddish tan look to her skin after ) You can get a lot of add ons to photoshop that will give you presets to mimic this type of stuff. For instance I have OnOne's Phototools which works with Photoshop. ( its basically just a bunch of Photoshop actions. You can do it all in photoshop without the program if you know how to do it and want to take all of the steps. But those programs just simplify it.
 
Yes I know about OnOnes Phototools I have it. But I just cant seem to get my photos to look like that.
 
Also, most photo places are just going to apply a preset ( just like these programs mentioned ) they are not going to actually go in an do specific tweaks to the eyes and skin and hair and color and all that. So if you find that you would use this a lot, get photoshop and watch some tutorials on Youtube. You can do more specific adjustments to wherever your problem areas are if you know how to do it.

Just my two cents I guess.
 
Do you use the mask feature on the phototools adjustments? ( You have to check a box to add a mask while inside phototools ). You can do things seperately. Like add a glow. ( I would recommend the DIFFUSE GLOW under portrait adjustments. It has a few variations depending on how much you want. You then check to make a mask and fill it with black. After you exit phototools and are back in photoshop, paint using white on that mask and paint the glow on only the skin. The other major difference other than the saturation of color, is just simply the contrast. Look at the shadow areas on the blanket. Before they are like a dark gray not quite black. Afterwards they are very black. Use a contrast adjustment, or you can also make this adjustment right away in Adobe Camera Raw by adjusting the blacks slider.
 
Can you post a larger version of the "Before" picture? I would like to take a stab at it later on. I will try to only use phototools and masks. ( others might want to try as well, so a large pic would be helpful )
 
First, realize that Photoshop is a tool not a solution. Just like any tool it takes lots of practice to master. Don't get discourage if it takes a bit of time to learn.

Often, a simple adjustments (curves, saturation, contrast, sharpening..) can do wonders. I went through some of the steps I take in this post:

http://www.thephotoforum.com/forum/...-what-can-i-do-improve-pic-2.html#post1788530

My guess at the picture above includes masking out the skin from the material the model is laying on. Probably a third layer masking out the facial features like eyes brows, and hairline. This allows aggressively pushing the saturation and adjustment of color without making the model's skin look unnatural. You can see that the aggressive contrast adjustment has clipped details in the darken areas. The next step looks to be careful adjustment of the skin (on a different layer). Perhaps a bit of blur to smooth things out a bit. A bit of sharpening to the eyes... A tiny bit of vignette on the edges.. via burning.

Again, get some resources and read about the various tools available in photoshop. Then simply experiment with one of your photos. I'm no expert but that's how I figured things out. Some of the stuff I've seen in PS is amazing... in both final results AND complexity in process.
 
Can you post a larger version of the "Before" picture? I would like to take a stab at it later on. I will try to only use phototools and masks. ( others might want to try as well, so a large pic would be helpful )
No this was off the H&H Color Lab website.
 
It's best to get as close as you can in the camera. If you're using film, a warming filter will do. If you're digital, mess around with the saturation and white balance settings. I leave my Nikon on standard saturation and auto white balance. By changing to vivid saturation and "flash" white balance, minus 3 levels, I came up with a reddish overall cast that with some fine tuning would give an easier starting point.
 
It's best to get as close as you can in the camera. If you're using film, a warming filter will do. If you're digital, mess around with the saturation and white balance settings. I leave my Nikon on standard saturation and auto white balance. By changing to vivid saturation and "flash" white balance, minus 3 levels, I came up with a reddish overall cast that with some fine tuning would give an easier starting point.

I'd recommend just shooting in RAW instead.
 

Create an account or login to comment

You must be a member in order to leave a comment

Create account

Create an account on our community. It's easy!

Log in

Already have an account? Log in here.

New Topics

Back
Top Bottom