Russell
TPF Noob!
- Joined
- Aug 24, 2007
- Messages
- 5
- Reaction score
- 0
- Can others edit my Photos
- Photos NOT OK to edit
Hello Everyone,
With my style of photography, I wish to print much larger than I have been. Currently, I'm doing 12"x36" panoramics - but I really want to at least double that.
So, I'm looking at prints that range from 24"x72"... up to maybe 36"x 108". Since I frame my images to fit my subject, they really are never a perfect 3:1 ratio. Like most artists, I really like to push the limits of my technique, I have one that would print 12" x 120"!
I've been lucky enough to sell a few prints through two local galleries. My best selling image is an old mine:

Please peek at my website for more examples of my work: www.russellschutte.com
So, I've run out of patience with standard archival framing. Anything larger than 12" x 36" seems to "sag" in the frame behind the mat or stick to the front glass - no matter how professionally it's done - within a year or two the problem will appear. In addition, mat board is impossible to find any larger than 108"... and sizes that big cost a fortune and are never perfect when they arrive. The prints are almost never perfectly flat, which makes the result look really bad.
I'm investigating several ways to mount my prints and I'm looking for feedback:
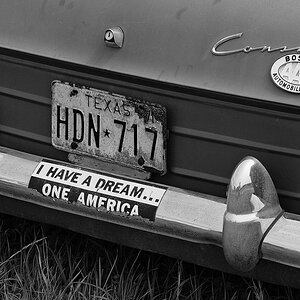
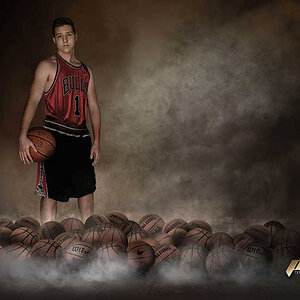
1. Mount the images to gatorboard (a very strong honeycomb foamboard). This is an adhesive process that permanantly binds the image to the gatorboard. While not obeying the "reversability" clause of archival processes, this seems to be a very common practice now, particularly with images that are too big for standard framing. Typically, the image is mounted to the gatorboard, and a mat is printed around the image to simulate matting, and the entire thing is then framed and plexiglassed on top - looking quite similar to traditional framing (if you don't look too closely). An example of this is shown here:

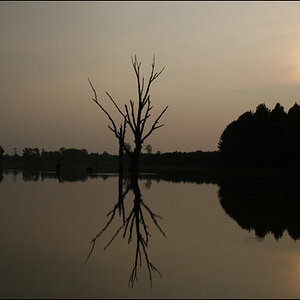
2. Sandwich mounting. This technique is to take the photograph, and sandwich it between two pieces of plexiglass. It is glued to both pieces and while it isn't considered archival, this process sounds like it may last longer than traditional mounting methods because of the way the image is secured from the surrounding environment. The primary advantage of this technique is the color that comes through - almost a glow when looking at the image. This is a very popular technique overseas, but hasn't seen much traction here yet. An example of this is shown here:


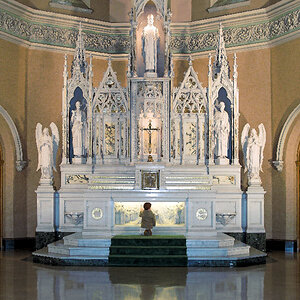
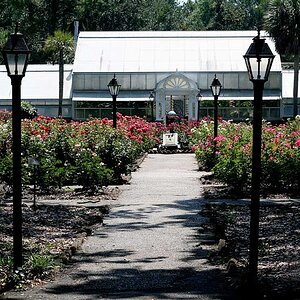
3. Mount to wood. This technique provides a very durable solultion. The image is mounted to an archival wood backing... and then laminated over the top. This is ideal for anyone who might be considering outdoor displays! If I remember correctly, it's rated for 10 years outdoors! That should make it last a long time on someone's wall. An example of this technique is shown here:


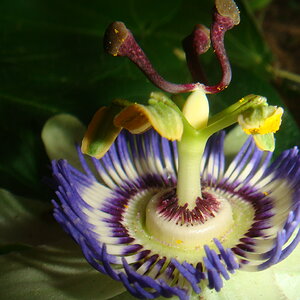
4. Print on aluminum. This technique I'm still researching. From what I gather, a sheet of aluminum is coated with a white coating - something like porcelin. Then the image is printed on this surface and a thin protective coating is applied. The result is an image, like the sandwich method above that radiates light back to the viewer. It looks impressive, but I have absolutely zero sources for this kind of printing. It took me an hour to find this one example:

5. Print to canvas. You've probably already seen this technique, but basically you print the image directly on a large piece of canvas, then stretch the canvas and use a spray protectant over the top. While this can look good for many styles of art - my art is an art of precision, and I'm afraid I'll loose detail in the weave of the canvas. Here's an example:

Keeping my format/style in mind... What do you guys suggest? Cast your vote for 1, 2, 3, 4, or 5.
 (Share any other ideas you have or vendors you've worked with!)
Thanks so much for your feedback,
Russell Schutte
www.russellschutte.com
With my style of photography, I wish to print much larger than I have been. Currently, I'm doing 12"x36" panoramics - but I really want to at least double that.
So, I'm looking at prints that range from 24"x72"... up to maybe 36"x 108". Since I frame my images to fit my subject, they really are never a perfect 3:1 ratio. Like most artists, I really like to push the limits of my technique, I have one that would print 12" x 120"!
I've been lucky enough to sell a few prints through two local galleries. My best selling image is an old mine:
Please peek at my website for more examples of my work: www.russellschutte.com
So, I've run out of patience with standard archival framing. Anything larger than 12" x 36" seems to "sag" in the frame behind the mat or stick to the front glass - no matter how professionally it's done - within a year or two the problem will appear. In addition, mat board is impossible to find any larger than 108"... and sizes that big cost a fortune and are never perfect when they arrive. The prints are almost never perfectly flat, which makes the result look really bad.
I'm investigating several ways to mount my prints and I'm looking for feedback:
1. Mount the images to gatorboard (a very strong honeycomb foamboard). This is an adhesive process that permanantly binds the image to the gatorboard. While not obeying the "reversability" clause of archival processes, this seems to be a very common practice now, particularly with images that are too big for standard framing. Typically, the image is mounted to the gatorboard, and a mat is printed around the image to simulate matting, and the entire thing is then framed and plexiglassed on top - looking quite similar to traditional framing (if you don't look too closely). An example of this is shown here:
2. Sandwich mounting. This technique is to take the photograph, and sandwich it between two pieces of plexiglass. It is glued to both pieces and while it isn't considered archival, this process sounds like it may last longer than traditional mounting methods because of the way the image is secured from the surrounding environment. The primary advantage of this technique is the color that comes through - almost a glow when looking at the image. This is a very popular technique overseas, but hasn't seen much traction here yet. An example of this is shown here:
3. Mount to wood. This technique provides a very durable solultion. The image is mounted to an archival wood backing... and then laminated over the top. This is ideal for anyone who might be considering outdoor displays! If I remember correctly, it's rated for 10 years outdoors! That should make it last a long time on someone's wall. An example of this technique is shown here:
4. Print on aluminum. This technique I'm still researching. From what I gather, a sheet of aluminum is coated with a white coating - something like porcelin. Then the image is printed on this surface and a thin protective coating is applied. The result is an image, like the sandwich method above that radiates light back to the viewer. It looks impressive, but I have absolutely zero sources for this kind of printing. It took me an hour to find this one example:
5. Print to canvas. You've probably already seen this technique, but basically you print the image directly on a large piece of canvas, then stretch the canvas and use a spray protectant over the top. While this can look good for many styles of art - my art is an art of precision, and I'm afraid I'll loose detail in the weave of the canvas. Here's an example:
Keeping my format/style in mind... What do you guys suggest? Cast your vote for 1, 2, 3, 4, or 5.
Thanks so much for your feedback,
Russell Schutte
www.russellschutte.com