How to duplicate the Civil War era Portrait "look"?

stovk

TPF Noob!
Joined
Jan 7, 2016
Messages
1
Reaction score
0
Can others edit my Photos
Photos NOT OK to edit
Hello All,

Sorta new to photography so I was wondering if anyone can help me out?

I noticed in American Civil War era portraits, there seems to be a "look" that you don't see very often. It's hard to explain, but it looks like there is a very short focal length.

Here is an example:
main_1500.jpg


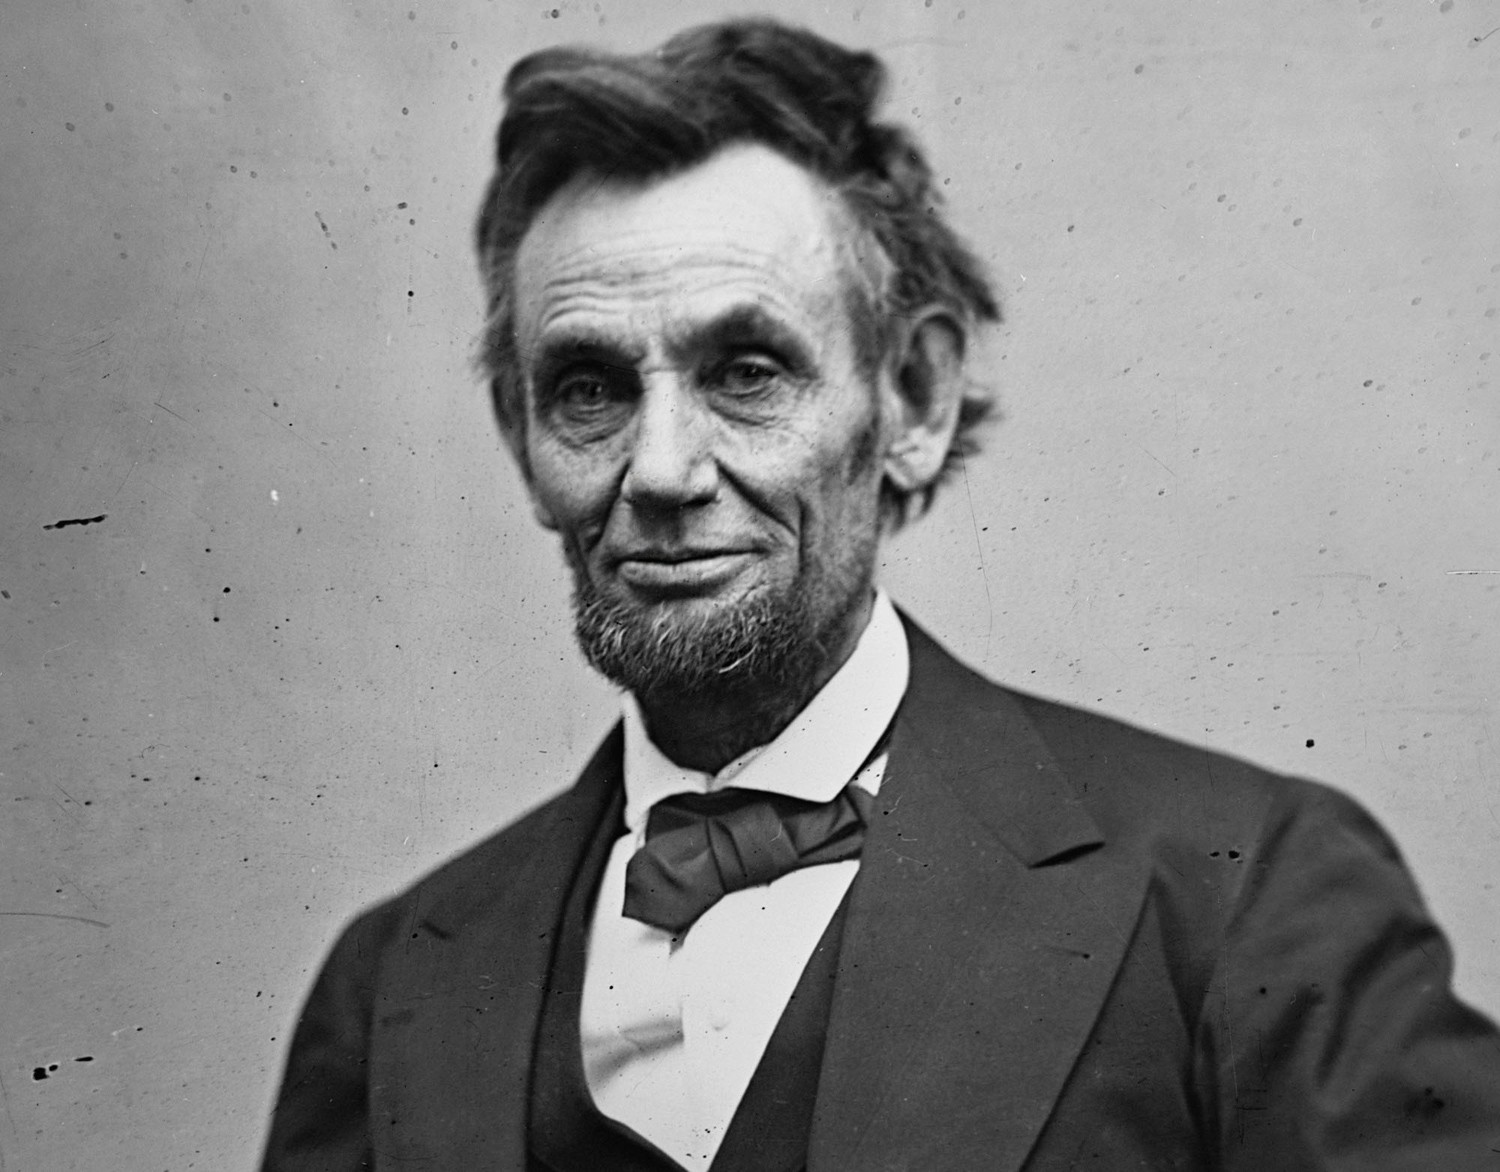
Notice how Lincoln's eyes, nose, and mouth are in focus, but his ears, hair, and arms are slightly out of focus. It's as if there is a narrow plane which is in focus.

My question is, what kind of lens could duplicate that "look"?
Would a fixed focal length lens be best?
If so, what lens would you suggest?

Thank you in advance for any help.
 
Last edited:
Several thoughts:

1. No smiles. In that period, it was considered frivolous to smile in a photo, you see almost none of anyone in that period. Also, not a lot of fat people (unless you were very well off).

2. You'd like use sepia (easily done with most photo editing programs.

3. Plenty of software editing programs have frames that can recreate this look (with garbage in the pictures, tears and wrinkles in the photo).

4. It's basically a photo taken with a narrow aperture so you could shoot at f20 on a tripod with your model holding still very stiffly and you'd be doing a modern recreation of a Civil War-era tintype or daguerrotype.
 
Actually, it's probably a very long focal length. Most likely, it was taken with what is known today as a 'large format' camera. Note the extremely thin depth of field, despite a 'normal' field of view. So you're looking at a 200mm or longer, depending on the film size.
 
I think that the most important thing to duplicate won't be the lens, but rather the lighting.

I've been trying to study lighting and reverse engineering it, so hopefully someone will correct me if I'm wrong.

It looks to me like the light is high above him and slightly to camera right. It's fairly hard...if you look at the shadows on his cheeks, the shadow is pretty strong. The half circle under his nose means it's loop lighting, so maybe googling the diagrams for that effect might help. His eyes are pretty dark, but there are small catchlights in each eye.

Now, to recreate that...that's where I'm not as sure. A big window with even, natural lighting is definitely NOT what you want. I think a shoot through umbrella might be too soft, too. Possibly a gridded softbox? Maybe a snoot of some kind? I think a bare flash would be too harsh, unless it was pretty far away....I'm really not sure. Hopefully someone else will chime in. (That way I can learn too!)
 
Plus in that era exposures were pretty long and many photos have subject or camera motion blur.
 
"North light" studio...long lens focal length, probably an eight inch lens or maybe even longer, exposure time counted in seconds. The long lens, which paired with a large-ish format wet plate capture medium, together meant that photos shot at closer, indoor distances like this, would create a very shallow DOF band, and as KmH mentioned, the exposure times in that era were slow and were counted out, or timed with a pocket watch.

Here is the Matthew Brady Studio era's post-1860 and his ACTUAL camera and lens: Famed Civil War Photographer Mathew Brady’s Studio Camera Readies For Public Auction At Heritage

As stated, this is an 1860 model, but Brady was making photos offamous people at least a full decade earlier, so, this is not the "only" camera his studio had, but this one and its lens was listed in his bankruptcy documents :

"Although no manufacturer's label is present on the camera itself, it is similar to examples made by H. J. Lewis of New York, circa 1860. The dark wood camera is fitted with a Petzval-type brass barrel lens bearing the serial number 1195. The Brady provenance is iron-clad.

“It’s accompanied by photocopies of original Bankruptcy Court records signed by Brady dating from April 1873, when he filed for bankruptcy,” said Slater, “listing this lens with its serial number in an inventory of his Operating Room equipment.” The camera was also notably featured in a Sept. 23, 1957 Life Magazine article titled “In Image of the Master, the Famous Photographs of Mathew Brady Are Matched Today with Pioneer's Own Camera.


what kind of camera did Mathew Brady use in his studio to photograph Lincoln? - Google Search
 
It looks to me like the light is high above him and slightly to camera right.
What kind of light do you get when you hold YOUR flashpan high above your head with your right hand while you hold the shutter bulb in your left hand?

The light of burning magnesium powder is not exactly like the light from a speedlight or studio strobe.
 
Sparky nailed it for me. I think the large format can be attributed to the look. I have been looking at them and the photos do tend to produce a look and feel of the Lincoln photo. Then Derrel just breaks it down, priceless.

Sent from my XT1254 using Tapatalk
 
My question is, what kind of lens could duplicate that "look"?
That would be hard to do, I think ?

Assuming you used a Petzval 600mm f3.5 on the 8x10 (200x250mm), you would need about a 85mm f0.7 for small format 36x24mm.
 
I think what the original poster is looking to dupe is the razor thin depth of field on that shot.
Lincolns beard,collar,and tie is in focus and the rest isn't.
Are you guys really so anal that you don't understand that?
 
1. Build a time machine.
 
Oh, Hi, Jack!

Here is a poor attempt done on the spur of the moment without the correct costumes or the correct light.

View attachment 114073
What the hell is that?
It's not even CLOSE to answering the guys question.
Did you even read what he asked or look at the photo?
Or were you just trying to scare the hell out of him with that photo?
 
I think what the original poster is looking to dupe is the razor thin depth of field on that shot.
Lincolns beard,collar,and tie is in focus and the rest isn't.
Are you guys really so anal that you don't understand that?

What the hell is that?
It's not even CLOSE to answering the guys question.
Did you even read what he asked or look at the photo?
Or were you just trying to scare the hell out of him with that photo?

PWI,...... or what?
scratch-1.gif
 
There are so many different ways you could replicate this look.
You don't necessarily need a telephoto lens to get that thin depth of field. You can replicate the thin depth of field by shooting wide open with an 85mm f/1.2 lens if you shoot Canon, or an 85mm f/1.4 lens if you shoot with Nikon. Not sure what lenses are available for other brands. Those lenses are very expensive though, but you can save a lot of money by renting. A blank canvas such as a large painter's drop cloth (very affordable to buy from a paint store) could be used for your backdrop, and if you don't have strobes you could use a window for lighting or even set the backdrop up outside. As for the texture, I'm not the best person to get that advice from; I have zero experience adding textures to images. I'm sure others here know some good way to do it though.

For black and white conversion I would just make a black and white adjustment layer over the image in Photoshop, and then make a curves adjustment layer to play with the contrast and tonality of the image until you get what you want. It's a very easy technique that takes very little time and gives you complete control over the look of the image in a non destructive way (Adjustment layers don't change the original image layer, meaning the changes are only done on the separate adjustment layers). I'll try to explain the process using screen captures. I don't have an image similar to that shot of Lincoln, so I hope you don't mind me explaining with a portrait of a girl.

1. Make a "Black and White" adjustment layer over your image in photoshop; this will do a basic black and white conversion on your image in a non-destructive manner:
step_one_by_danostergren-d9n9uus.jpg


2. Make a curves adjustment layer:
step_two_by_danostergren-d9n9uui.jpg


3.
In the curves dialogue box, make two points on the diagonal line in the grid. One point should be halfway down towards the bottom of the line, and another should be made halfway towards the top. The lower point will let you control the shadows and darker tones of the image. Pull it down to intensify the dark tones. The point on the upper end of the line controls your highlights. Adjust these points accordingly to achieve some contrast (making an "S" curve is generally what you want to do with these points the achieve a contrast boost). You will also notice a point in the very bottom left corner of the grid; if you pull it up just barely, you will start seeing a bit of a fade in the dark areas of the shot. If I want a vintage look to my black and white images, this is how I achieve that look. Make sure you don't go over the top with this, otherwise your photo will look edited rather than natural.
step_four_by_danostergren-d9n9uuu.jpg


I hope this helps.
Start:
screen_shot_2016_01_08_at_11_03_17_pm_by_danostergren-d9n9vu9.png


Finish:
screen_shot_2016_01_08_at_11_06_13_pm_by_danostergren-d9n9w12.png
 
Last edited:
Oh, Hi, Jack!

Here is a poor attempt done on the spur of the moment without the correct costumes or the correct light.

View attachment 114073
What the hell is that?
It's not even CLOSE to answering the guys question.
Did you even read what he asked or look at the photo?
Or were you just trying to scare the hell out of him with that photo?
Instead of trolling why don't you just try to answer the topic author's question? Trolling someone who misunderstood what the author asked is certainly less helpful than anything else that's been posted in this topic.
 

Most reactions

New Topics

Back
Top