Just a few randoms

CarlosFrazao

No longer a newbie, moving up!
Joined
Jan 11, 2016
Messages
223
Reaction score
174
Can others edit my Photos
Photos OK to edit
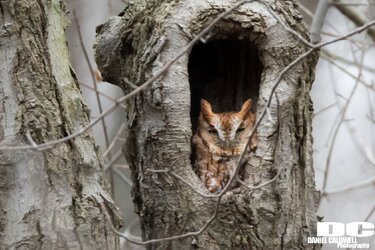
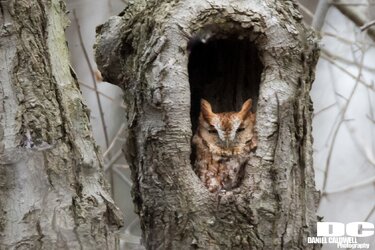
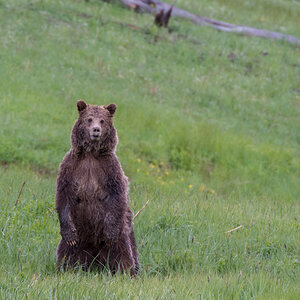
Hey guys here's a few random bird shots that I took in the last few months, hope you enjoy.. Once again CC welcome please. Thanks
image.jpeg
image.jpeg
image.jpeg
image.jpeg
image.jpeg
image.jpeg
 
Excellent set. Great timing in 5.

Sent from my XT1254 using Tapatalk
 
Nice shots is that a little blue heron in the first one? and what type of cormorant is that?
 
Nice shots is that a little blue heron in the first one? and what type of cormorant is that?

Hey bud the first one is a called a black heron or black egret they have the coolest way of hunting pushes out its wings like an umbrella to block the sun then he can see nicely into the water.. The one is flight is a reed cormorant
 
the first photo.. looks like focus was on the tree and not the bird, the bird is lacking detail.. adjusting the shadows could possibly bring out more detail...

the second one the top of its head is missing and its eye almost looks fake.. something weird about that but i cant quite figure out what it is..

i really like the 3rd one allot.. i would probably tone down the highlights just a little bit on that one..

the 4th one those birds can be very hard to photograph since there so dark.. that came out quite well..

the last 2 are really cool photos but i think you could make them look better with a little editing in lightroom or a simular program.


here is what i did with 2 of your photos in lightroom.. i adjusted the image than i took a brush and adjusted the background.. i sharpened them a little.. toned down some highlights and what not.

image (1).jpg


image-2.jpg
 
the first photo.. looks like focus was on the tree and not the bird, the bird is lacking detail.. adjusting the shadows could possibly bring out more detail...

the second one the top of its head is missing and its eye almost looks fake.. something weird about that but i cant quite figure out what it is..

i really like the 3rd one allot.. i would probably tone down the highlights just a little bit on that one..

the 4th one those birds can be very hard to photograph since there so dark.. that came out quite well..

the last 2 are really cool photos but i think you could make them look better with a little editing in lightroom or a simular program.


here is what i did with 2 of your photos in lightroom.. i adjusted the image than i took a brush and adjusted the background.. i sharpened them a little.. toned down some highlights and what not.

View attachment 120993

View attachment 120995

Dude I really need to learn how to edit cause those photos look so much better now thanks for the edits.

Yeah the first one was missed focus that was when I upgraded from the d7000 to the d7200 and the sigma 150-500 was utter rubbish, the focus was so out so badly doesn't matter where I aim it was out, and sigma South Africa are really pathetic wanted to ask me R1000 to do a firmware update and then they say I will probably not even work. So I sold it and got the contemporary much much better now...

On the second pick is that the one with the yellow eye, I didn't cut off any of the head so maybe it didn't load correctly on your side no idea though, but yeah those eyes looking fake, that is what they really look like it a pair of intense eyes those

i am no longer seeing the head being cut off lol, weird..

light room is awesome for making photos look better. its super easy to use once you get the hang of it, i find the brushes to be super helpfull since you can use them to edit the area of the photo you want, you just got to take your time when painting that area with the brush to get it right. takes some practice but once you get it the brushes can be a huge help.. i love brushing the background and darkening it up at times. it can really make the subject stand out more IMO..

i watched these 2 videos when i got lightroom and they got me off to a awesome start.. i may have watched a few more of his videos but i really found these really helpful..


Yeah I have a lot to learn looks like it, I do have Adobe cc so just need to sit and work on that editing skills as it really does make the difference between a good and a great photo
 
that is what i have too. i never use photoshop though.. i like to keep a raw copy of my finished images and photoshop does not seem to allow you to make a raw image.. light room does and i dont really need to do any major editing, just touching up and making them look good or what not, lightroom works great for that

learing to use the brush in lightroom was really was the key to being able to make a photo look good that i could not get just right in the basic editing section.. some photos i may have several different brushes in different spots....

basically ill adjust things in the basic section till i get the subject looking as good as i can..

than i got to the sharpen menu.. i usually sharpen the amount between 40 and 60 set the radius to 1.5 and set the detail slider to around 40 if the subject has too much noise ill try to use the luminescence slider but only as much as i need to since it can kill the sharpness of the image.

now i go to the brushes. if the background is noisy i brush the whole background and set the noise slider up and move that up, that removes noise in the background.. i do not brush the subject just the background, than i adjust the contrast, exposure and all that stuff if i think the background could use improvement..

now say the birds head is dark and lacking detal but the rest of the bird is exposed properly, of ryou still have a spot where the highlights are blow out on the animal.. ill brush the head and adjust the exposure and shadows.. or ill brush the blown out spot and bring down the highlights

if there is a spot where the highlights are blown out ill brush that spot and turn down the highlights.. as you notice on the photo of yours i edited, the big white spot near its eye was blown out in your photo and you could not see any detail.. i used the brush to adjust that and its not blow out like it was and you can see some detail in that spot now..

after i am done with all the brushes ill go back to the basic editing tab and move each slider again making a note of where it had it. so i adjust that slider a little and see if i like it better or not after i have made the other changes , if i cant get it to look better ill put the slider back to where it was.. than do the same thing or the next slider.

so i use the basic editing tab, the detail tab, than i use brushes if needed and the basic editing tag again, i dont usually mess with any of the other stuff unless i just cant get a image i like, in that case ill go to the tone curve tab and play with those, or i may use the dehaze slider in the effects tab if the photo is looking a little hazy or foggy or something.. most of the time i do not use those settings..

if there is something in the photo i do not like i will use the spot removal tool to try and remove it.. that can be very time consuming depending on what your doing.. ill show you a photo with and without the spot removal tool that has major spot removal going on.. i used the spot removal tool over and over and over and over, little small spots removed all over... this probably took me about a hour to do in light room but i did not want these branches and i wanted the raw origional.. probably could have removed them much faster in photoshop but it can be done in light room allot of the times..

20151211-DSC_6596-2.jpg 20151211-DSC_6596-3.jpg
 
Nice set! When posting a variety like this, I think IDs would be appreciated.
 
that is what i have too. i never use photoshop though.. i like to keep a raw copy of my finished images and photoshop does not seem to allow you to make a raw image.. light room does and i dont really need to do any major editing, just touching up and making them look good or what not, lightroom works great for that

learing to use the brush in lightroom was really was the key to being able to make a photo look good that i could not get just right in the basic editing section.. some photos i may have several different brushes in different spots....

basically ill adjust things in the basic section till i get the subject looking as good as i can..

than i got to the sharpen menu.. i usually sharpen the amount between 40 and 60 set the radius to 1.5 and set the detail slider to around 40 if the subject has too much noise ill try to use the luminescence slider but only as much as i need to since it can kill the sharpness of the image.

now i go to the brushes. if the background is noisy i brush the whole background and set the noise slider up and move that up, that removes noise in the background.. i do not brush the subject just the background, than i adjust the contrast, exposure and all that stuff if i think the background could use improvement..

now say the birds head is dark and lacking detal but the rest of the bird is exposed properly, of ryou still have a spot where the highlights are blow out on the animal.. ill brush the head and adjust the exposure and shadows.. or ill brush the blown out spot and bring down the highlights

if there is a spot where the highlights are blown out ill brush that spot and turn down the highlights.. as you notice on the photo of yours i edited, the big white spot near its eye was blown out in your photo and you could not see any detail.. i used the brush to adjust that and its not blow out like it was and you can see some detail in that spot now..

after i am done with all the brushes ill go back to the basic editing tab and move each slider again making a note of where it had it. so i adjust that slider a little and see if i like it better or not after i have made the other changes , if i cant get it to look better ill put the slider back to where it was.. than do the same thing or the next slider.

so i use the basic editing tab, the detail tab, than i use brushes if needed and the basic editing tag again, i dont usually mess with any of the other stuff unless i just cant get a image i like, in that case ill go to the tone curve tab and play with those, or i may use the dehaze slider in the effects tab if the photo is looking a little hazy or foggy or something.. most of the time i do not use those settings..

if there is something in the photo i do not like i will use the spot removal tool to try and remove it.. that can be very time consuming depending on what your doing.. ill show you a photo with and without the spot removal tool that has major spot removal going on.. i used the spot removal tool over and over and over and over, little small spots removed all over... this probably took me about a hour to do in light room but i did not want these branches and i wanted the raw origional.. probably could have removed them much faster in photoshop but it can be done in light room allot of the times..

View attachment 120999 View attachment 121000

Damn bro thanks for that in detail message, I have never touched the brush tool literally just pull a few sliders and I'm done... You have opened a new perspective for me here.. If you brushing the background how do you stop that from affecting the main focus be it a bird or whatever
 
Nice set! When posting a variety like this, I think IDs would be appreciated.

My apologies I am going to make another thread with a few more pics and will then identify them all... Just so hard as I'm working from my iPhone and on my Mac I'm struggling as pics are to big and I have no idea how to use flicker. My pics would probably be better quality aswell if coming from the Mac
 
You only brush the areas you are adjusting. It's always useful if you zoom in to do detailed brushing and make sure AUTO MASK is turned on. When you brush over an area you did not mean to, simply hold the (alt key) in to turn your brush into an eraser. I would highly suggest you bookmark this page and refer back to it for much of your Lightroom needs as you continue to grow with the software. Lightroom Tutorials by Julieanne Kost We all learn differently, but I would suggest picking and choosing subjects you need so you don't feel like it's information overload and get frustrated.
 
You only brush the areas you are adjusting. It's always useful if you zoom in to do detailed brushing and make sure AUTO MASK is turned on. When you brush over an area you did not mean to, simply hold the (alt key) in to turn your brush into an eraser. I would highly suggest you bookmark this page and refer back to it for much of your Lightroom needs as you continue to grow with the software. Lightroom Tutorials by Julieanne Kost We all learn differently, but I would suggest picking and choosing subjects you need so you don't feel like it's information overload and get frustrated.

You guys are truly awesome. I really appreciate all the knowledge flowing around and guys taking the time to reply to my threads
 

Most reactions

Back
Top