Problem with depth

Forget just about everything that has been posted. This is a simple fix.

1. Use a tripod. Use the self timer or a cable release. Use mirror lockup if you're shooting with a telephoto lens. Hand holding a camera is probably the most common cause of unsharp pictures.

2. If it's really sunny, set camera to f/16 and shutter speed to 1/100 sec and iso to 100.

3. If it's cloudy or late afternoon, take a meter reading off your hand or grey card. Set aperture to f/11 and set shutter speed to whatever your meter tells you.

4. No matter what method you use, to insure a correct exposure bracket your exposures by a half stop in either direction. Then do another bracket by a full stop in either direction. Or, use the "white towel" method. Put a white towel in the shot and take a picture. Adjust exposure via shutter speed until the white towel just clips in your histogram.

5. Pick a better time of day to shoot when the sun isn't directly overhead.

6. Set focus to about 20-30' If there is nothing 20-30' of interest, then set focus to infinity. Read up on "hyperfocal distance"

7. Compose your shot so that you have something really interesting in the frame. Look up "rule of thirds" on tips for composing.

8. To make your shots "pop" use a polarizer filter or graduated ND filter to control the sky. Also, set your camera to "Landscape" mode if it has this setting. To make your shots REALLY pop, shoot in RAW and do some post processing in PS, Lightroom, or another program.
 
7. Compose your shot so that you have something really interesting in the frame. Look up "rule of thirds" on tips for composing.

cannot see how the guideline of thirds should give such images more depth.
 
I will not start a debate here, but IMHO the so called "rule" of thirds is the most overrated guideline ever ;)

I agree though, that thinking deeper about composition will help anybody.

image 1 is not bad in composition though, and image 3 is even quite good.
I the latter the centred main subject works quite well and regarding the vertical layering I can even see almost something like a golden ratio.

The image mainly suffers from exposure, the light, and the white balance.
Overrated? Perhaps, however it has stood the test of time regarding composition. Having said that, I've seen some wonderful shots that violated just about every "standard" rule of photography. I had a photography instructor many years ago who told me; "The first rule of photography is that there are many rules. The second rule of photography is that you will often break these rules".

I've taken that to heart over the years but I've always believed that one should know the "rules" before you break them.
 
I'm with Flatlline. The pics are too small to make a good judgment. Are you even sure you need everything sharp from front to back?

A little overexposed, but that's an easy fix. Blah color, though. Is that that auto white balance?

Like Alex P suggested, dropping the camera down might have made the difference. I do like the composition on them otherwise.
 
Forget just about everything that has been posted. This is a simple fix.

haha...that seems pretty arrogant! Especially since several of your items were already mentioned.

To me it's obvious that one of his biggest issues here is his shutter speed. Yes there are others but this is a huge fundamental issue.

There is no way he should be shooting a bright sunny day at 1/2.5 of a sec! (And handholding, at that.)
 
Shots taken in setting like this rarely do justice to the actual scene you saw in person. there is too much going on to focus on any one thing and furthermore there is no ral subject to focus on. It takes a lot of skill to compose and expose a shot like this that porduces a result as beatiful as reality. Try running this image through an HDR program that will get you closer to what you saw when you were there. Also keep experiemting with different setting.... and last of all get a tripod, if you can never shoot anything lower than 1/60th without a tripod.
 
I think the main problem is that point and shoots just don't do a wide enough angle. On a scene with a lot of depth like this, with a P&S it's like you're just looking through a small window and missing a ton. This is where SLR systems are great since you can get super wide angles of view. Making some of those the center shot, you could try taking nine more surrounding the center one and stitching them all together.
 
I almost NEVER follow the rule of thirds. Sometimes I accidentally get an image with the rule of thirds but I stopped using it by default years ago.

You need to know where the light in your subject is going to fall. Use your meter, even the one in your camera, to find the values in your subject. If there is a shadowed area in you subject, meter a similar shadow area close to you if you can't get to it. Same for highlights. Make a mental note of the SBR (subject brightness range) between the most important shadow and highlight and set your exposure somewhere in between.

You should try to avoid handholding your camera at a shutter speed that is less than the focal length of your lens (ie. 50mm lens, no slower than 1/60th of a second)

Also, a higher ISO will produce more contrast, a lower one will reduce contrast. There is actually nore contrast in an decreased exposure than in an increased one because there is more seperation between lower exposure zones than between higher ones.

Definitely use a tripod. But remember that you are photographing more than your subject. You are photographing light. The film/sensor is sensitive to light, not a fern or a boulder or a stream. So learn what light will do to your photographs. Once you master light the rest will fall into place.
 
haha...that seems pretty arrogant! Especially since several of your items were already mentioned.

To me it's obvious that one of his biggest issues here is his shutter speed. Yes there are others but this is a huge fundamental issue.

There is no way he should be shooting a bright sunny day at 1/2.5 of a sec! (And handholding, at that.)
Arrogant? Not really. There is a lot of confusing information for a beginning photographer to digest in this thread. I'm trying to simplify it for him by breaking it down into easy to understand steps.
 
What's the focal length on these?
 
I agree that by now this thread is full of info, some of which is less and others more relevant. And I guess it is hard for a beginner to digest it by himself.

But if you start with forget everything just said, it is quite obvious that you will
annoy some of the previous posters :p
 
Okay, here's the deal:

I looked up the exif data. It says;

f5.6 @ 1/40

So, f5.6 is a large aperture.

A number like f22 or f27, f32 is a small aperture. I know, it doesn't sound like it, but it is. Crazy world.

[edit]

And don't pay any attention to the posts above this one.

:biglaugh:

or below.

[/edit]
 
Stream1.jpg


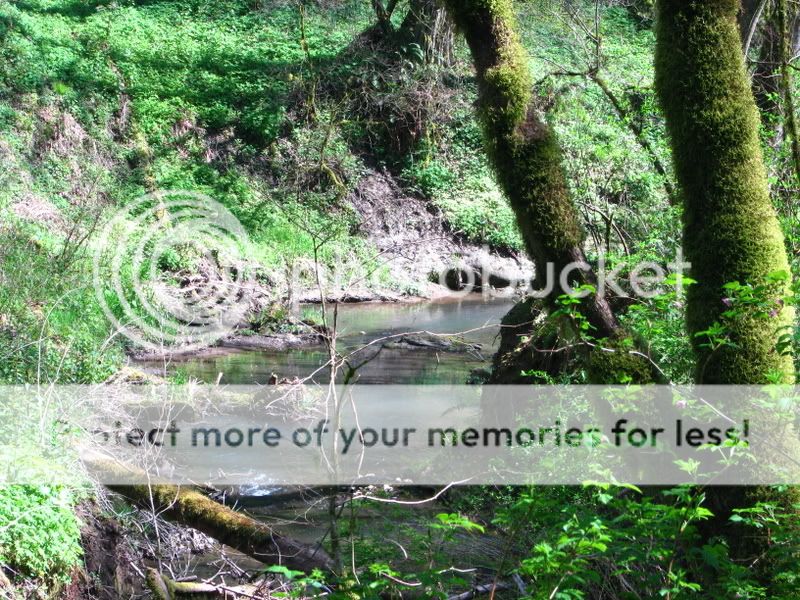
Let's divide the first pic' into two sides.
The cutting vertical is where the left side of the left near tree touches the top of the frame.
Cover the left side up to that point. There's depth.
Now cover the right side. The depth is pretty much gone.

The reason for this is that on the right side, the near, small details, are much larger than the far ones, and the hues are darker & more saturated (compare the near leafs to the far leafs).
Notice how, at the right top corner, the far tree somewhat spoils the depth.

On the left side, there is not such a clear difference in brightness, color saturation or size, between the far leafs and the near leafs.
Also, there're dark parts on both the foreground and the far part (near the top of the pic').

Now, when you look at the right side only, and then at the whole pic', you can see why and how the depth is lost:

The far areas of bright leafs "overflow" into the foreground, at the bottom left.
Even worse, there's shadow on the green near the top, which is far, while the near green is brighter. This is the opposite of what happens at the right side, and therefore spoils depth.

Also, the darker & more saturated area at the low right, is repeated at the far part (top, middle).
These two elements 'break' the sense of depth.
There's a mix of dark and bright, saturated and over exposed details, all over the pic', at both near and far objects.

A photograph rarely repeats exactly what you see with the naked eyes.
Perception of what we see in real life, vs perception of the same, but as a flat & static pic', are quite different.
In real life, our brain overlooks many details, in order to always deliver a sense of depth.
However, when we look at a static, flat pic', on a screen or a print, and the angle of view is narrow compared to what we saw in real life, the brain no longer corrects as much.

BTW, a sense of depth can also be created by a bright foreground and dark background.
e.g.: A building, at night, against black sky.
But, if the dark and the bright get into both the near and far details too much, depth is spoiled.
If the building includes very dark areas, and some strong light sources are included at the far black sky area, depth would be spoiled.

I suggest that you train yourself to look at what you intend to shoot this way:
Imagine the pic' in your mind as limited the frame in the intended photograph.
Imagine it as a flat print.
With this imagined pic', in your mind, go over the various details, and try to judge if it has what it takes to deliver the pic' that you want.

In all 3 pics', even in this kind of light, a lower point of view would have increased the sense of depth.

The focal length has its own influence. Generally, the wider the lens, the more depth, the larger the focal length is, the less depth you get.
Still, you can get depth with a Tele, by including some near out of focus detail, or spoil the depth with a wide-angle lens, by having the wrong elements at the wrong places over the pic'.
 

Most reactions

Back
Top