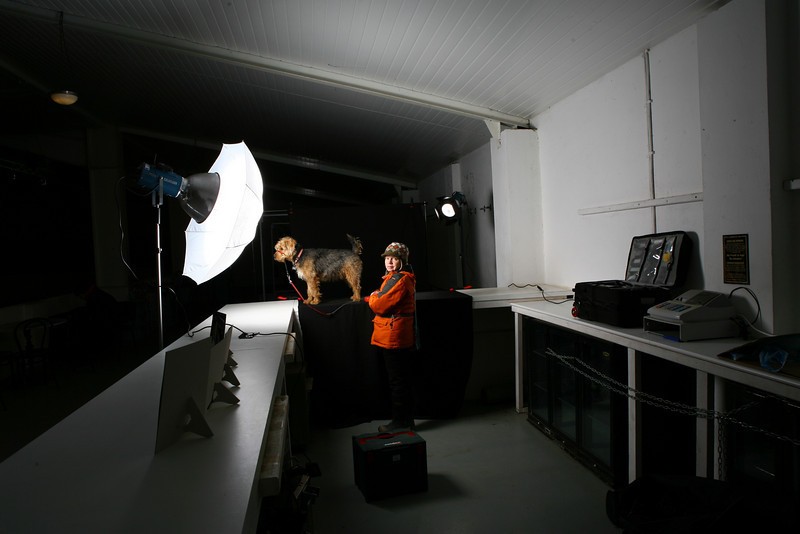
I included #1 to illustrate how the lighting itself looked in the different ways I was shooting. These were all test images so that I could show what I was (and clearly wasn't) doing so I could seek guidance from others in a photography forum.
And correct me if I'm wrong but this is supposed to be a forum about learning photography. So I thought it might be appropriate to show both what I was doing correctly and what I was doing incorrectly.
Yes, this is a place for learning. Given the fact that you obviously have some understanding of what your desired results are to be, by way of the last two images posted, there is nothing more to learn with #1 other than becoming more self-aware of the "misses" all of us get. In my opinion, this awareness is just as important of a learning tool as knowing how to interpret your GN information. Let the Recycle Bin become your friend.
This isn't directed solely at you but I get pretty aggravated with some of the smug and often times rude responses that people give out here. There are a lot of very nice people around here that continue to share their advice for free (which I know lots of us appreciate). But there are also a lot of people who want to be snarky for no real purpose.
I did not intend to be rude nor snarky, thus my opening sentence. But on the other hand, I will be direct. Including #1 was a step backwards because it served no real purpose for you. You knew it was under exposed, you knew the aim of the lighting was well off. I suppose the one thing to learn though is to be astute with the images you post in an effort to increase your understanding of off camera flash.
Of course the first image is crap ... but isn't talking about what is wrong with an image also a valuable way of learning? Isn't there value in talking about why something is crap so that something can be learned from it?
Well then, let's discuss the other images because they aren't crap and there is enough to provide feedback.
As a begining, in studio situations there are 5 basic lights with specific purposes. Back light is not one of them.... backlight, backlighting, backlit; yes...... background light, yes.
- Main / Key - This sets the mood and modeling for the subject.
- Fill - This fills in the shadows created be the Main and smoothes the transition from lighted side to shadow side.
- Background - This illuminates the background to provide separation from subject to background
- Hair / Rim - This adds light and life to the subjects hair adding another layer of separation and dimensionality.
- Accent - This adds illumination on specific areas of the subject to create a spark of interest without overpowering the image.
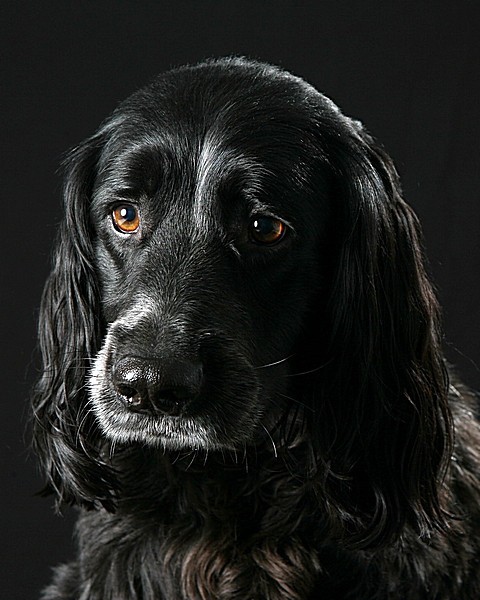
Okay, so with #2 - The Main lighting is pretty good as it is well controlled to illuminate the face making it stand apart as the main interest of the photo. I think turning off the Hair light was a mistake though. The subject is melting into, or rather, being swallowed by the background where some separation would certainly add more life to the image. The lack of detail in the shadow side is a problem. One option to try if you didn't want the Hair light is to feather the Main light towards the camera slightly. This will help with some extra light getting to the shadowed side. Another option to try if you didn't want the Hair light (and this would always be my first) is to use the second flash as a Fill. Either hotshoe mounted or better yet, slightly off lens axis on the same side as the Main light. By using Fill flash some if not all the shadow on the face would have some detail, probably would also lessen the hard shadow from the arm of the eyeware as well as the reflection line from the glass on the left cheek.
Personal taste here, but up-the-nose shots have never been appealing to me. With the subject looking up and to the left, a position in the lower right interset point would be more appealing.
I hope this is a more helpful post for you.


![[No title]](/data/xfmg/thumbnail/41/41930-3f8741ecabbbfd4d67ade3e339078814.jpg?1734176287)


![[No title]](/data/xfmg/thumbnail/32/32805-61ca9a4fb87d37c0ef4f991ac1705e1f.jpg?1734162488)
