Since your profile says you have a Canon 60D, you can get Astronomik EOS Clip-in filters (these are only made for Canon bodies). The "CLS" filter is a broad-band light pollution filter which works by blocking wavelengths associated with common street lighting but allowing other wavelengths to pass. You don't necessarily "need" a filter, but you get a muddy sky and have to process it to tease the detail out of the image.
I posted this a while ago... I'll give you a single frame of unprocessed image and a frame showing the completed post-processed (but not much retouching yet) image.
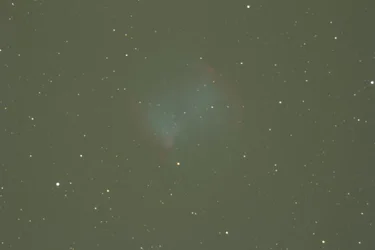
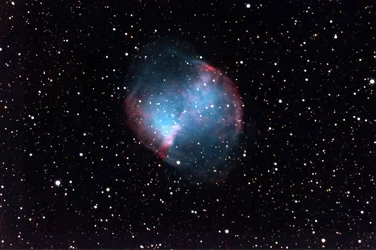
You can see how muddy the background sky is in that left image. No filters were used... but I was able to test the detail out to provide the image at the right. In reality I took 16 "lights", 8 "darks", and combined with my flats and bias frames.
Astrophotography happens in three distinct parts:
(1) image acquisition is all about collecting all the frames. The "light" frames are the hardest because they require careful tracking (a high quality mount and usually a guide-scope and guide-camera.) The flat frames might be tricky if you have a large scope, but with a small scope it's pretty easy to use an iPad as a flat field illumination device. Dark frames and bias frames are very easy.
(2) there's an image processing phase where you stack all the frames you acquired... lights, darks, flats, and bias... to create a combined master. Sometimes you take lights of different durations depending on the object. The Orion nebula (M42) for example, has a very bright core, but it's nebulosity goes far beyond what you might expect visually. Very long exposures can help get those faint details of extended nebulosity but would blow out the core. A short exposure would capture the core nicely but would fail to get the faint nebulosity in the outer areas. So you might take two or three sets of "lights" and merge these as a kind of "HDR" image to get something that captures the full dynamic range. All of this needs to be combined. The multiple exposures help the camera identify and smooth out the noise. There's a poisson progression whereby the noise reduction can be improved by the square root of the number of frames you take. E.g. 16 frames would mean you could reduce the noise by about 4x better than a single frame.
DeepSkyStacker is free (and popular). I use Pixinsight (not free, but as you might expect... I have a lot more control.)
(3) then there's the post-processing... and this is a bit of a black art. Up to this point you have "linear" data in your image. As you post process the image, you will "stretch" the image data in unnatural ways to try to push down the background glow and exaggerate the light of the object. The image you see above was further processed to exaggerate the subtle differences in the nebulosity of this planetary nebula (this is M27 -- the Dumbbell nebula. An example of what may become of our own Sun when it eventually dies.) The exaggeration (more stretching) helps bring out the structure and texture of the nebula.
If you do use a filter, it's going to mess with your white balance (of course). If you can identify a G2 class star (our own Sun is a G2 star) then you can use that star as a white balance target because the "color" of that star would be exactly he same as the color of the light from our own Sun.
Gav already mentioned that "darks" need to be taken under the same conditions (which typically means at the same time.) In other words... if I'm shooting an object on a cold winter night, then the 'darks' that I captured back on some hot summer night 6 months ago won't be useful at all. The amount of "noise" in the frame is based on the physical temperature of the sensor, the duration of the image, and of course the ISO setting being used. All of this must be matched to the conditions of our "light" frames. Stacking software analyzes the noise in your "darks" to figure out how to knock back the noise in your "lights".
Flats have to be created for each unique focal length. You can shoot photos through the scope (and take several of these) to capture the "flats". But the flats are only good for that camera sensor and that scope at that specific focal length. If you use a tele-extender (a barlow or powermate) or if you use a focal reducer, then you need a DIFFERENT set of flats for those. But you do not need to capture new flats for each different object. The "flats" identify the characteristics of your scope, focal-length, and camera combination.
There is something called 'bias" frames that you should capture. In order for the camera to operate, it has to apply some voltage to the sensor. This means that if you could charge up the sensor as if to take a photo... but then not take it, you would find that you could read-out data from the sensor MERELY because voltage was applied (even though no photo was taken.) High end CCD imaging cameras have a bias setting to read this voltage. DSLRs do not, but the convention is to just take several photos with the lens cap on AND at fast shutter speed (a shutter speed of about 1/1000th sec is adequate).
A "dark" frame is technically the noise of the "bias" plus the noise of the exposure. If the stacking software can figure out how much noise was generated in the bias then it can more easily determine how much noise is present based on the duration of the exposure and sensor temperature. Bias frames basically help the stacking software do a better job. You do not need to capture bias frames every time you shoot. I have one set that I use over and over.
Astrophotography is surprisingly more complex than most people would probably guess.



 I liked this answer