My Post Processing Workflow

Thanks for this workflow idea.
I don't have a glamour shot available so I tried it with a travel shot.
The difference is clear even on these. Increased contrast and what seems like deeper color.
I used the minimum of all your suggested ranges.

BTW, this was shot with the Nikkor 18-200 VR zoom

chiefunsharpenedxu0.jpg


chiefsharpenedmo5.jpg
 
Is there any particular reason the workflow uses JPG? I prefer TIFF.

Thanks for the workflow tip. Definitely one to add to my journal...
 
Wow. This is like getting my first pair of glasses. I had no idea how fuzzy everything looked before.
 
Is there any particular reason the workflow uses JPG? I prefer TIFF.

Thanks for the workflow tip. Definitely one to add to my journal...

The illustration shown was done by someone else trying out my workflow and illustrating it on Pentax Life. I never work in JPEG only PSD or TIFF. Of course by all means.
 
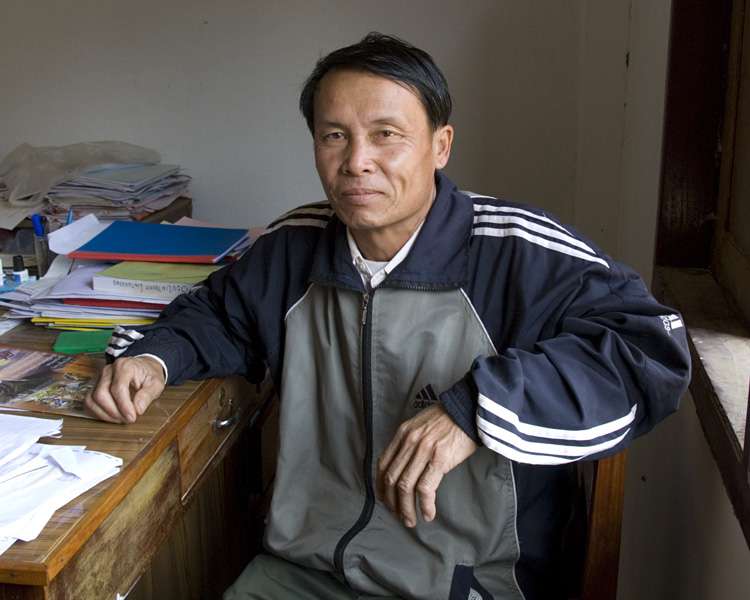
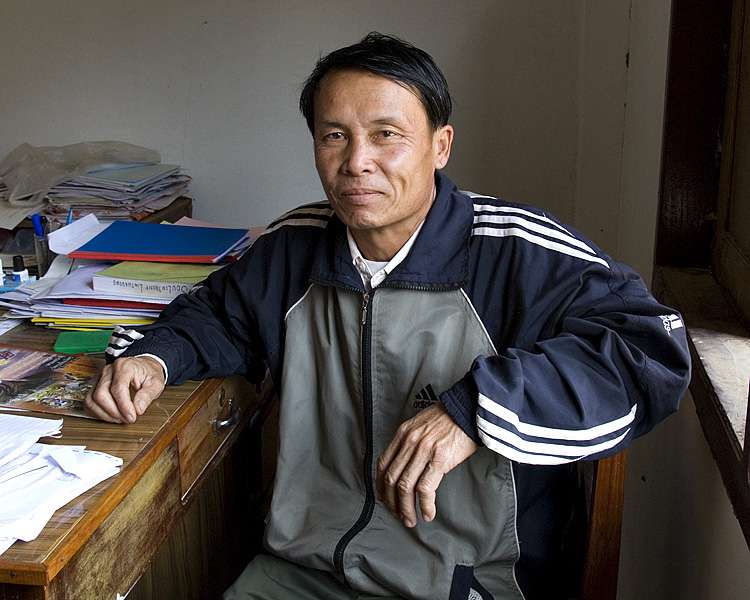
If at all interested in making your images "Pop" more like 4x5 or 6x7 film, you may wish to look at one of my suggested work flow methods:

http://pentaxlife.com/benjamin-kanarek-post-processing-method

Your sharpening workflow works wonders.
Can you point me to any source of info about 'why' this is working and
what is happening when we do this process?

Are there any guidelines for moderating the parameters for different gkinds of images?

It seems not to be the edge sharpening we usually think of.


Thanks in advance,

L
 
I just extracted the details to tape on my wall and here they are

Benjamin Kanarek sharpening workflow

On unsharpened image, duplicate background

Step 1 -
Unsharp Mask (USM) filter :
Amount: from 240 to 330 percent
Radius: 0.3 pixels
Threshold: 0 level

Step 2 -

Unsharp Mask
Amount from 10 to 15 percent
Radius from 40 to 60 pixels
Threshold still at 0 level .

Step 3-

Duplicate altered layer
To emphasize blacks. desaturate new layer.
To emphasize colors and shadows – leave as is


Step 4
Apply soft light blending mode to the new layer.
Reduce opacity to 50 - 80 percent
 
Excellent excellent guide, and thanks also to The Traveler for extracting the key points. Will definitely bookmark this.
 
This is an interesting method of sharpening, and an even more interesting method of controlling colour and contrast. Up until now I have always been using curves to bump contrast when needed, and I have often used the high-pass method of sharpening.

It is interesting how many different ways there are to do the same thing yet achieve varied affects. Thanks for the method it works a treat with some pictures.
 
Benjamin, call me naive but how did you figure that out? Trial and error, or did you know exactly what to do? Thanks!
 
Benjamin, call me naive but how did you figure that out? Trial and error, or did you know exactly what to do? Thanks!

I basically found a way to replicate film by trial and error and in doing so realised that layering or sandwiching my images using either a B&W grey scale enhancement or a colour based shadow highlight saturation enhancement, would give me a Kodakchrome look or a mixed B&W and Colour slide look. Just did another shoot employing the later and am pleased with the results.
 
Is there any particular reason the workflow uses JPG? I prefer TIFF.

Thanks for the workflow tip. Definitely one to add to my journal...

They have corrected my method at Pentax Life. It is now correct. I.E. Shooting in Raw or JPEG and working in PSD or TIFF...
 
benjikan, do you work in RGB Tiffs?

I traditionally think of Tiffs as CMYK in print

And you don't use JPEG because of the way it compresses the image? Hence the uncompressed tiff?
 
I just tried that sharpening on an image and I like it, although its not to kind for skin imperfections on the lady in question!

I duped the layer, used the sharpening and then used the sharpened image for just the eyes, a little part of the nose and the lips.

Thanks
 
Heres a quick try, the effects were applied to the image on the left. The right was a straight digital file with no manipulation. Definitely a cool method!

sharp.jpg
 

Most reactions

Back
Top